
Ping360 Installation Guide for the BlueROV2
Introduction
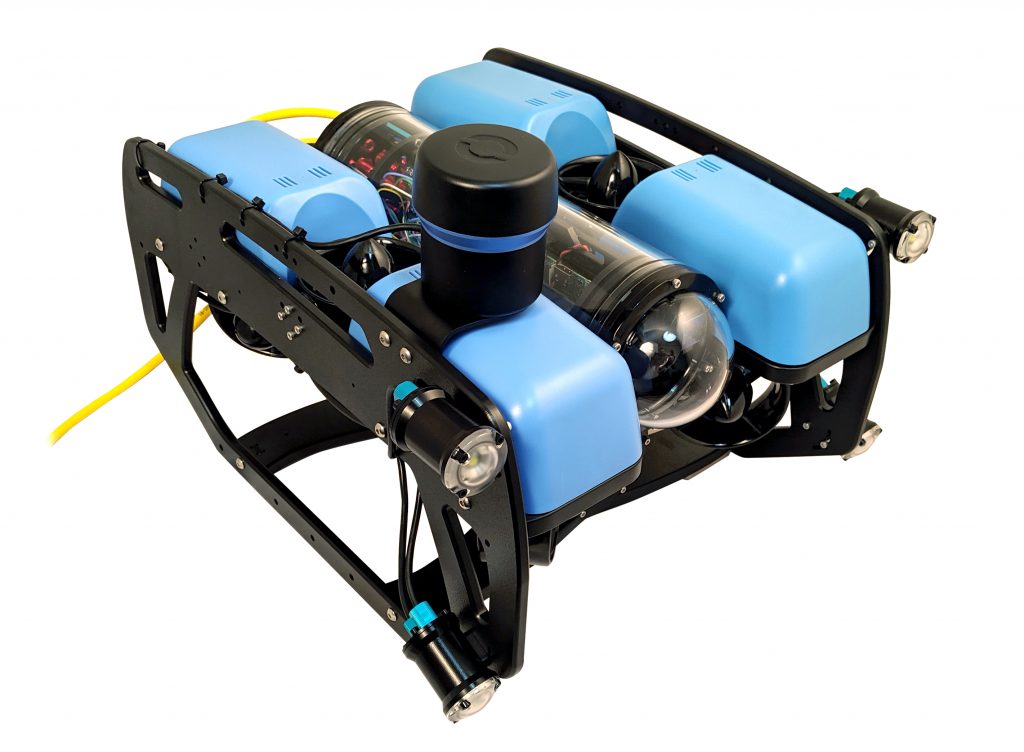
The Ping360 sonar is a mechanical scanning sonar. When mounted on a BlueROV2 and using the Ping-Viewer software application, a Ping360 can be used for navigation in low-visibility water conditions, inspection, obstacle avoidance, target location and tracking. You can see echoes from objects like ropes, walls, dock pilings, rocks, shipwrecks, boats, and any other structures or objects that reflect sound waves. With that, you have reference points to navigate from, regardless of water visibility, and you can locate important features in the water quickly.
This guide will show you how to install the Ping360 onto your BlueROV2 using the default USB interface or the optional Ethernet interface.
Parts and Tools
You Will Need
-
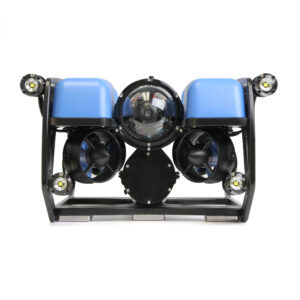
BlueROV2
Affordable and customizable high-performance ROVFrom: $ 4,900.00 -
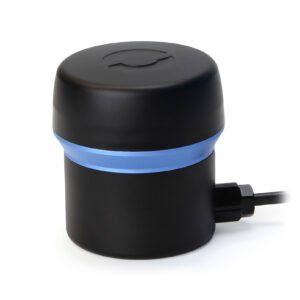
Ping360 Scanning Imaging Sonar
Navigation and imaging sonar for BlueROV2 and other ROVs$2,750.00 -
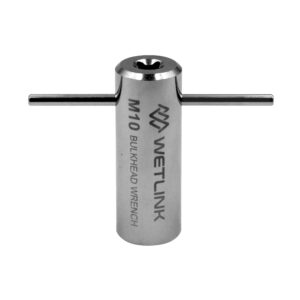
WetLink Bulkhead Wrench
For use with M06, M10 or M14 bulkheadsPrice range: $17.00 through $22.00 -
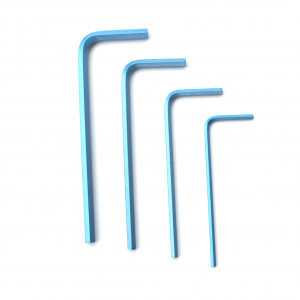
Hex Key Set
Commonly used on the BlueROV2 and other products$7.00
You will also need:
- 1 x #1 Phillips head screwdriver (BlueROV2 kit)
- 1 x Sharpie or other type of marking pen (not included)
- 1 x 5.50mm (or 7/32”) drill bit (not included)
- 1 x Battery Powered Hand Drill (not included)
- 1 x Bottle of Threadlocker (not included)
Additional Parts for Ethernet Connection
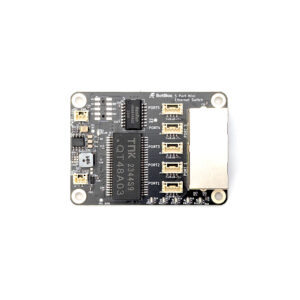
Ping360 comes ready to install in a BlueROV2 using the default USB connection. The Ping360 can also be installed using the Ethernet interface. To install the Ping360 using the Ethernet interface, you will also need the Blue Robotics Ethernet Switch and it will need to be installed in your BlueROV2.
Removing a Blank Penetrator
To remove a blank penetrator from your BlueROV2, you will need the following tools:
- 1 x 2.5 mm hex driver
- 1 x #1 Phillips head screwdriver
- 1 x Penetrator wrench
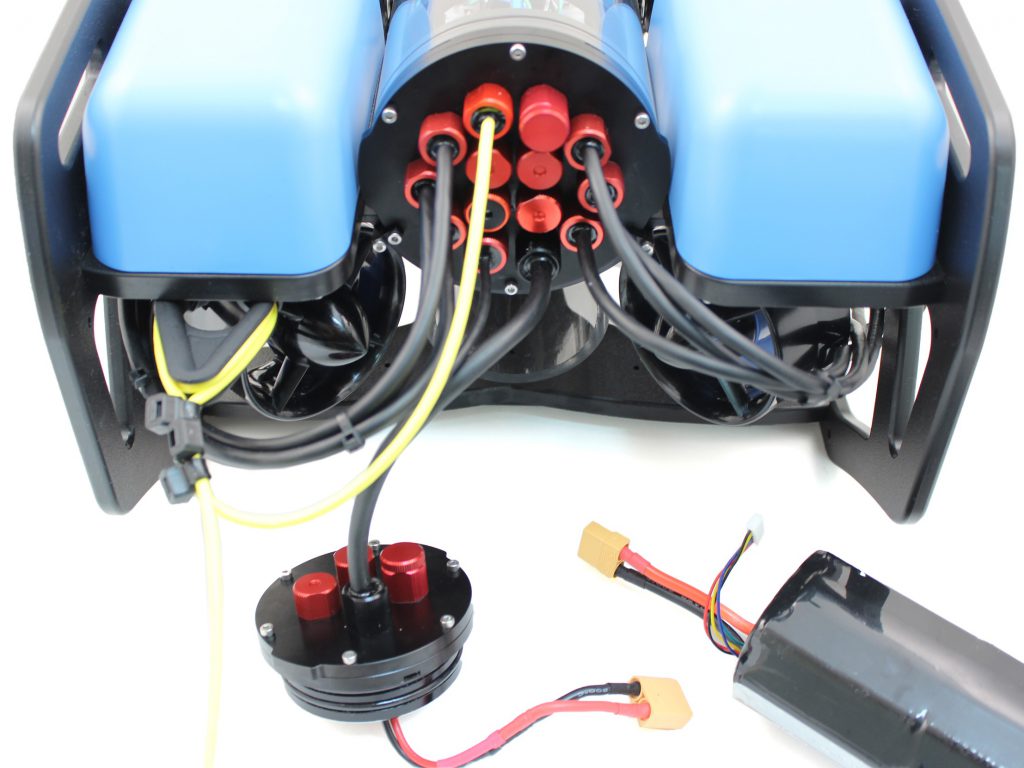
1. To ensure your ROV is completely powered off, please remove the battery completely from the 3” enclosure and place to the side.
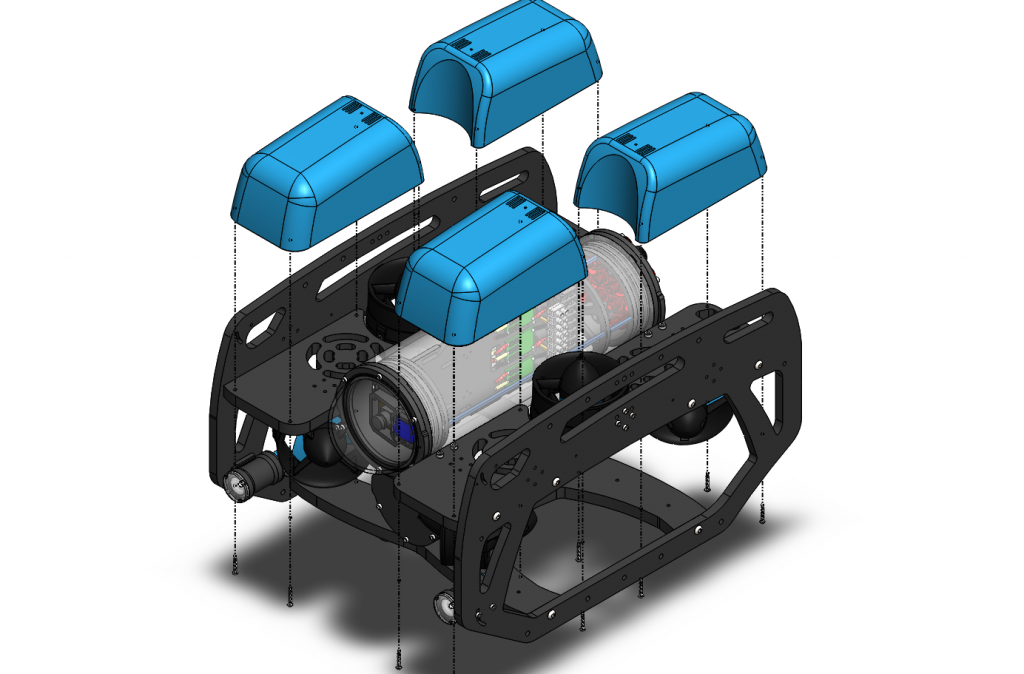
2. Remove the fairings and buoyancy blocks by removing the self-tapping screws that hold the fairings to the frame.
3. Remove the 4” electronics enclosure from the ROV by removing the M3x16 screws that mount the enclosure to the ROV cradle.
4. Remove the Vent Plug from the Vent Penetrator Bolt on the electronics enclosure. Remove the 4″ tube and forward dome assembly from the rear end cap.
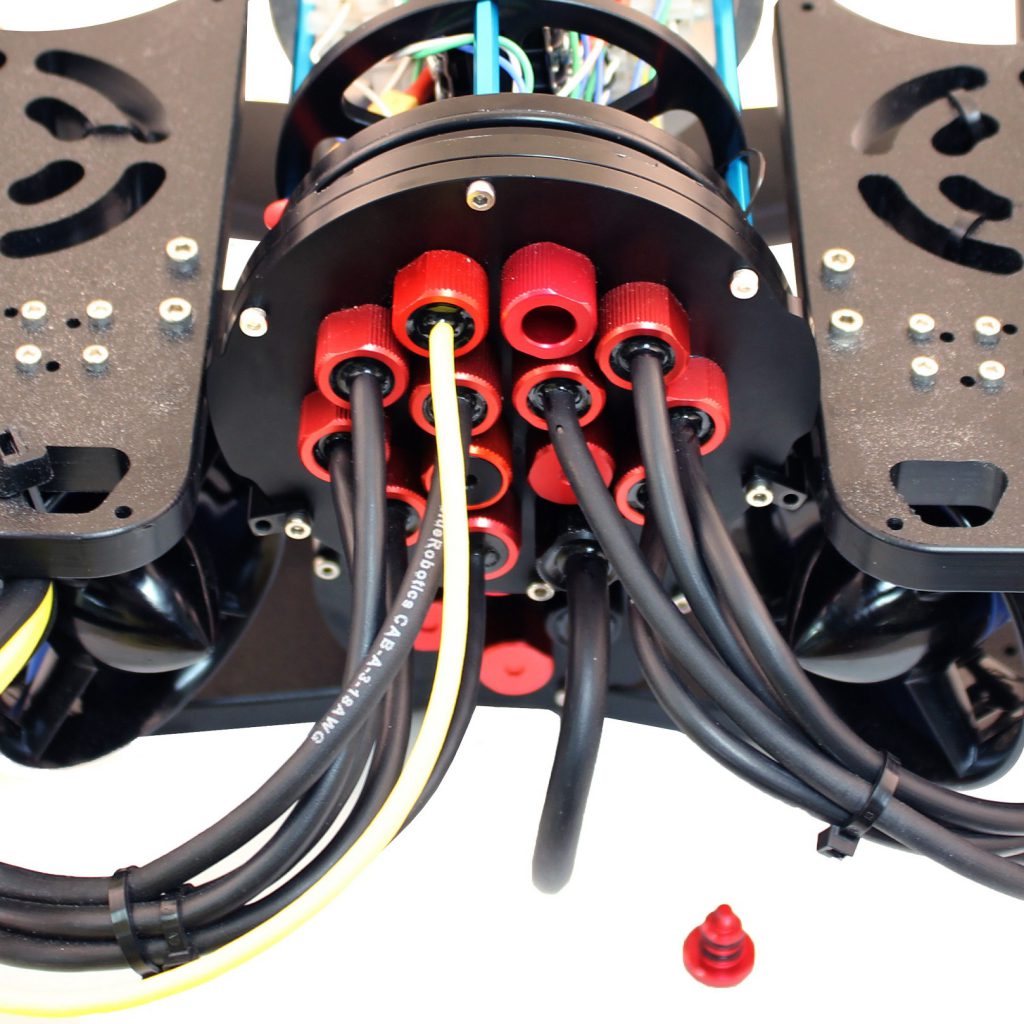
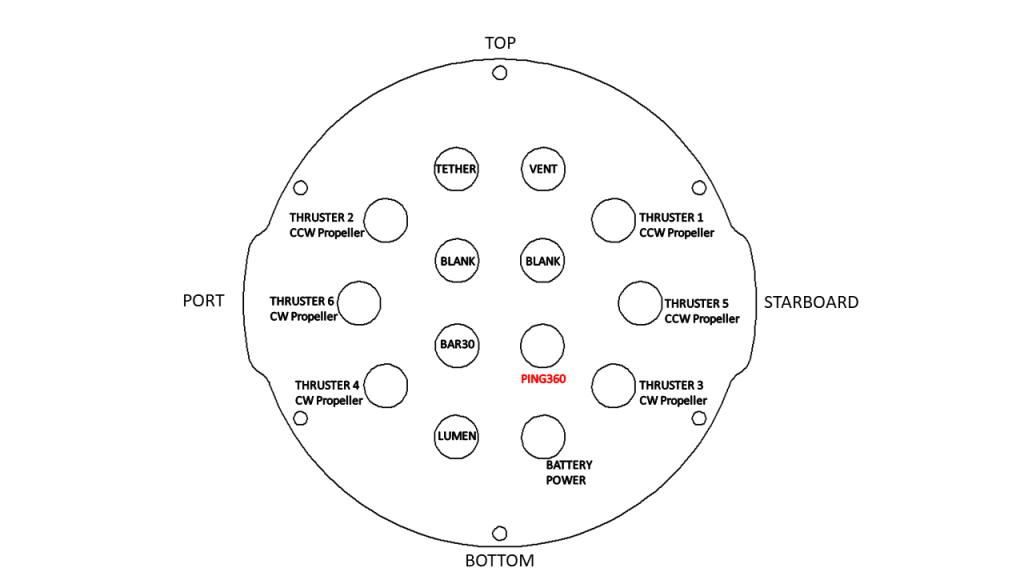
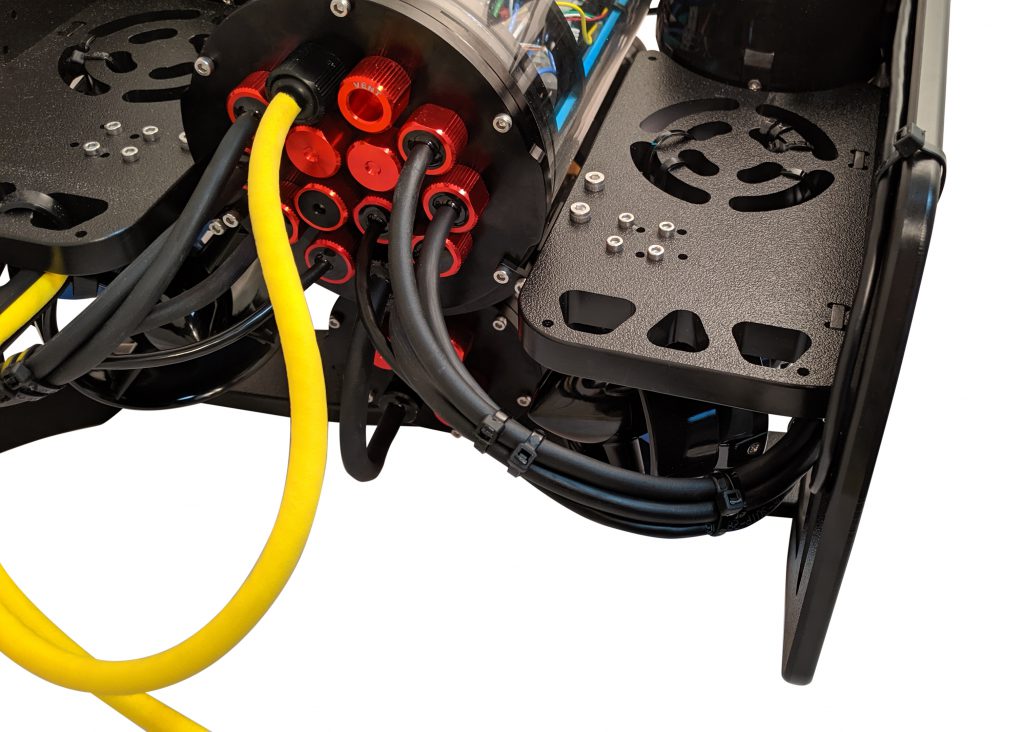
5. Remove the blank penetrator as pictured from the 4” End Cap with the penetrator wrench that came with the BlueROV2 kit.

Install Ping360 Penetrator
To install Ping360 into the end cap, you will need the following parts and tools:
- 1 x Ping360 Scanning Sonar
- 1 x Penetrator Nut (Red)
- 1 x Penetrator O-ring
- 1 x Silicone Grease – 10g Tube
- 1 x Isopropyl Alcohol Wipe
- 1 x Penetrator wrench
1. Wipe the exterior surface of the electronics enclosure endcap clean with isopropyl alcohol or isopropyl alcohol wipes, and make sure it is free of any particles in the areas where the penetrator O-ring will sit.
2. Remove the O-ring from the bag and apply silicone grease to it.
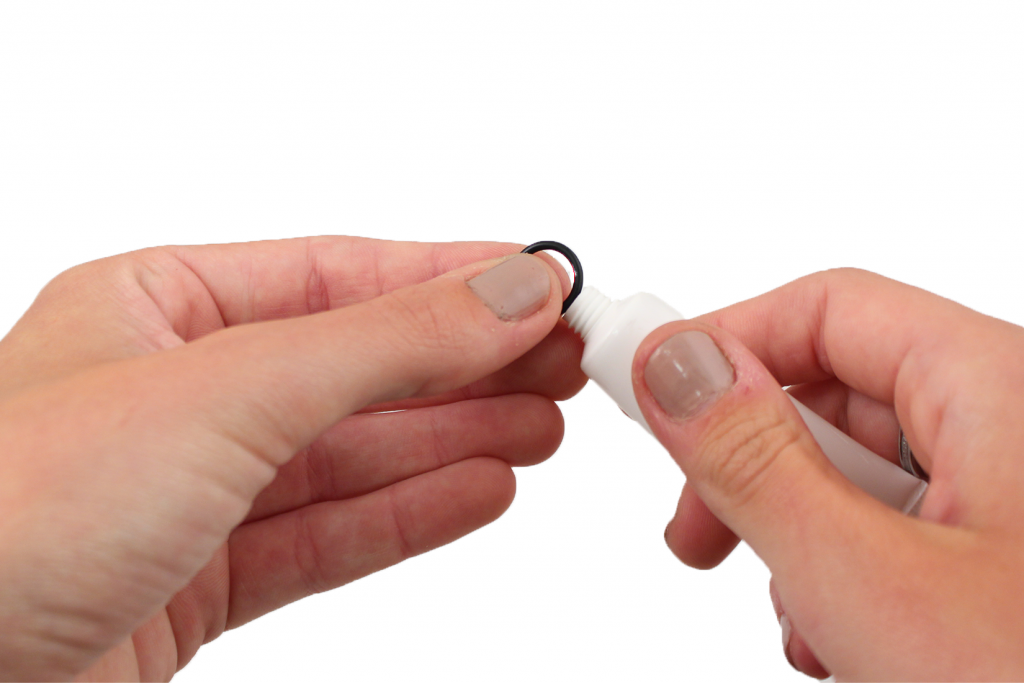
3. Install the O-ring onto the Ping360 cable penetrator.
4. Install the Ping360 cable penetrator into the end cap in the hole you previously removed the blank penetrator from. Tighten to finger tight, then use the wrench to tighten it an additional ~1/16 of a turn. If you can’t loosen it with your fingers, it is tight enough.
Connecting The Power Wires
To connect the Ping360 power wires, you will need:
- #2 Phillips screwdriver
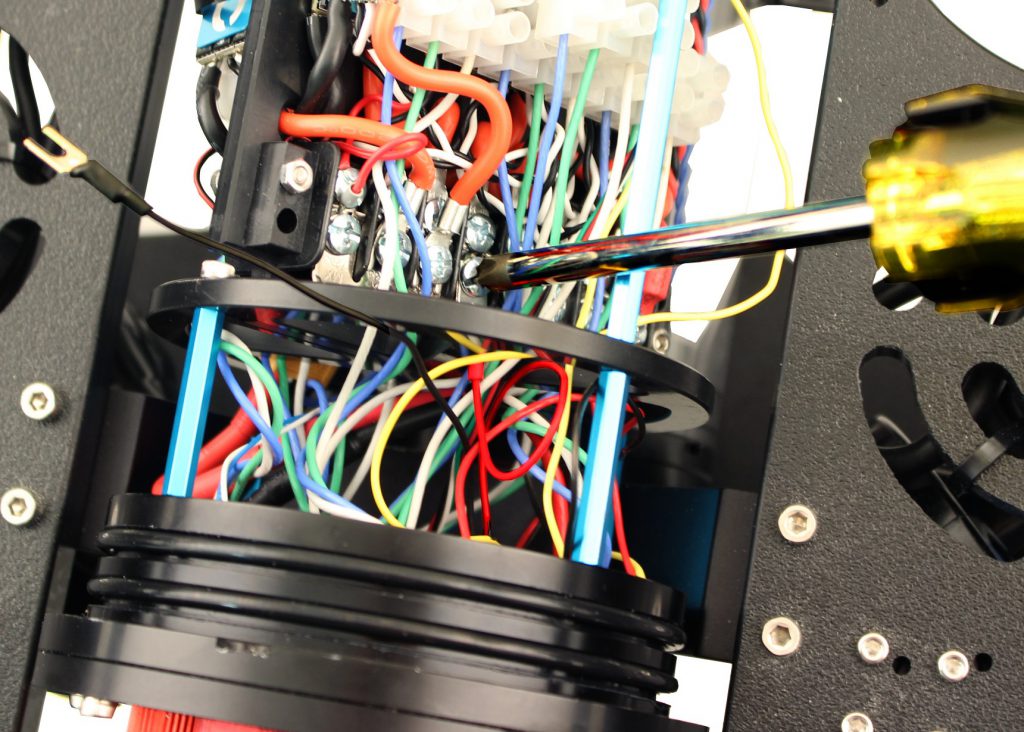
1. Connect the power wires (red and black wires) into open screw terminals on the respective positive and negative terminal blocks.
Wiring Connections for USB
To install the Ping360 wires into your BlueROV2 via USB, you will need the following components:
- 1 x JST-GH to JST-GH inline connection board
- 1 x JST-GH to USB cable
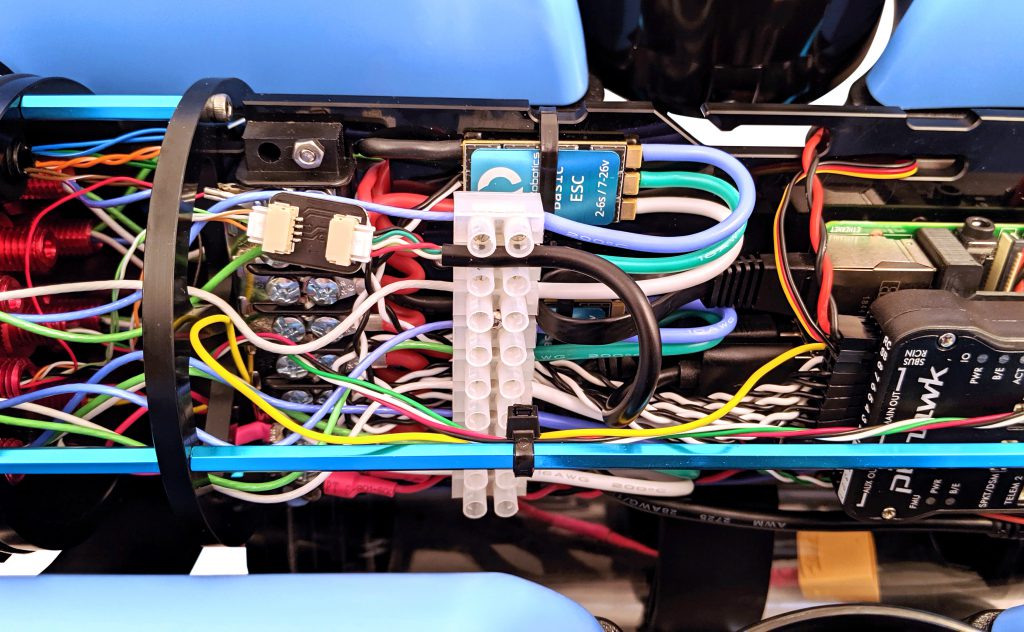
1. Plug the JST-GH connector coming from the Ping360 cable into the JST-GH to JST-GH inline connection board.
2. Plug the JST-GH to USB cable into the other end of the JST-GH to JST-GH inline connection board.
3. Plug the JST-GH to USB cable (USB side) into one of the open USB ports on the Raspberry Pi.
Wiring Connections for Ethernet
To install the Ping360 wires into your BlueROV2 via Ethernet, you will need the following components:
- 1 x Blue Robotics Ethernet Switch
- 1 x 200mm JST-GH to JST-GH twisted pair cable (from Ethernet Switch kit)
- 1 x JST-GH to JST-GH inline connection board
1. If the Ethernet Switch is not already installed in your BlueROV2, install it now by following the Ethernet Switch Installation guide. Once that is complete, return to this guide.
2. Switch the internal communication interface in the Ping360 from USB to Ethernet by following the instructions in the Changing Communications Interface on the Ping360 guide. When you are done switching the interface to Ethernet and the Ping360 is fully reassembled, come back to this guide.
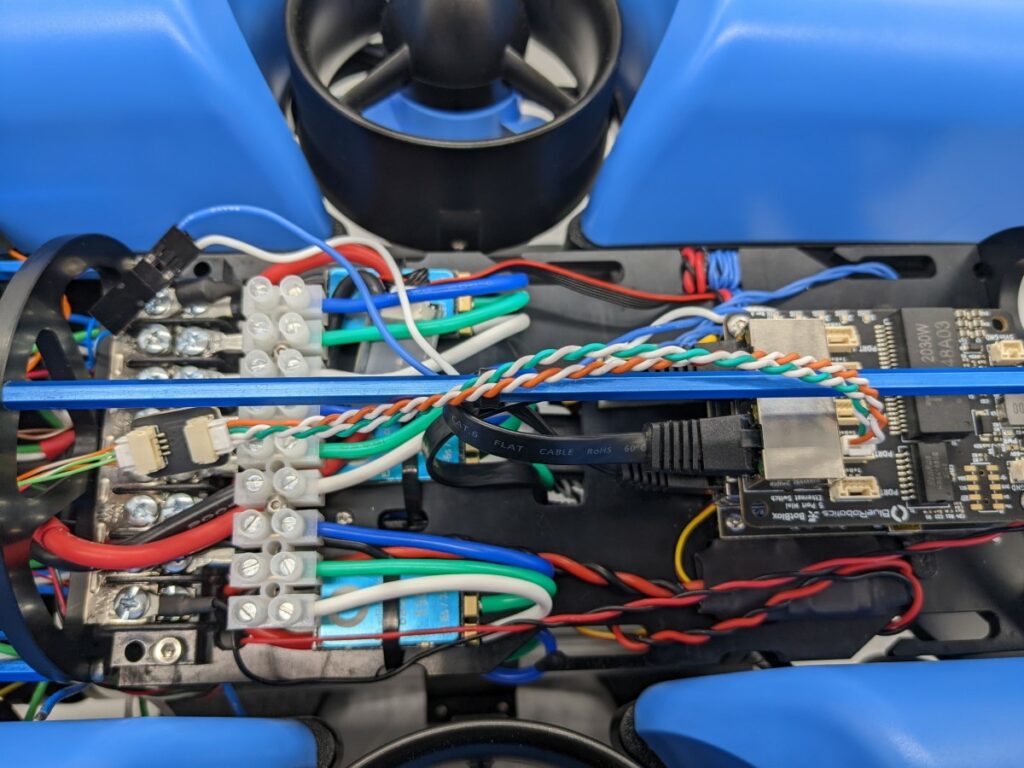
3. Plug the JST-GH connector coming from the Ping360 cable into the JST-GH to JST-GH inline connection board.
4. Plug the 200mm JST-GH to JST-GH twisted pair cable into the other end of the JST-GH to JST-GH inline connection board.
5. Connect the other end of the JST-GH to JST-GH twisted pair cable to one of the open JST-GH ports on the Ethernet Switch. Do not use ports 1 or 5 as these are already in use.
Reassemble BlueROV2 Electronics Enclosure
To reassemble your BlueROV2 Electronics Enclosure, you will need the following parts and tools:
- 4 x M3x16 screws that were placed off to the side during disassembly
- 1 x Silicone Grease – 10g Tube
- 1 x 2.5 mm hex driver
Reinstall 4” Watertight Enclosure onto ROV with the following steps:
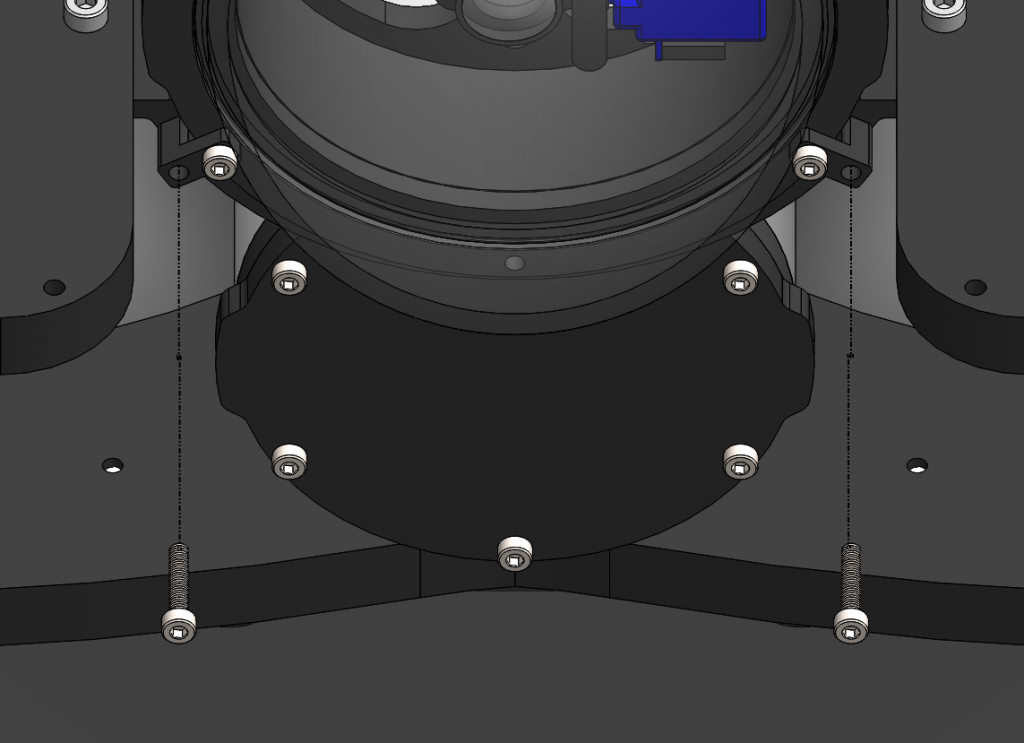
1. Apply silicone grease to the two radial O-rings on the O-Ring Flange (4” Series) that is attached to the Electronics Tray then install the Watertight Enclosure (4” Series) with installed Dome End Cap to the O-Ring Flange (4” Series).
2. Mount the Electronics Enclosure to the frame using the M3x16 screws so that the dome is on the same side as the front center panels (the center panels without the 3 large holes). Install the M3x16 screws through the clips and into the Enclosure Cradle (4” Series). It is easier to install these screws if the clips are not fully tightened until all screws are through the clips and threading into the Enclosure Cradle (4” Series). This allows to clips to rotate so you can find the threaded hole in the Enclosure Cradle (4” Series) easily.
Mounting the Ping360 to the BlueROV2 Frame (Standard)
To mount the Ping360 to the BlueROV2 frame, you will need the following parts and tools:
- 1 x Ping360 Mounting Bracket
- 4 x M3 x 5 button head cap screws
- 2 x M5 x 12 button head cap screws
- 1 x Marking pen
- 1 x 5.50mm (or 7/32″) drill bit (not included)
- 1 x Battery Powered Hand Drill (not included)
- 1 x 2 mm hex driver
- 1 x 3 mm hex driver
- 1 x Bottle of Threadlocker
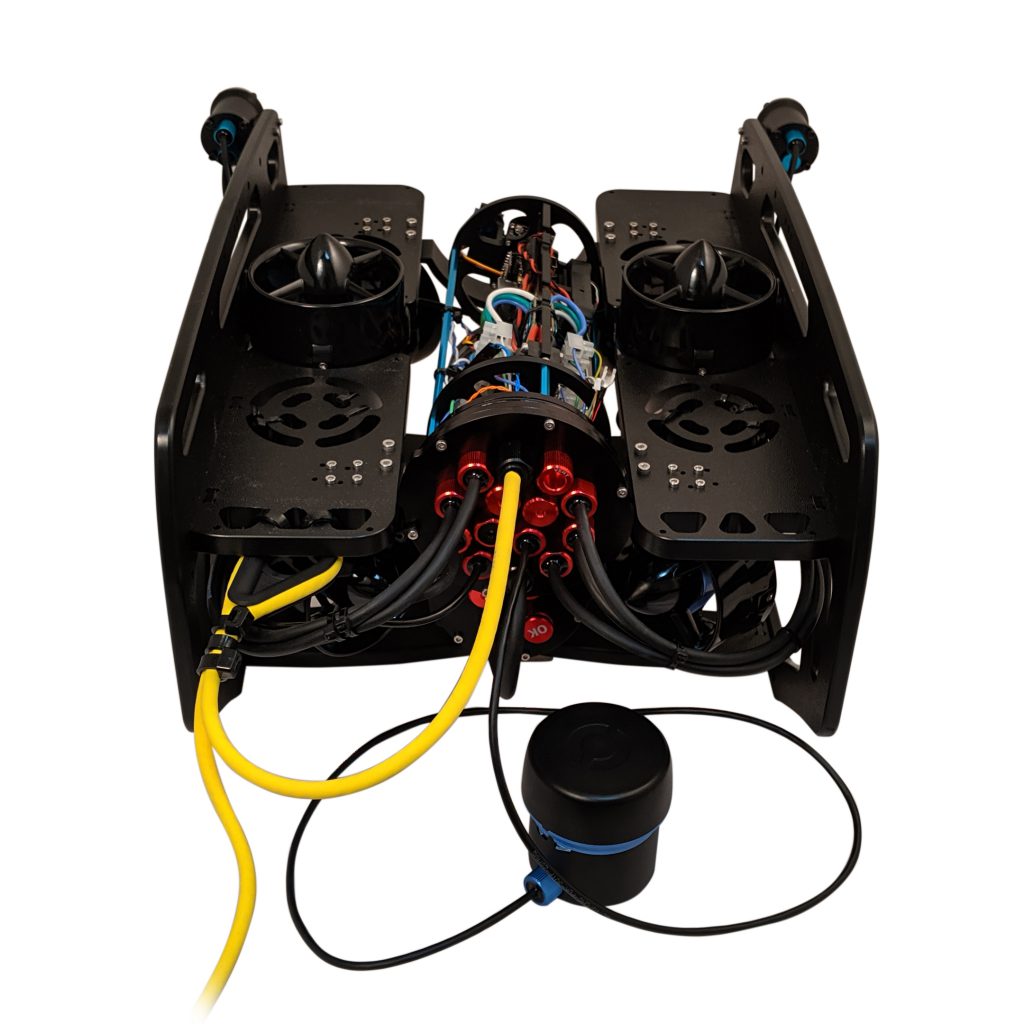
1. Pick which side you wish to install the Ping360 on your BlueROV2, port or starboard. For this guide, starboard was chosen.
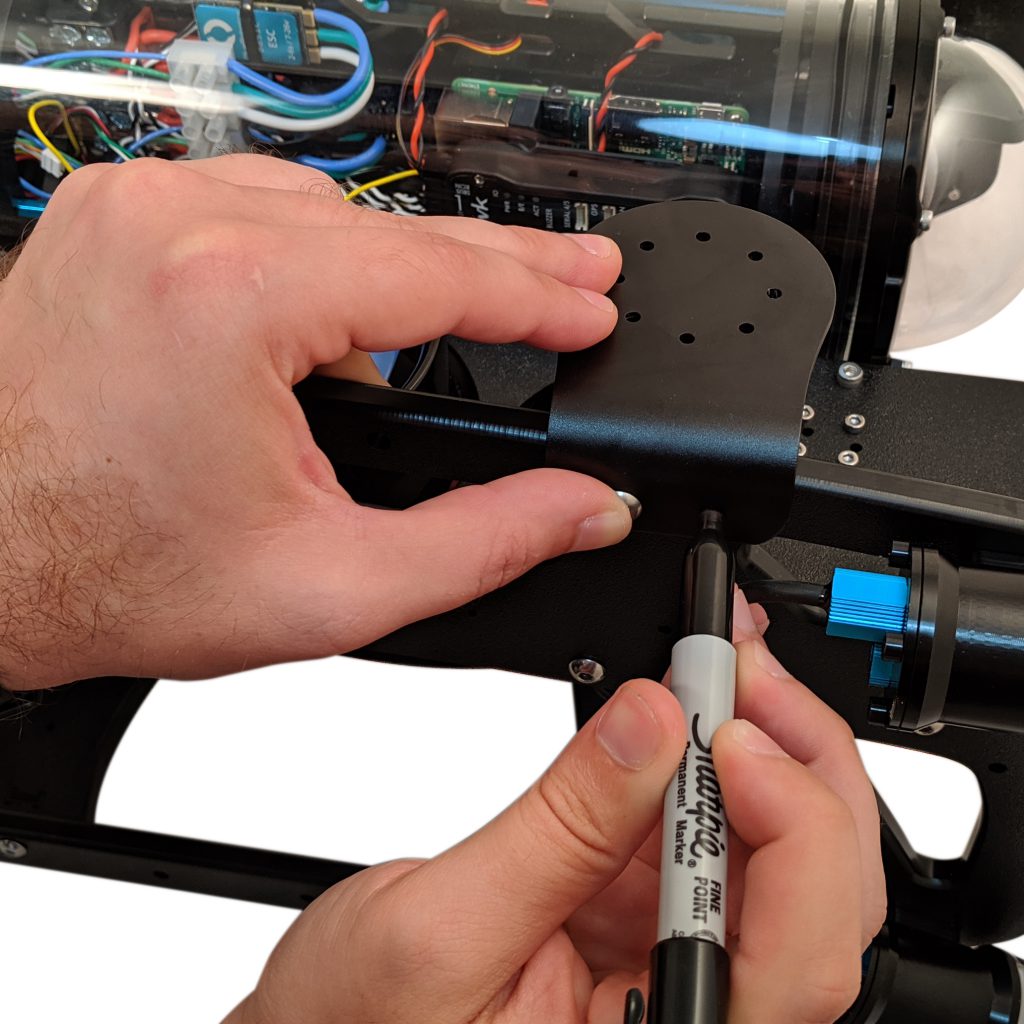
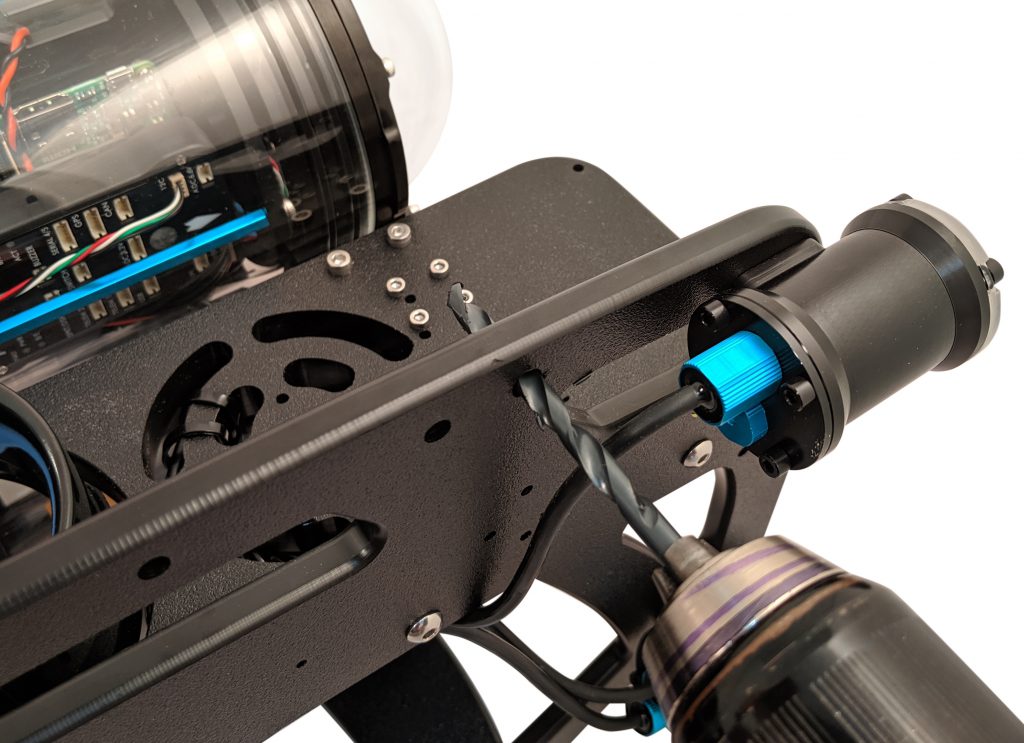
2. Thread an M5 x 12 screw into the aft-most hole of the mounting bracket. Insert the assembly into the forward-most M5 hole on the BlueROV2 frame. Adjust the bracket so it is level and straight and mark the forward hole location with a Sharpie or marking pen.
3. Remove the bracket assembly and remove the M5 x 12 screw.
4. With a battery powered hand drill and 5.50mm (or 7/32″) drill bit, drill a straight hole in the marked position.
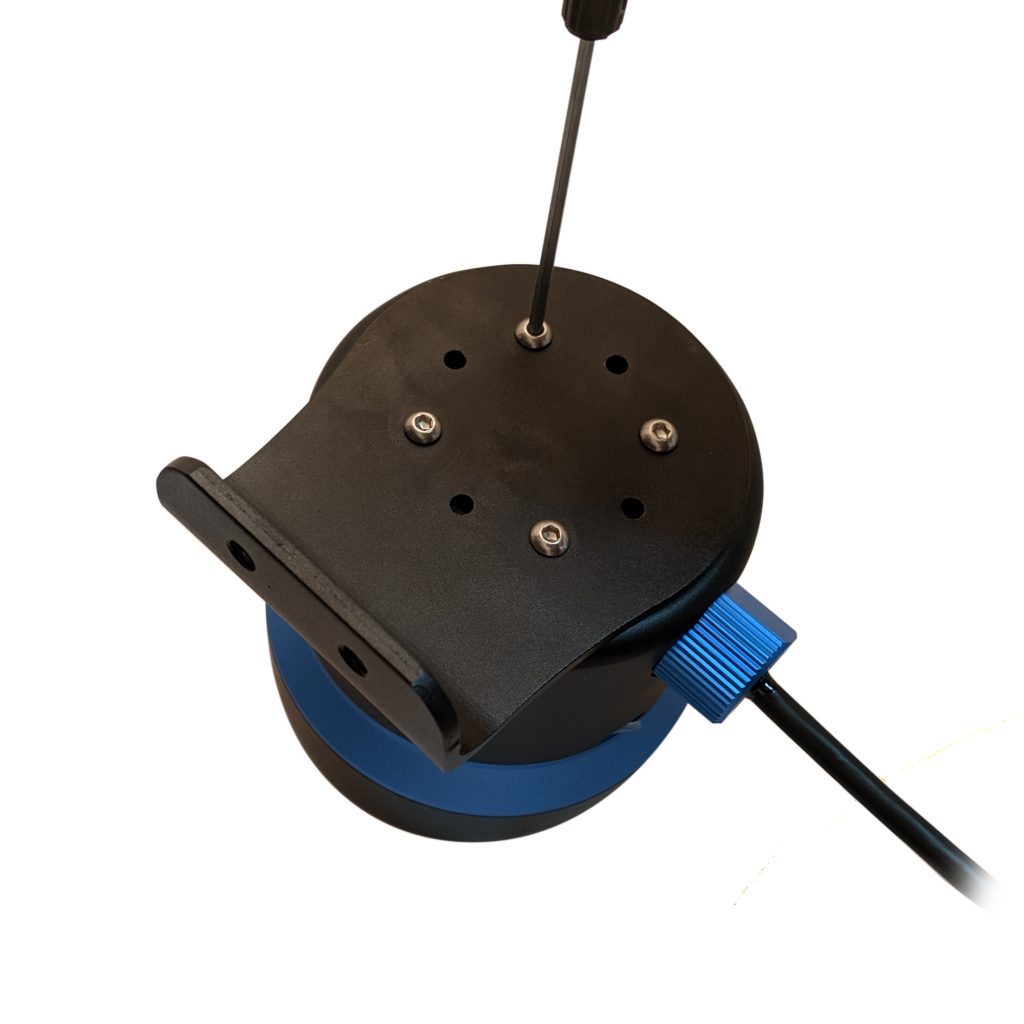
5. Secure the bracket to the base of the Ping360 using the M3 x 5 mm screws.
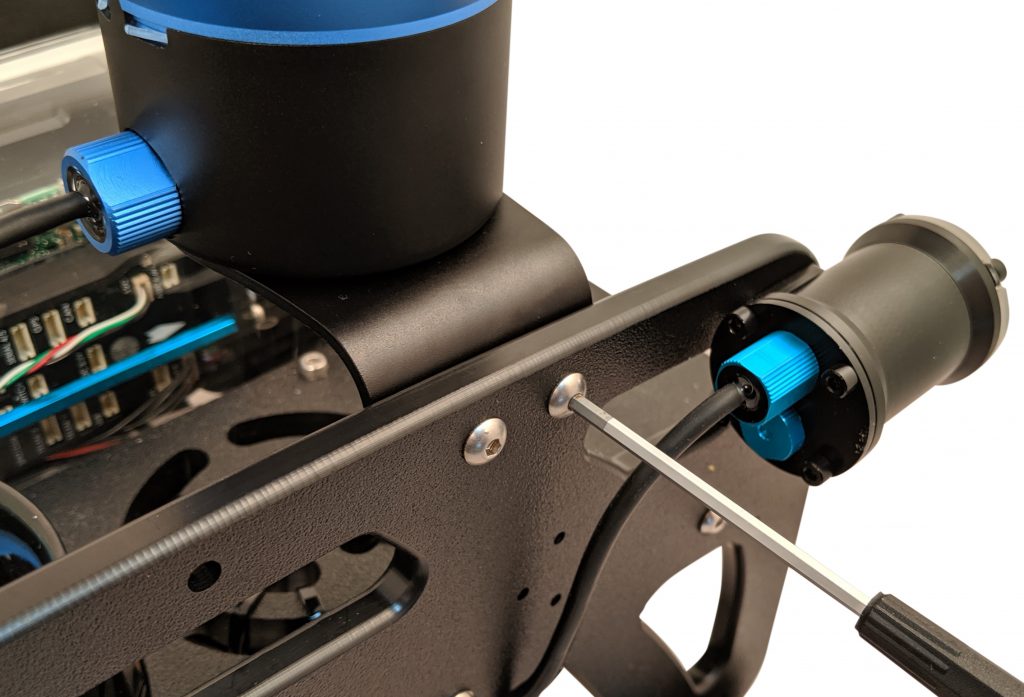
6. Secure the bracket to the BlueROV2 frame with the M5 x 12 screws.
Mounting the Ping360 to the BlueROV2 Frame (Heavy)
To mount the Ping360 to the BlueROV2 frame, you will need the following parts and tools:
- 1 x Ping360 Mounting Bracket
- 4 x M3x5 button head cap screws
- 2 x M5x12 button head cap screws
- 1 x 5.50mm (or 7/32″) drill bit (not included)
- 1 x Battery Powered Hand Drill (not included)
- 1 x 2 mm hex driver
- 1 x 3 mm hex driver
- 1 x Bottle of Threadlocker
1. Pick which side you wish to install the Ping360 on your BlueROV2, port or starboard. For this guide, starboard was chosen.
2. With a battery powered hand drill and 5.50mm (or 7/32″) drill bit, drill out the M4 holes in the middle of the frame. This will make it easier to install the mount.
3. Secure the bracket to the base of the Ping360 using the M3 x 5 mm screws.
4. Secure the bracket to the BlueROV2 frame with the M5 x 12 screws.

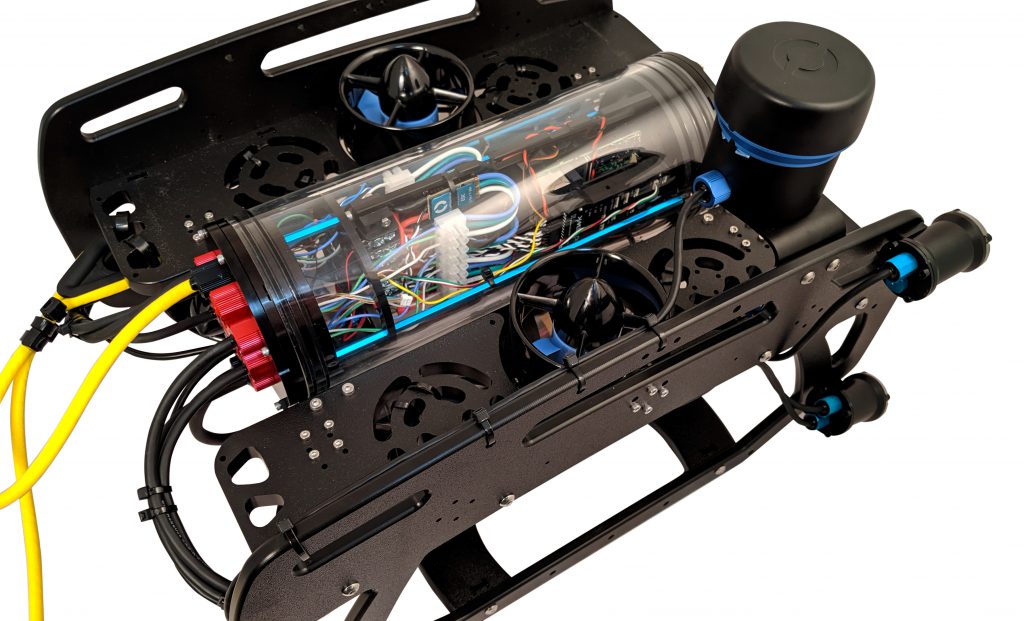
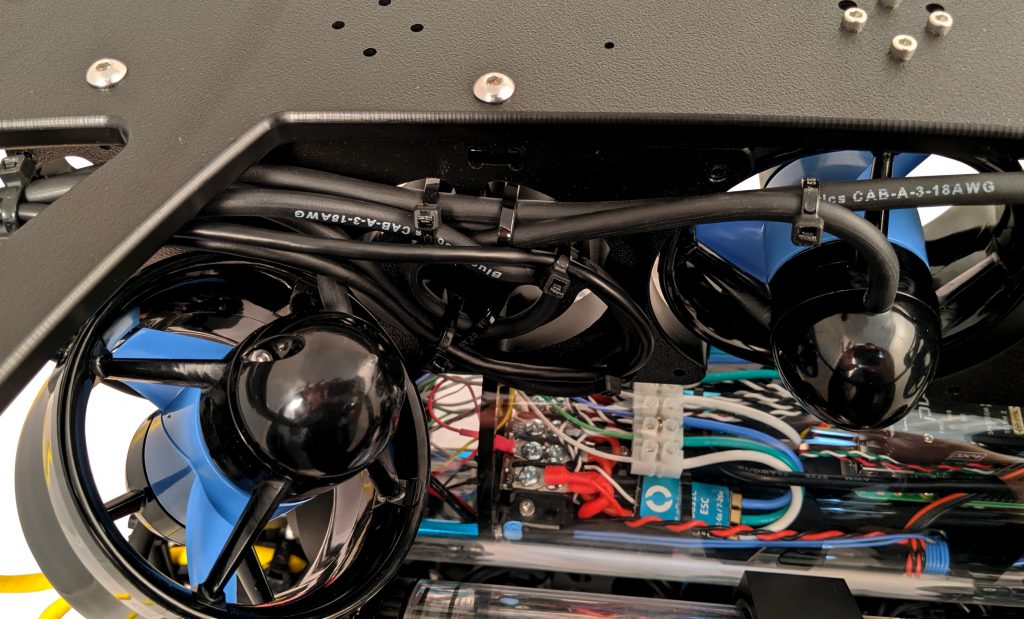
Cable Management
To clean up the external Ping cable, you will need several zip ties and your scissors/wire cutters.
The primary goal of cable management is to prevent the wires from getting cut by the propellers. Make sure to check that no wires can reach the propellers after you have finished routing the Ping360 cable.
Reinstall Buoyancy Blocks and Fairings
To install the new buoyancy blocks and fairings, you will need the following parts and tools:
- 16 x Fairing screws that were placed off to the side during disassembly
- 4 x Fairings with buoyancy installed that were placed off to the side during disassembly
- 1 x #1 Phillips head screwdriver
1. Reinstall Original Fairing Blocks onto ROV by installing the screws through the center panels and into the fairings.
Adjusting Ballast on the Frame
To adjust the amount or position of ballast on the frame you need the following parts and tools:
- 7 x 200g Ballast weights (from original BlueROV2 Kit)
- 7 x 8-16 Thread, 5/8” Long, Thread-Forming Screws
- 1 x #2 Phillips head screwdriver
To get the longest battery life and the best driving experience, it is important to have the ROV close to balanced from front to back in water and close to neutrally buoyant. Ping360 is 175g negatively buoyant in water, so depending on placement, the ROV will need to be re-trimmed based on your operating conditions. Trimming the ballast may involve a bit of trial and error.
Software Update
Use With Ping Viewer Software - USB Configuration
The most recent stable release of Ping Viewer is required.
1. With the Ping360 fully installed in the BlueROV2, power on the BlueROV2 and make sure you are able to establish a connection.
2. Open Ping Viewer, the Ping360 should show up in the Device Manager list after a few seconds.
3. Select the Ping360 from the list, the sonar display and scanning should automatically start.
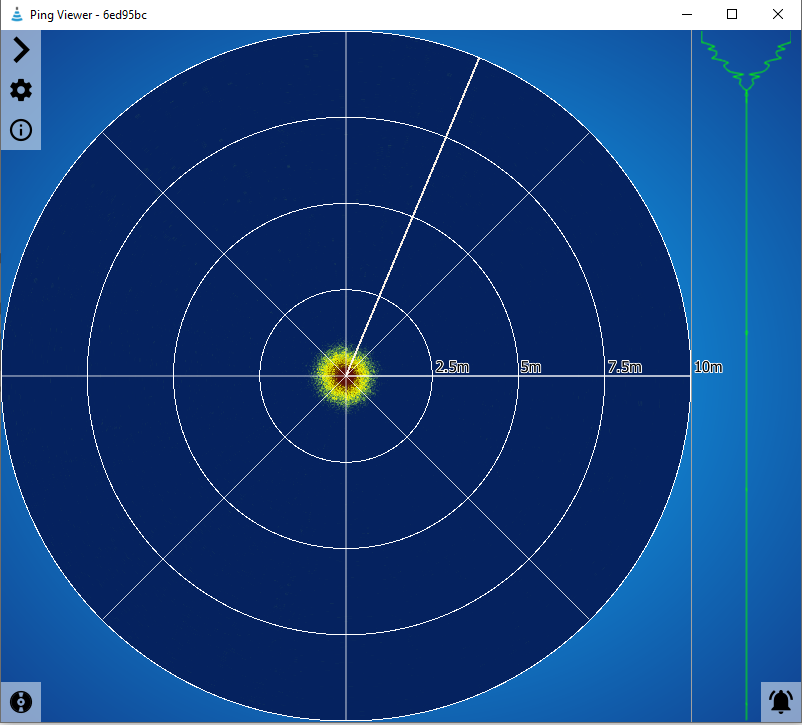
Main Ping-Viewer Interface Window
Use With Ping Viewer Software - Ethernet Configuration
Ping Viewer version 2.4.1 or newer is required. Get the most recent stable release of Ping Viewer here.
1. With the Ping360 fully installed in the BlueROV2, power on the BlueROV2 and make sure you are able to establish a connection.
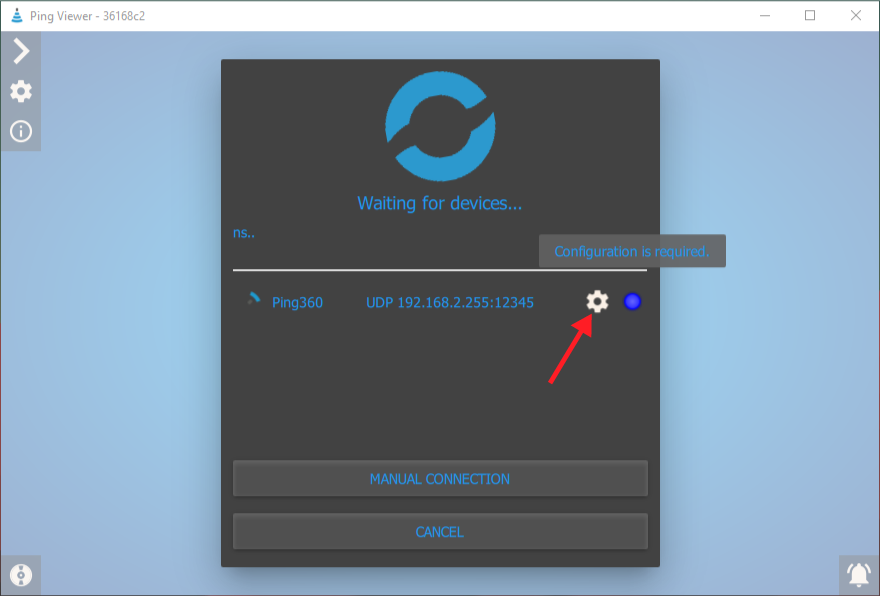
2. Open Ping Viewer, the Ping360 should show up in the Device Manager list after a few seconds with a blue status icon indicating that additional configuration is required.
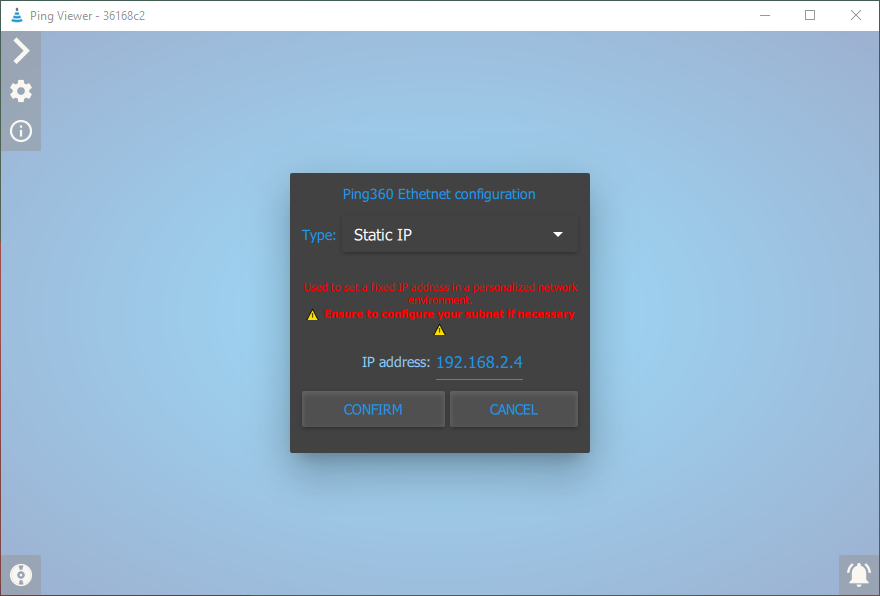
3. Open the Network Configuration menu and select “Static IP” from the dropdown list.
4. Enter an IP address for the Ping360 that is on the same subnet as the BlueROV2 and your topside computer. If you are using the default BlueROV2 network settings this should be “192.168.2.__”, the default choice of “192.168.2.4” works fine on most networks.
Configuring Your Firewall
Windows Firewall
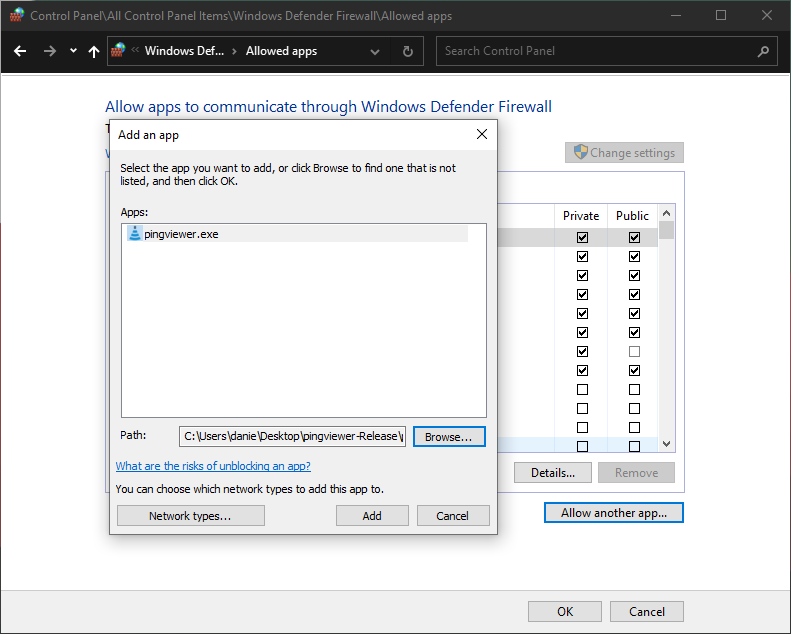
1. Go to Control Panel > Windows Firewall and then select “Allow an app or feature through Windows Firewall”.
2. Select “Change Settings” and then select “Allow another app…”.
3. In the next screen, select “Browse…”, navigate to the Ping Viewer folder and select the “pingviewer.exe” file. Finish by selecting “Add” to add it to the list of allowed apps.
MacOS Firewall
1. Follow the instructions here to allow Ping Viewer through the MacOS firewall.
Troubleshooting
Ping-Viewer does not connect to the onboard Ping360
1. Recheck the Ping360 wiring harness going to the Raspberry Pi.
2. Check to make sure you have the most recent release of Ping Viewer.
3. If using the Ethernet interface, ensure the IP address for the Ping360 is configured correctly and the Ping Viewer software is allowed through your computer’s firewall. Try pinging the Ping360 at its configured IP address. If there is no response, check the network configuration.
4. Contact our support team for further troubleshooting recommendations.