
Integrating a 4K Cinema Camera on the BlueROV2
Introduction
The BlueROV2 is equipped with a full HD, low-light USB camera ready to stream and record underwater video. This camera is great for underwater work, especially in low-light conditions, but some customers were hungrier for something with a few more pixels. So naturally, after many questions about using a cinematic camera with the BlueROV2, we set off to complete the integration ourselves. This guide explains how we integrated a 4K cinema camera on the BlueROV2.
The TLDR
This guide provides an explanation of the integration process, along with the rationale behind our equipment choices. However, if you’re short on time and prefer to focus on the key points, a summary is provided below.
- Choose an Ethernet-enabled camera that has supporting software for remote control over Ethernet. We chose the BGH1 4k cinema camera.
- Use an off-the-shelf underwater housing to house the camera. We chose Anglerfish Creative Lighting’s housing for the BGH1 paired with the Lumix 7-14mm lens.
- Install a WetLink Penetrator on the cables to connect them to the BlueROV2’s Electronics Enclosure.
- Use two twisted pairs in the cable for Ethernet communication and the other two twisted pairs to connect to power.
- Install the Blue Robotics Ethernet Switch in the BlueROV2 and connect the camera to the network.
- Use the Blue Robotics Payload Skid to mount the housing to the BlueROV2.
- Use a small 12 V voltage regulator inside the housing to connect the camera to vehicle power.
- Configure the camera with an IP address on the same subnet as the BlueROV2 and surface computer.
- Use the camera’s supporting software for remote control and to view the live feed.
- Watch the video montage here.
The Equipment
Choosing a Camera
Our objective for this integration was to enable remote control and real-time monitoring of the camera’s live feed from the surface computer, without the using an extra tether cable. The communication between the BlueROV2 and the surface computer is Ethernet based, so choosing a camera that was also Ethernet-enabled greatly facilitates the integration.
With this in mind, we decided on using the Panasonic Lumix BGH1 4K Cinema Camera with a Lumix 7-14mm lens. It is a compact and capable Ethernet-enabled camera that can be remotely controlled using Lumix Tether software from a computer on the same network.
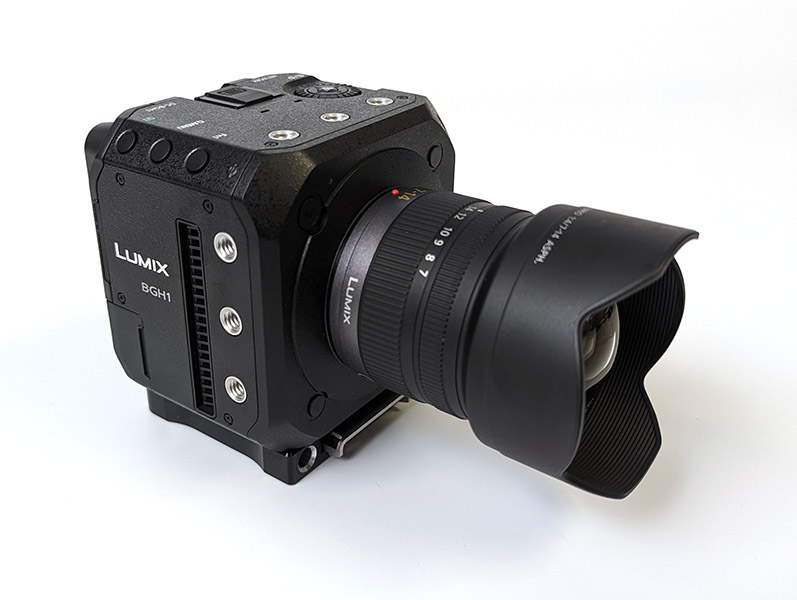
The Panasonic BGH1 4K Cinema Camera
The BGH1 is also the most affordable camera from Netflix’s list of approved cameras. Netflix approved cameras are cameras that have been evaluated to ensure they meet their quality standards for streaming content. You can read more about Netflix approved cameras here.
Choosing a Housing
UPDATE: While the Anglerfish housing we used in this guide is still a great choice, we now have 5″ Series enclosure options with dome end cap that are the perfect size for the BGH1 or other cameras.
Since the BGH1 itself is not waterproof, it needs to be inside a waterproof housing in order to use underwater. Our line of Watertight Enclosures equipped with a dome end cap would have been the obvious first choice, but the camera is slightly too large to fit in our 4″ series enclosure. The camera could fit in our 6″ series enclosure, but the enclosure’s 65-meter depth rating and lack of a suitable dome port led us to look for a housing designed specifically for the camera. Our friend, wildlife documentary filmmaker Nick Hawkins, pointed us to Anglerfish Creative Lighting, who make a high-quality housing for the BGH1.
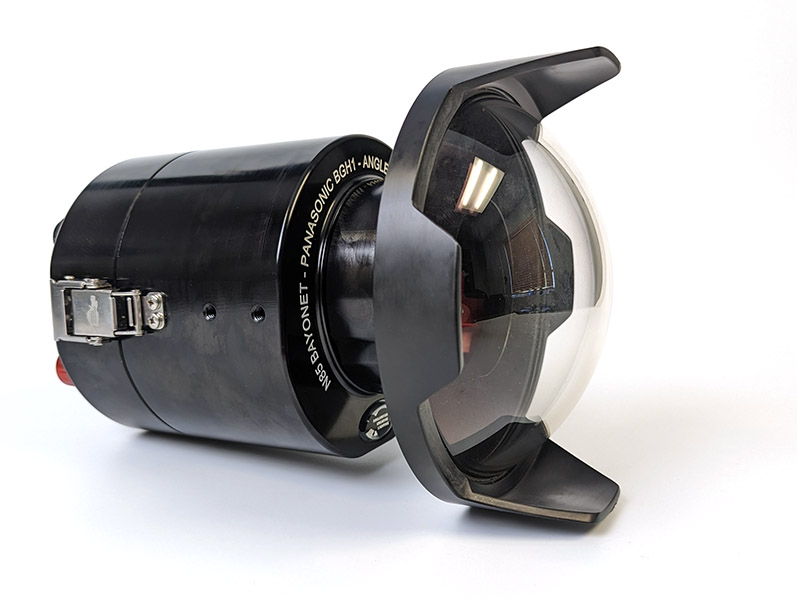
BGH1 Housing from Anglerfish Creative Lighting
ROV Upgrades
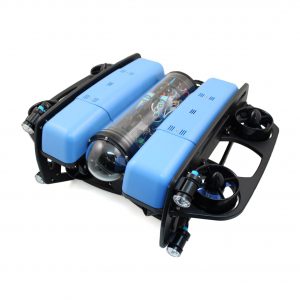
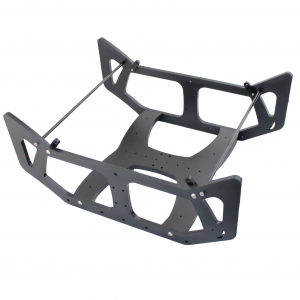
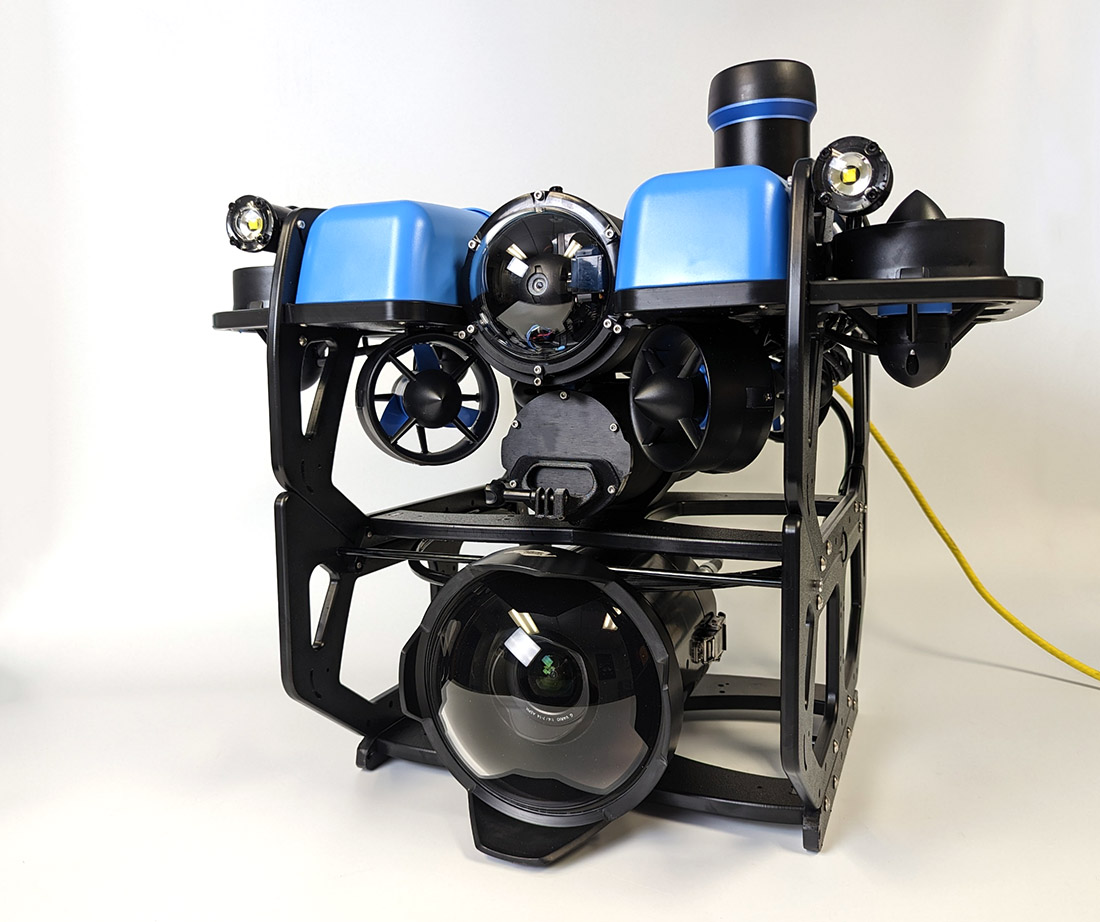
To ensure maximum stability with the somewhat chunky camera and housing payload, we use a BlueROV2 outfitted with the Heavy Configuration Retrofit kit. The optional Payload Skid is used to mount the camera housing under the ROV.
Handling Communication
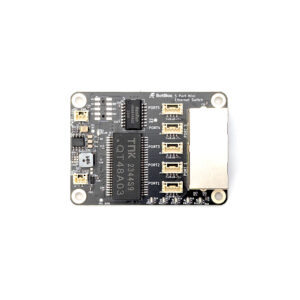
The Blue Robotics Ethernet Switch is a network switch designed to fit inside and integrate easily with the BlueROV2. It enables you to connect multiple devices to the same Ethernet network used by the BlueROV2 to communicate with the topside computer. This is the key component that really simplifies this type of integration and will allow us to remotely operate the camera without an additional tether connecting the camera to the surface.
Supplying Power
For this integration, the BGH1 is powered from the BlueROV2’s main power distribution. The ROV battery voltage ranges from 16.8 VDC to about 12 VDC as the battery charge is depleted. The BGH1 requires 12V at the DC power input, so the ROV voltage needs to be stepped down to the correct input voltage for the camera. To do this we use the LanParte D-Tap to Barrel 12 V Regulated Constant Power Cable but many other 12 V regulators will also work.
We initially planned on powering the camera using its own battery but the housing option we chose is configured for POE (Power Over Ethernet) and could not fit a camera battery. In retrospect, we would have opted for the Anglerfish housing option that supported also using a battery. Using a separate battery for the BGH1 can greatly simplify the integration, as this makes running power from the Electronics Enclosure to the camera unnecessary. But either method of powering the camera works well and both methods have their advantages and disadvantages:
| Camera Power Source | Pros | Cons |
|---|---|---|
| Separate Battery | -Easier integration -Less load on ROV battery, possibly extending runtime | -Need to keep track of two batteries -More equipment (batteries, chargers, etc) |
| From ROV Power | -Only one battery to keep track of -ROV battery has much larger capacity than camera batteries -If the ROV has topside power then both camera and ROV can run indefinitely | -Increased integration complexity -All load on one battery |
Why didn’t we use POE to power the camera?
The BGH1 has the option to power it using active POE+. Active POE means that the POE power source equipment and the device need to communicate to establish power requirements before power is delivered to the device, you can’t just send power down the conductors. Powering the camera using POE would have required installing a POE+ compatible injector somewhere in the ROV, adding additional equipment cost and complexity to the integration.
Hardware Integration
Preparing the Cable
The Anglerfish housing comes with a connectorized Ethernet/POE compatible cable with four twisted pairs of conductors to work with.
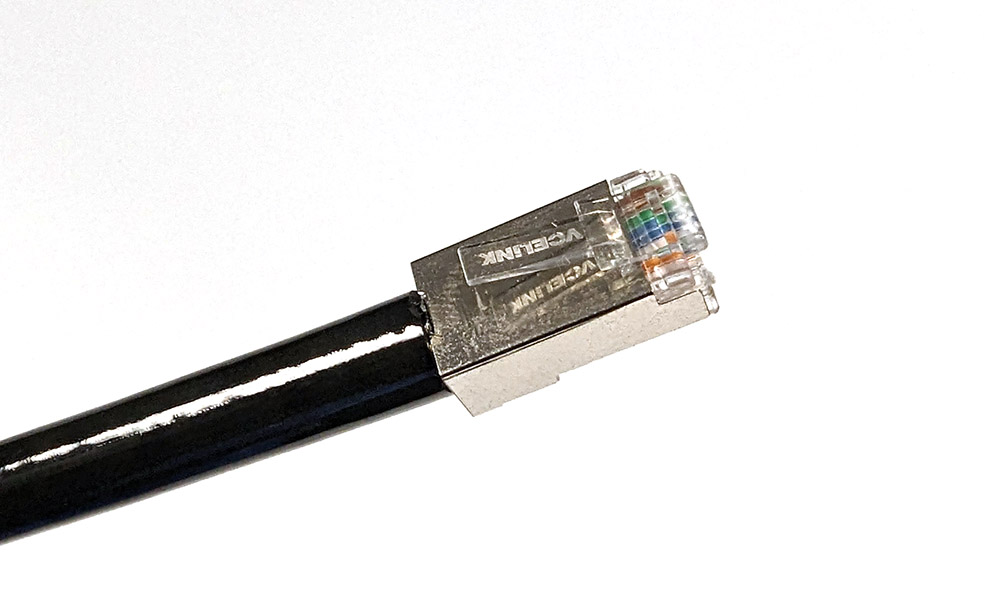
Cable supplied with the housing
We are not using POE to power the camera so we only needed two of the twisted pairs to handle the Ethernet connection, leaving the other two pairs available for powering the 4K camera.
The cable diameter is the perfect size to fit the M10-8.5mm-LC WetLink Penetrator, making it super easy to create a watertight seal that can connect directly to the BlueROV2’s Electronics Enclosure.
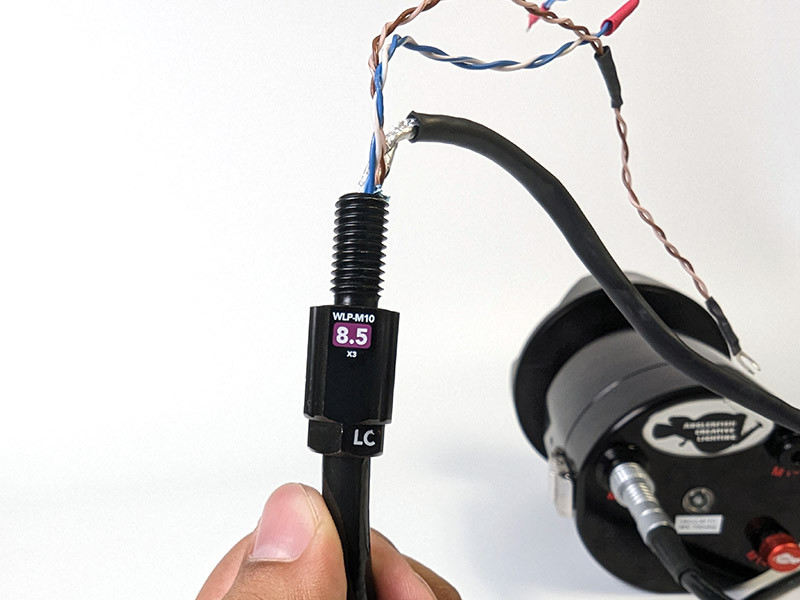
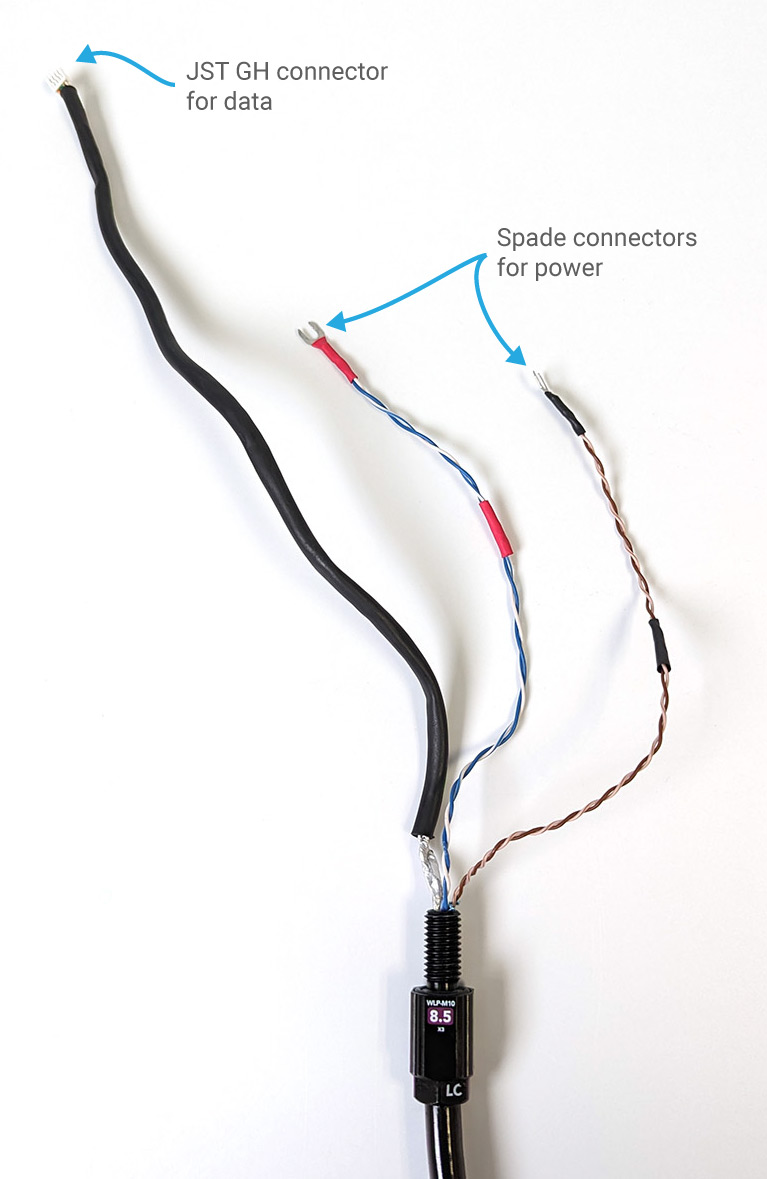
To install the penetrator, cut the RJ45 connector from the end of the cable and strip the jacket to length, leave enough conductor length to connect everything inside the enclosure. After the WetLink Penetrator is installed, install a 4-position JST GH connector on the twisted pairs used for data (green/green-white, orange/orange-white) to connect them directly to the Ethernet Switch. We have the tools to crimp the connector onto the wires directly, but the Ethernet Switch also comes with spare extension cables that can be used to solder splice the connector if you don’t have crimping tools available.
The remaining twisted pairs, the blue/blue-white and brown/brown-white pairs, are used to connect to the ROV’s power distribution block, one pair for positive and one pair for negative. Solder spade connectors at the end of the pairs to make it easy to connect securely to the BlueROV2’s power distribution blocks.
Inside the BlueROV2
With the cable complete, continue to installing the Ethernet Switch in the BlueROV2 Electronics Enclosure. The Ethernet Switch is designed to install easily into the BlueROV2 right above the tether interface board. We have a detailed guide showing how to install the switch here. Once the switch is installed, install the cable penetrator in a spare end cap hole then connect the data wires to a port on the Ethernet Switch and the power wires to the power distribution blocks.
Inside the Housing
The other end of the provided cable terminates in an underwater connector that connects directly to the AnglerFish housing.
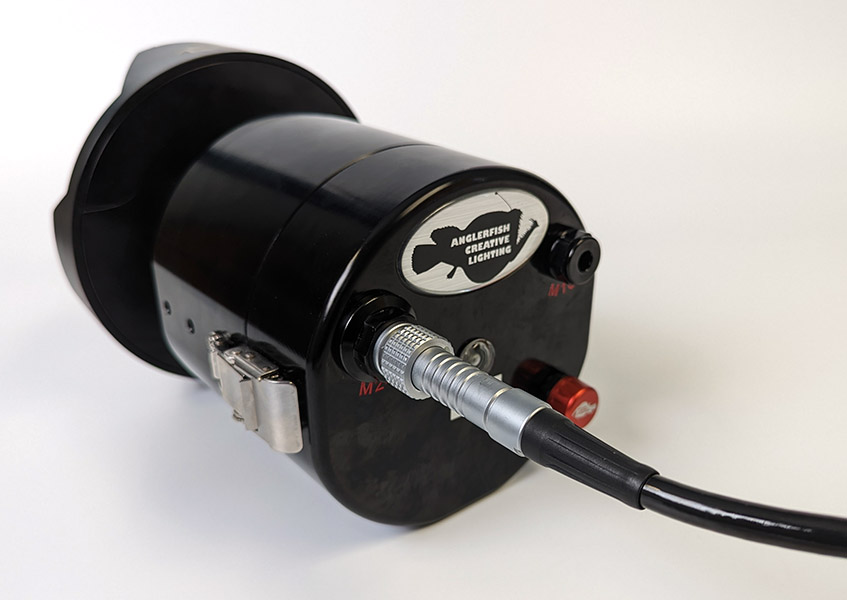
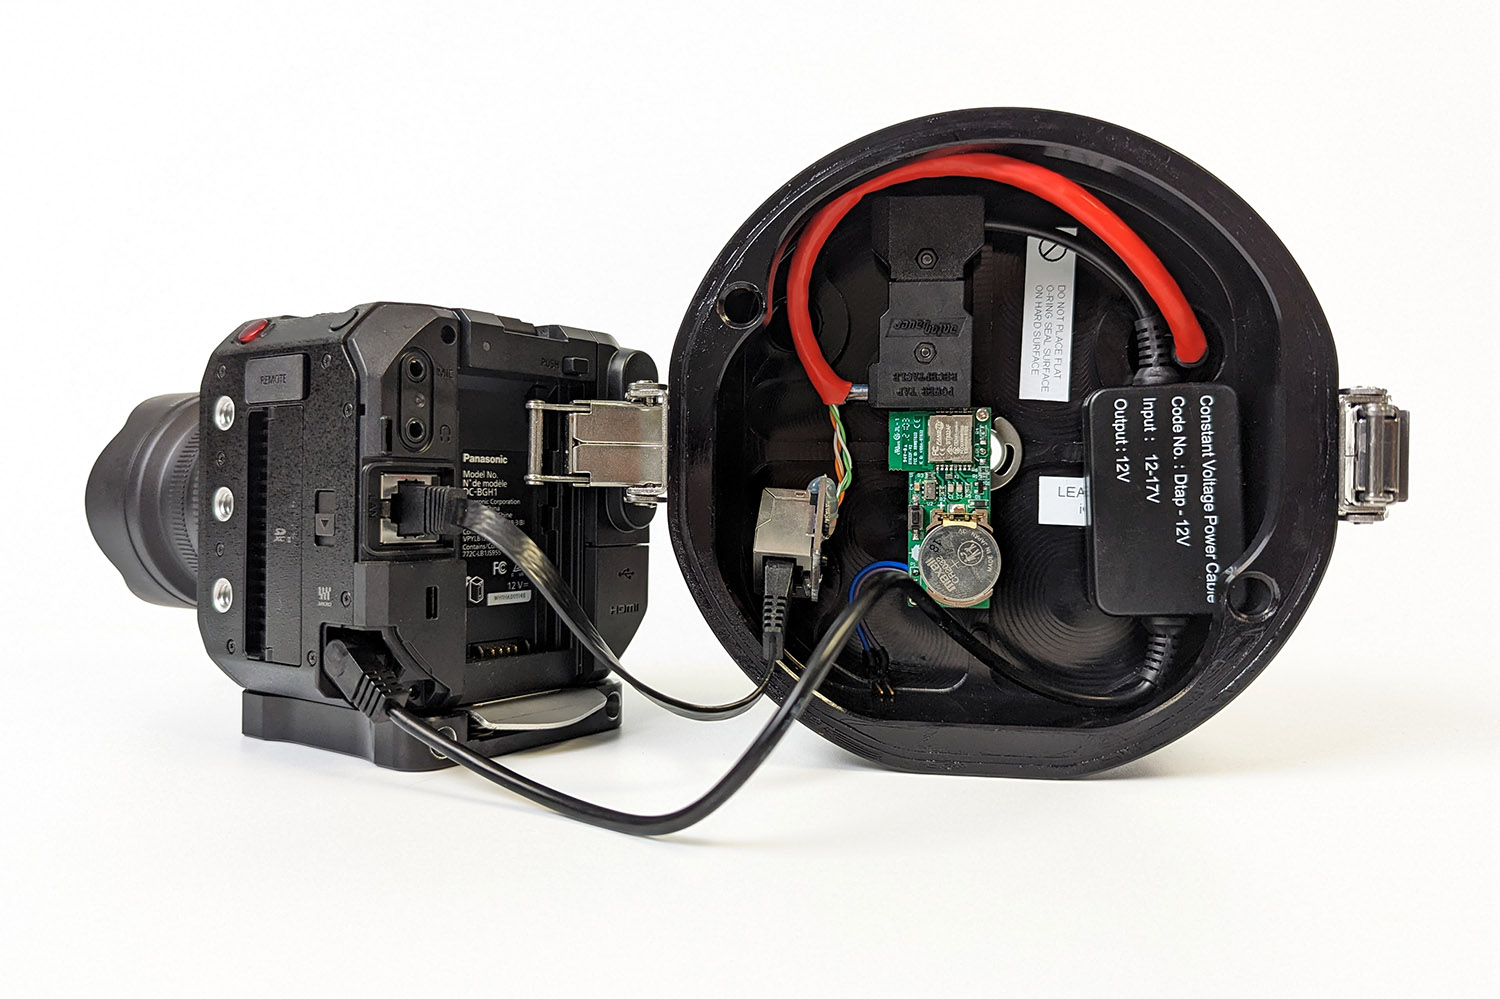
The other side of the connector bulkhead, inside the housing, terminates in an Ethernet cable that plugs directly into the BGH1 4K camera. This works well if you are using POE to power the camera, but we are powering the camera from the BlueROV2’s battery so some modification is necessary.
The power wires in this cable are connected to the BlueROV2’s battery power, which can range from 16.8 V to 12 V. The DC power input for the BGH1 requires 12 V so the power wires needed to go through a 12 V regulator before being connected to the BGH1. Cut the RJ45 connector from the cable and connect the blue and brown pairs to the LanParte 12V regulator. Connect the data pairs Ethernet cable using an RJ45 breakout connector.
Now it’s time to mount the Anglerfish housing to the BlueROV2 frame.
Mounting the Housing to the Frame
The Payload Skid makes mounting larger payloads quick and easy. Drill holes into the bottom panel to match the Anglerfish housing mounting hole pattern, then install the skid on the BlueROV2. Mount the housing to the bottom panel of the skid using ¾ inch long 1/4-20 screws.
The housing needs about a centimeter of extra space to fit in the payload skid. Two pieces of frame material and some extra metal clips were used to drop the bottom panel a little lower to provide extra clearance.
With the hardware integration complete, it’s time to configure the camera settings for communication over the network.
Software Setup
Configuring the Camera Settings
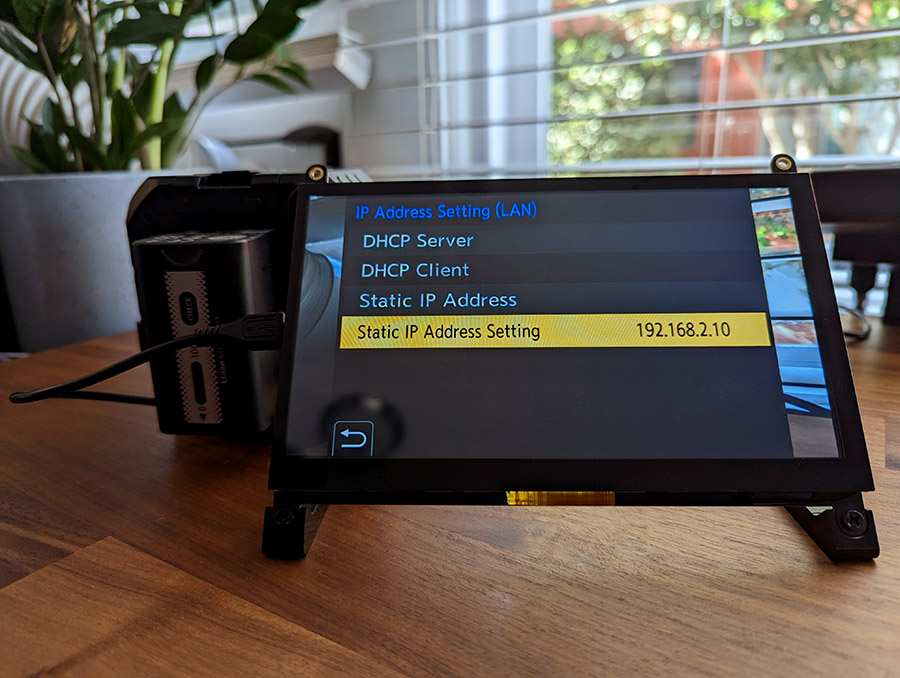
To get the BGH1 communicating on the network properly, configure it to the Static IP setting and give it an IP address that is on the same subnet as the BlueROV2 and the topside computer. For the default BlueROV2 network settings, this should be “192.168.2.__”, with the last digit being a number that does not create an IP address conflict with any other connected devices. We chose 192.168.2.10.
Using Lumix Tether
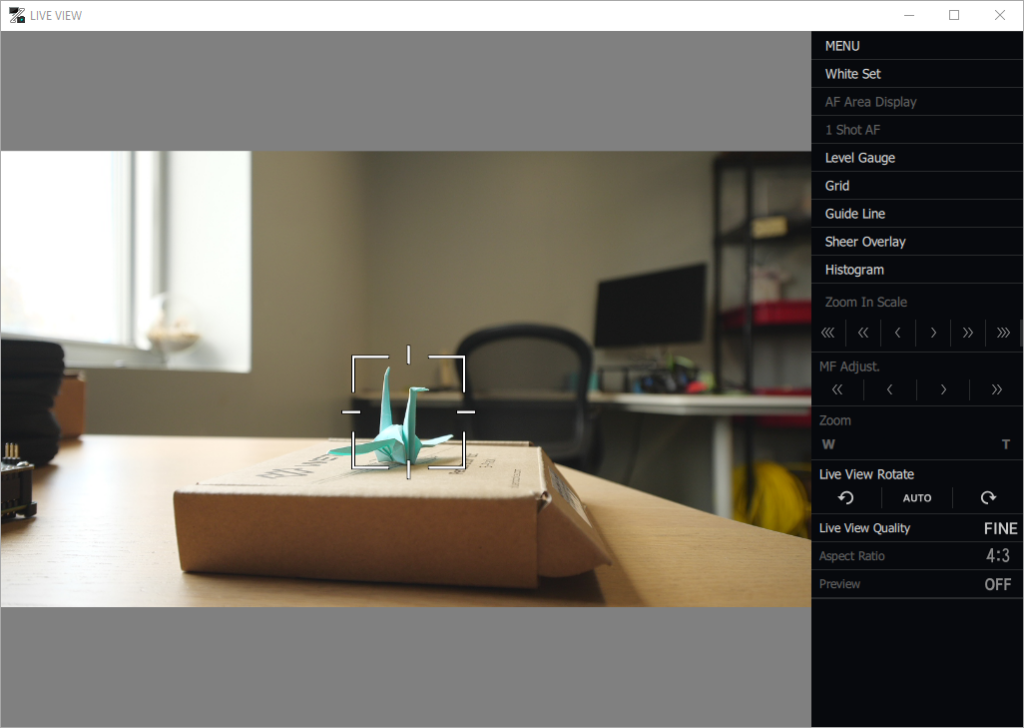
The BGH1 is compatible with Panasonic Lumix Tether software, which allows you to remotely control Lumix digital cameras and get a live view from the camera. It can be downloaded from the software site here.
When the Lumix Tether program is launched, it will automatically begin searching for compatible cameras connected to the network. As long as the camera’s IP settings are correct, connecting to the camera is automatic without any additional configuration.
Lumix Tether has a control panel that allows you to start and stop recording as well as access some camera settings.

Viewing the Live Preview
The Live Preview window allows you to view what the camera is capturing in real time. The quality of the live preview can be reduced, which is helpful to reduce bandwidth usage. 4K video can take up a lot of bandwidth and it’s usually not necessary to stream the full resolution video to the topside computer. Using a lower-quality live stream helps keep bandwidth usage low while the full resolution 4K video is recorded to the camera’s SD card.
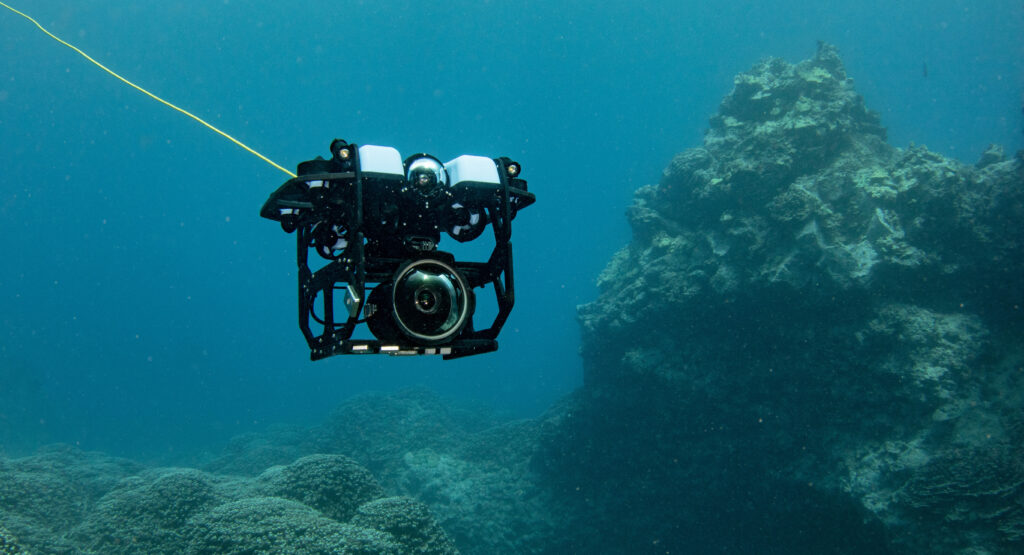
In the Field
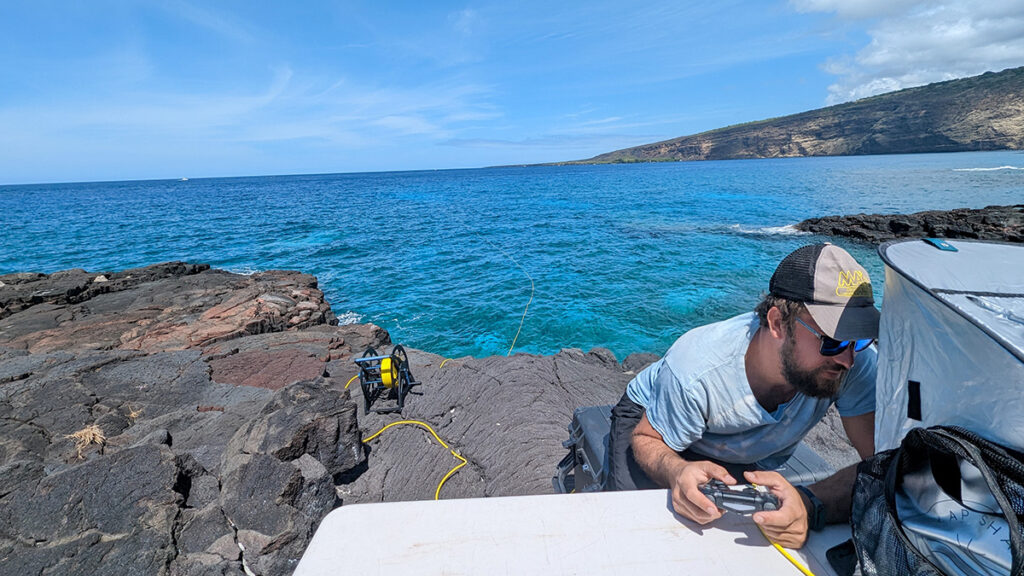
We took the completed build to Hawaii’s Big Island to capture some 4K video. If a picture is worth a thousand words, then a 4K video is probably worth a few million, so we’ll just show you the video and let the results speak for themselves.
We’re not professional underwater videographers by any stretch of the imagination, but as you can see, the BlueROV2 paired with a cinema-quality camera can provide some pretty great results.
We hope this guide is helpful for anyone interested in using a 4K or other type of high-end camera with the BlueROV2. If you have any questions about a specific integration, send us an email at [email protected] or start a conversation on our forums.