
WetLink Penetrator Assembly and Installation
The WetLink Penetrator (WLP) is our next-generation solution for low-cost, high pressure, high reliability sealing of electrical cables. The WetLink Penetrator is easy to assemble and doesn’t require any adhesives, potting compounds, or rubber molding.
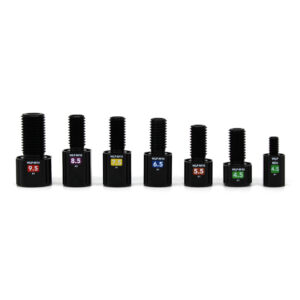
The full WLP product line supports sealing of cables from 3.7mm up to 9.8mm in diameter. This guide will show you how to assemble and install a WetLink Penetrator.
This guide assumes you have already selected the correct size WLP for your cable. If you are unsure which WetLink Penetrator to use for your cable, our Choosing a WetLink Penetrator guide will help you through the process of choosing the correct size. It also provides more information about how WLP works and troubleshooting steps for assembly on untested cables.
Parts and Tools
Assembling a WetLink Penetrator is simple and only requires a couple of tools. We’ve designed the WetLink Plug Wrench and Assembly Block to make assembly super easy. If you’re going to be making a lot of WetLink Penetrators, we highly recommend getting these tools.
If you do not have a WetLink Plug Wrench or Assembly Block, you can use common hand tools as well. Refer to the Choosing the Correct Tools section below for compatible tool sizes.
Choosing the Correct Tools
Use the table below to find the correct tool sizes for the WetLink Penetrator you are assembling. Locate the correct row in the table by matching the “Seal Size” and “Bulkhead Size” columns to the WetLink Penetrator you are using.
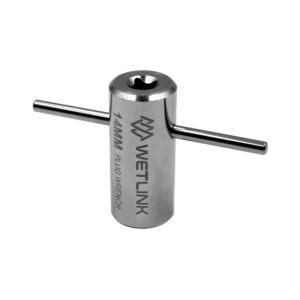
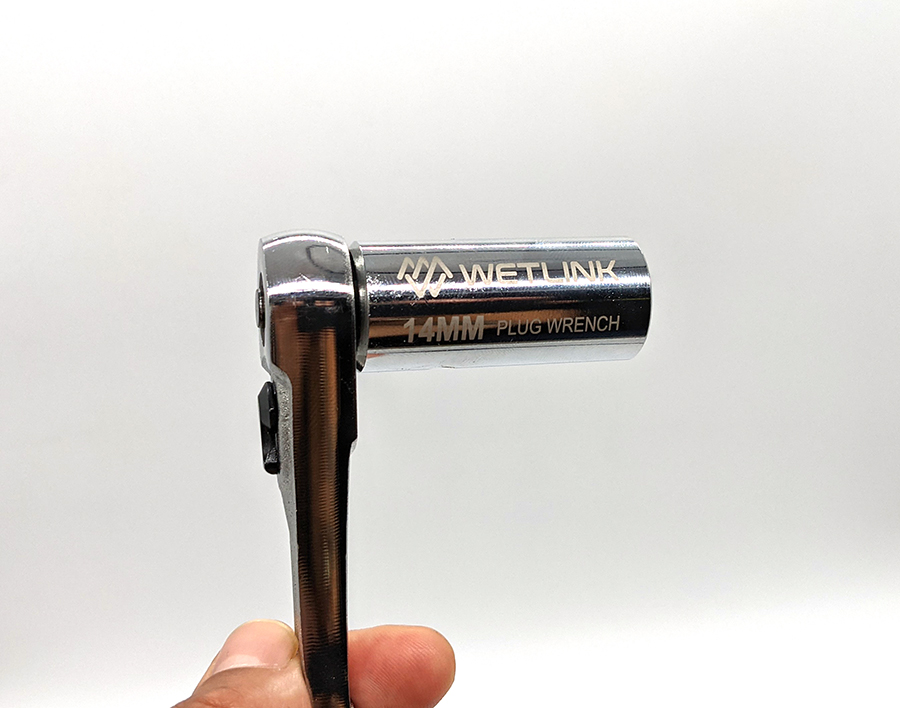
- Plug Wrench: The Plug Wrench is used to install the plug into the WLP bulkhead. The compatible Plug Wrench is listed in the “Plug Wrench” column in the table below. Alternatively, you can use a regular wrench of the size specified in “Plug Hex Size” column.
- The Plug Wrenches can be attached to square drive ratchets or torque wrenches. The 11 mm and 14 mm Plug Wrench accept a 1/4 inch (6.3) square drive. The 18 mm Plug Wrench accepts a 3/8 inch (9.5 mm) square drive.
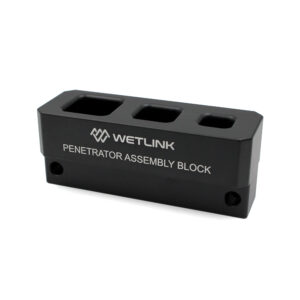
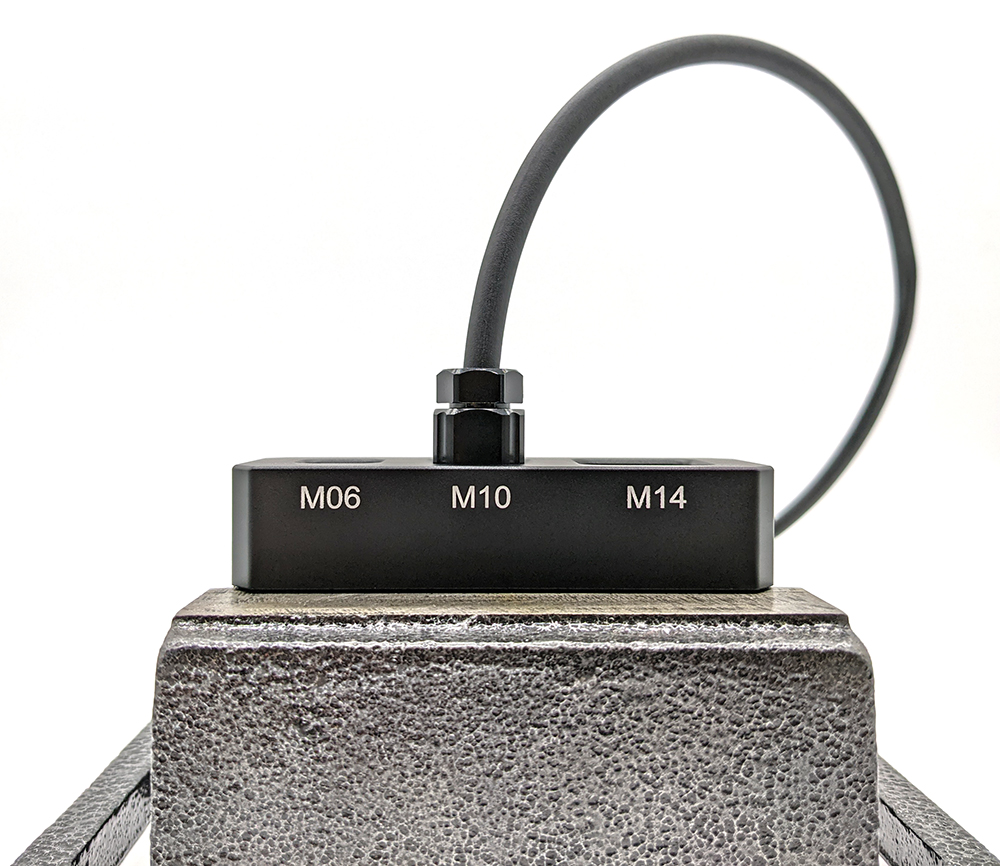
- WetLink Penetrator Assembly Block: The WLP Assembly Block is used to hold the bulkhead while installing the plug. The assembly block is compatible with all WetLink Penetrator sizes. Alternatively, you can also use a vice or wrench of the size specified in the “Bulkhead/Nut Flat Size” column.
Compatible Tools
| Seal Size | Bulkhead Size | Bulkhead Wrench | Bulkhead/Nut Flat Size | Bulkhead Installation Torque | Plug Wrench | Plug Hex Size | Plug Installation Torque ² |
|---|---|---|---|---|---|---|---|
| 4.5 | M06 | M06 (BR-100977-006) | 12 mm | 1 N⋅m | 11 mm (BR-100369-011) | 11 mm | ~14 N⋅m |
| 4.5 | M10 | M10 (BR-100977-010) | 16 mm | 3.5 N⋅m | 11 mm (BR-100369-011) | 11 mm | ~14 N⋅m |
| 5.5, 6.5, 7.5, 8.5 | M10 | M10 (BR-100977-010) | 16 mm | 3.5 N⋅m | 14 mm (BR-100369-014) | 14 mm | ~14 N⋅m |
| 9.5 | M14 | M14 (BR-100977-014) | 20 mm | 3.5 N⋅m | 18 mm (BR-100369-018) | 18 mm | ~20 N⋅m |
| ¹ The WetLink Penetrator Assembly Block is compatible with all WetLink Penetrator sizes. ² Installation torque is approximate. Actual torque to fully seat the plug varies by cable. |
|||||||
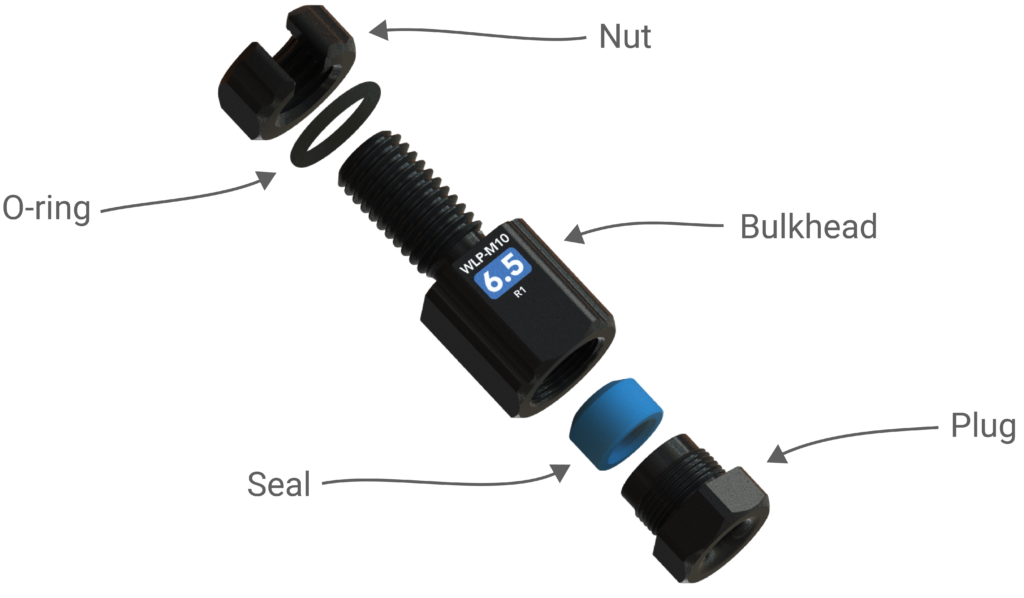
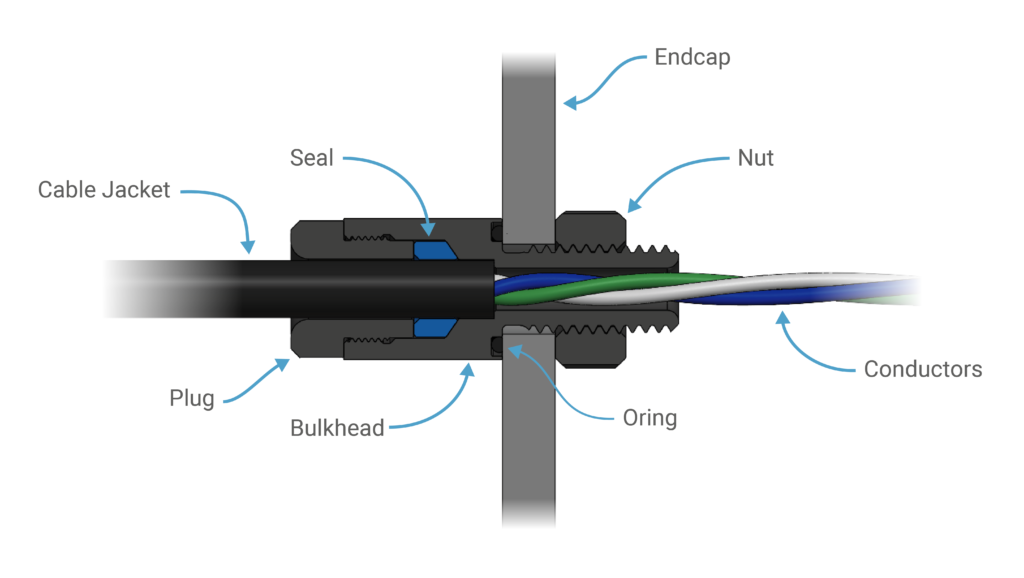
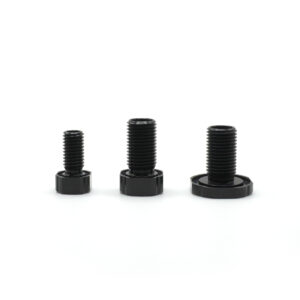
Parts of a WetLink Penetrator
The diagram below shows the names of all the parts of a WetLink Penetrator.
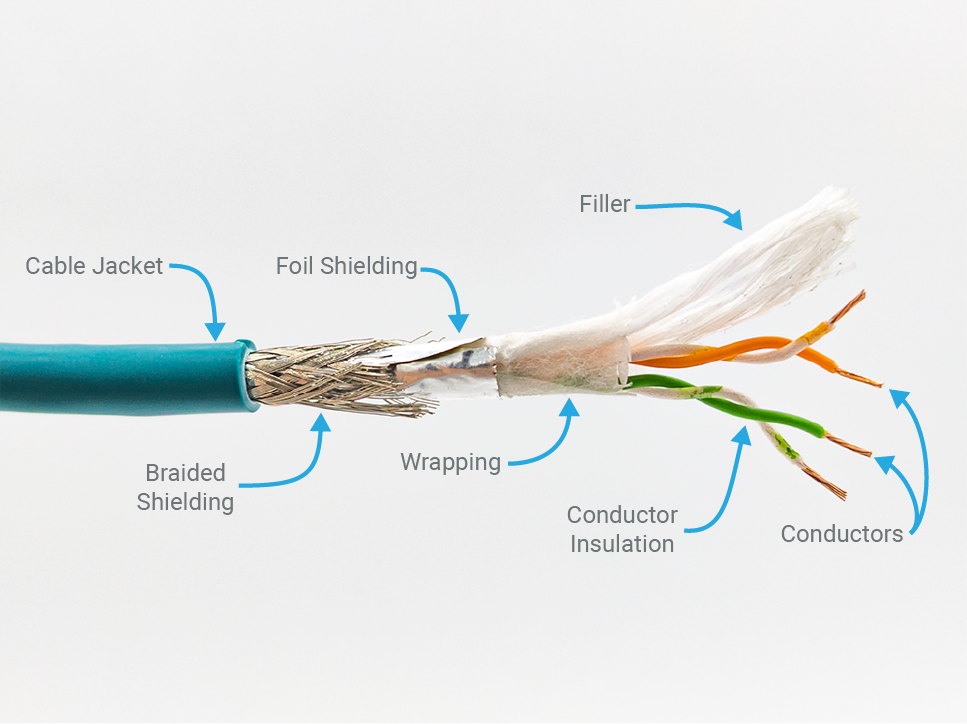
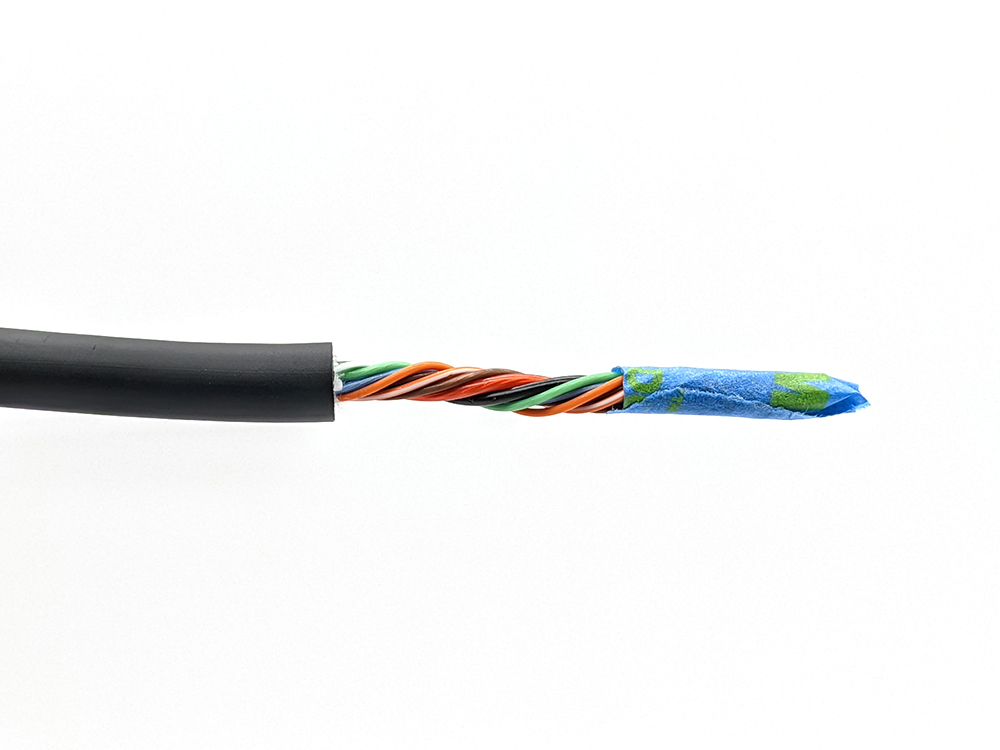
Parts of a Cable
The diagram below shows all the different parts of a cable.
Prepping the Cable
The cable jacket must be properly stripped before installing a WLP on it. We have a complete Cable Jacket Stripping Guide for information about how to properly strip cable for use with WetLink Penetrators, but the basic guidelines are also provided below.
Cable Stripping
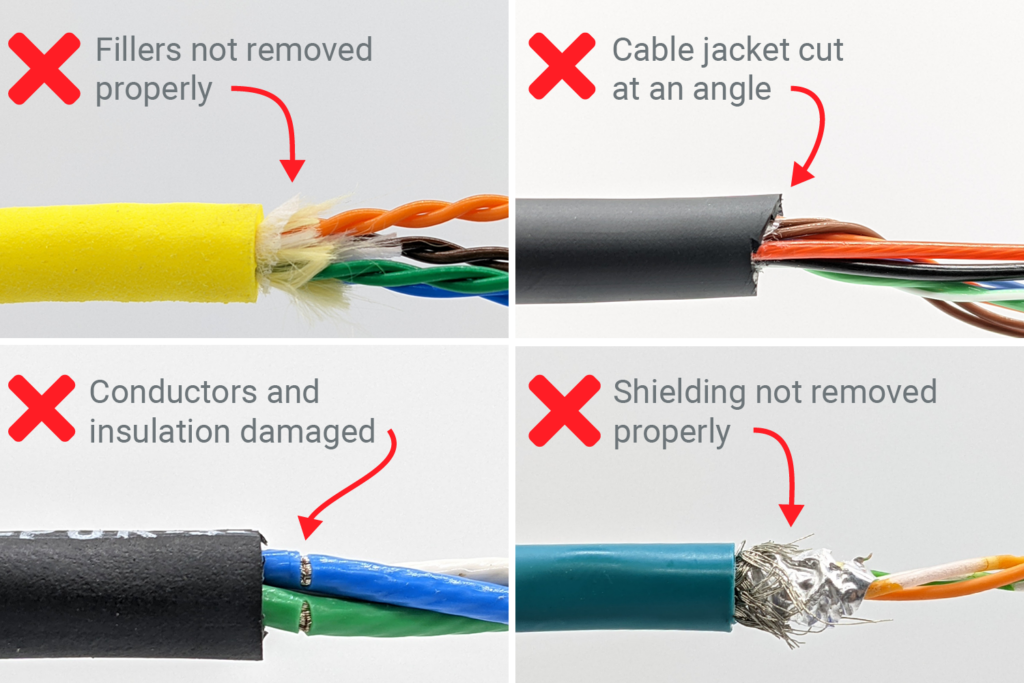
Basic guidelines for properly stripping cable:
- The cable jacket must be cut straight across, perpendicular to the cable. A straight, perpendicular cut is necessary to allow the cable to seat fully into the penetrator and ensure a proper seal.
- Cable shielding, wrapping, and fillers must be removed cleanly. Any loose shielding, wrapping, or fillers may prevent the cable from seating fully in the penetrator or interfere with the seal.
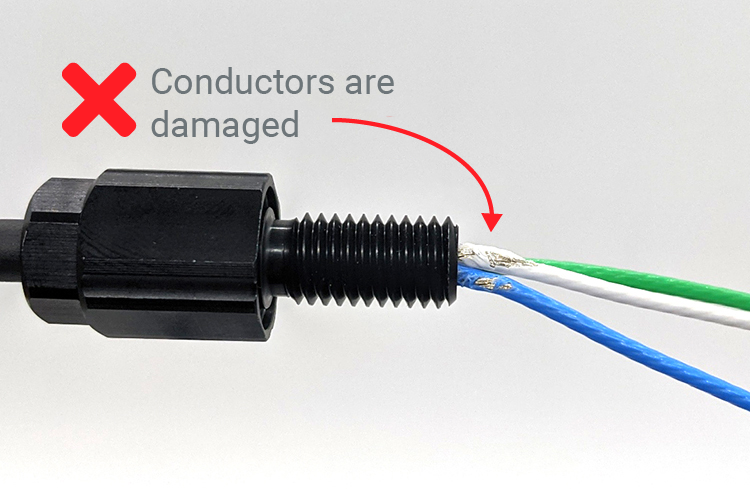
- Avoid damaging the conductor insulation. Accidentally cutting the insulation may lead to shorts between the conductors.
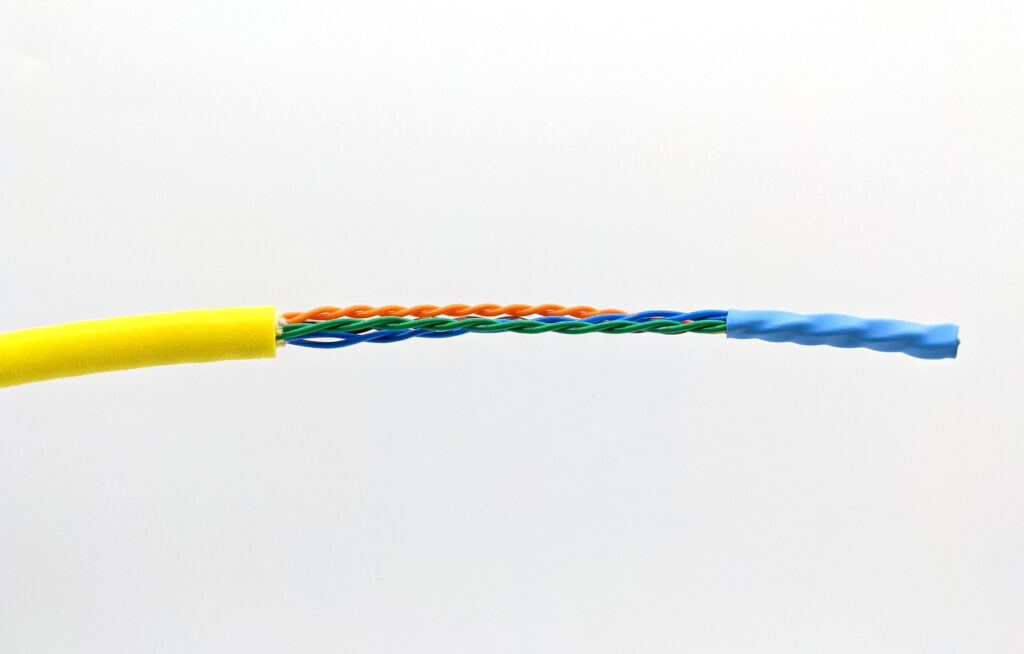
The following picture shows examples of improperly stripped cables.
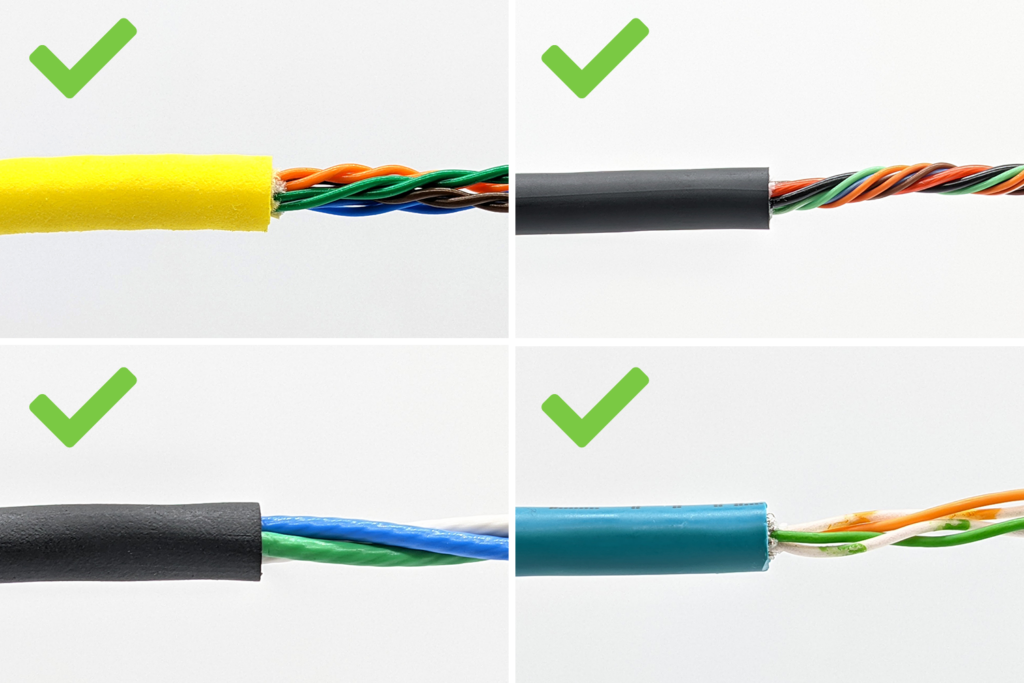
The next picture shows examples of properly stripped cables.
Assembly
Video Tutorial
Install the Plug and Seal Onto Cable
1. Slide the plug onto the cable with the threads pointed towards the stripped end of the cable.
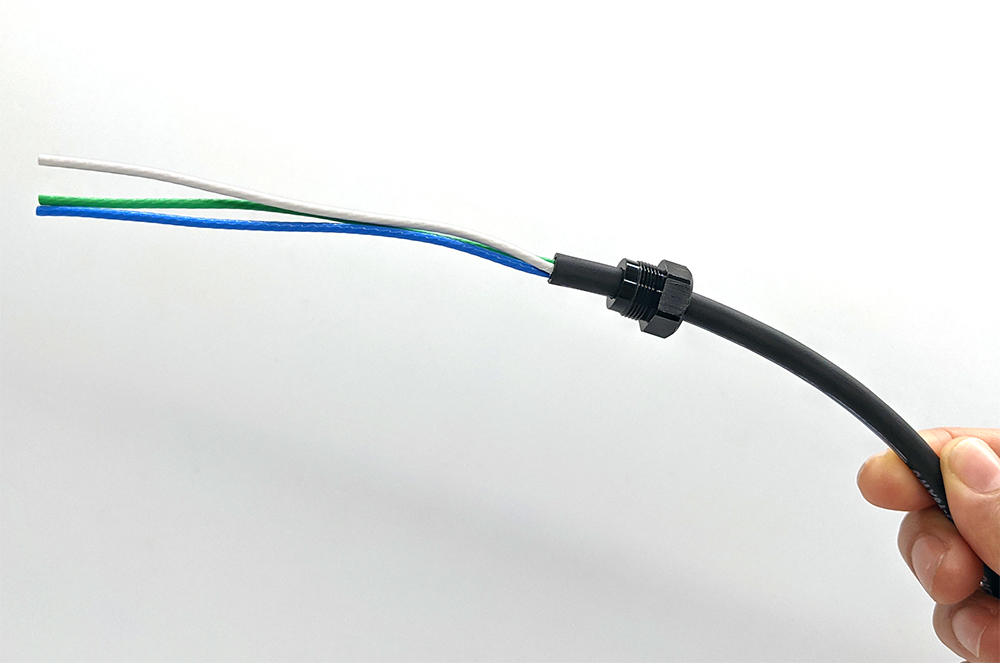
Plug installed on the cable.
2. Slide the seal onto the cable. The seal has a flat end and a tapered end, make sure the tapered end is pointing towards the stripped end of the cable. Do not add any type of grease or lubricant to the seal. Lubricant is not required to seal the cable and may cause the cable to pull out of the compression seal.
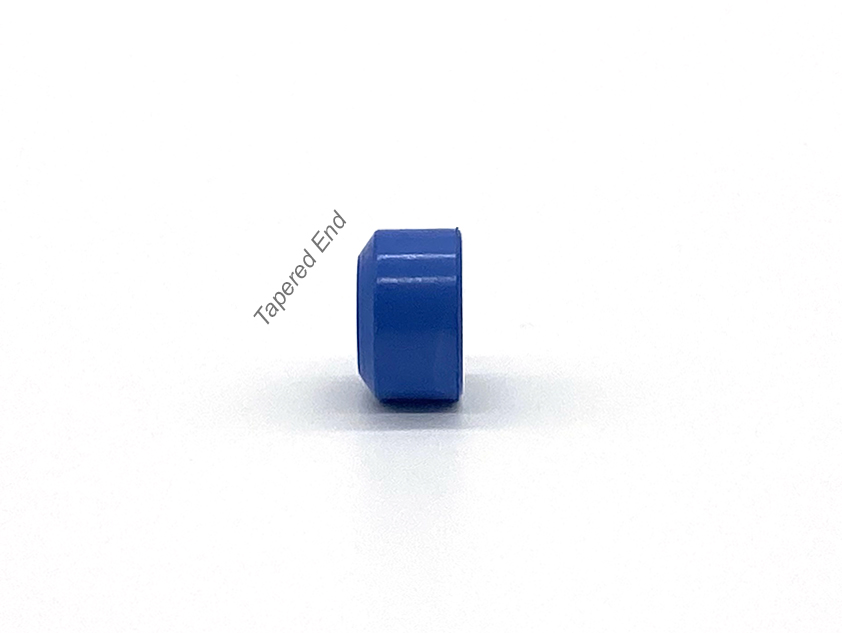
Plug tapered end.
Plug and seal installed on the cable.
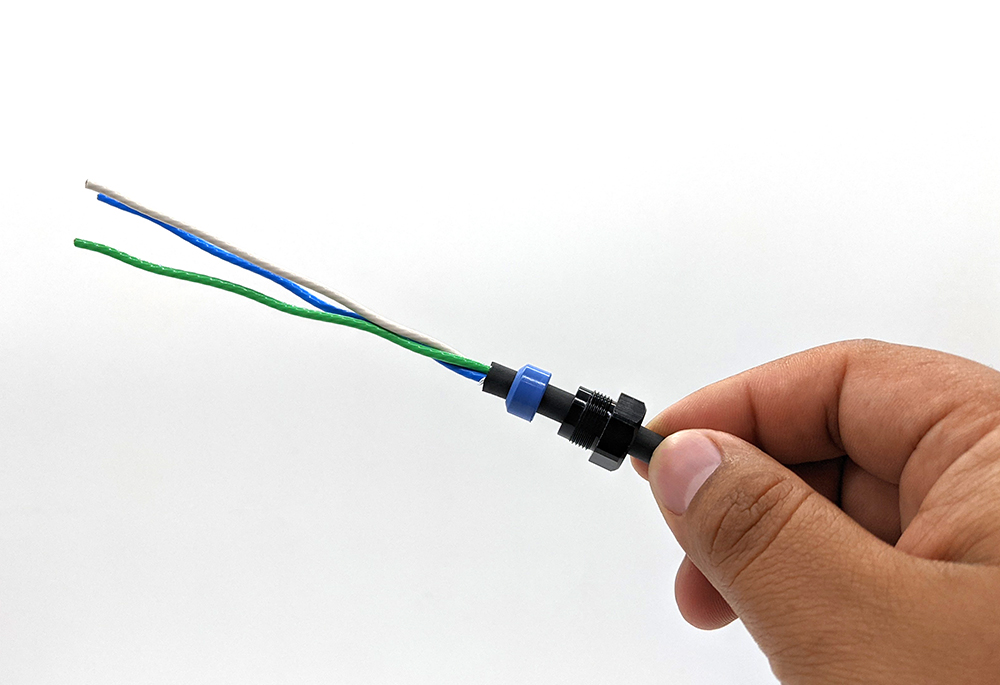
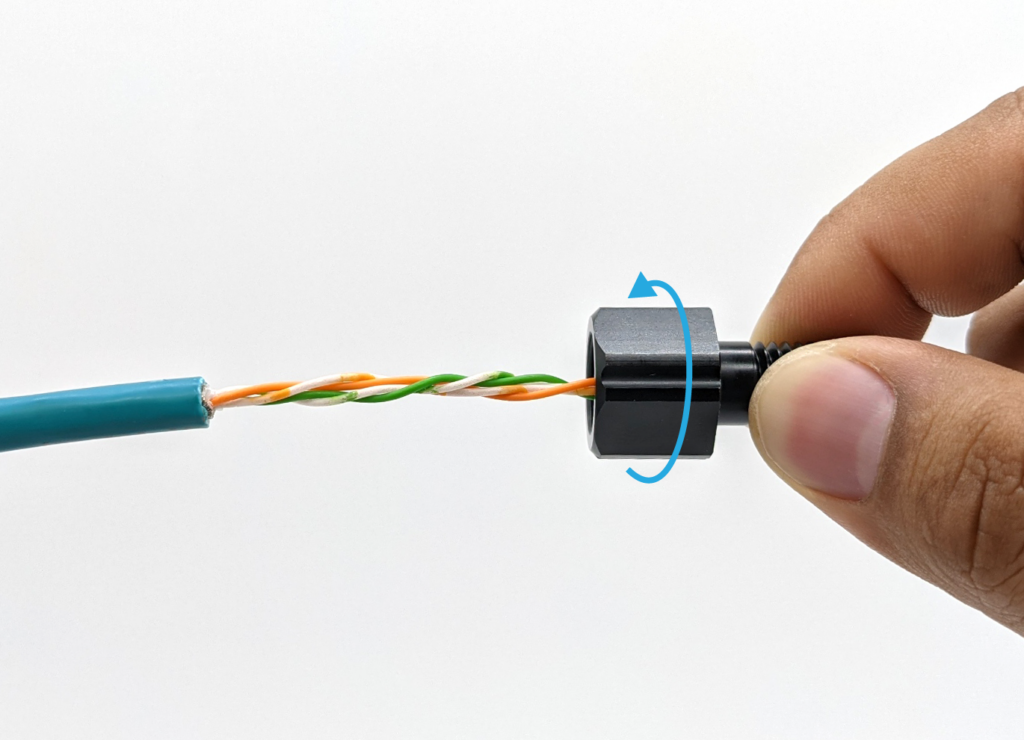
Prepping the Conductors
The next step involves inserting the conductors through the bulkhead. This may be difficult with certain cables, especially if the cable has many conductors. It is important not to force the conductors through the bulkhead to avoid damaging the insulation or the conductor itself. Below are some useful methods for easily inserting the conductors through the bulkhead without damage.
- Twist the conductors into a tight, neat bundle.
- Twist the bulkhead onto the conductors. Some cables have conductors that are already twisted, try turning the bulkhead in the direction of the twist as you insert the conductors through the bulkhead.
- Tape the tip of the conductors. Wrap a small piece of tape around the conductors to keep them together as you insert the conductors through the bulkhead.
- Install heat shrink around the conductors. Install a small piece of heat shrink around the conductors to keep them together as you insert the conductors through the bulkhead.

Installing Into the Bulkhead
Insert the conductors and cable into the penetrator bulkhead. Make sure the cable is seated firmly and fully against the cable jacket seat inside the penetrator. This is very important! The seal will not seal correctly if the cable is not inserted fully into the bulkhead.
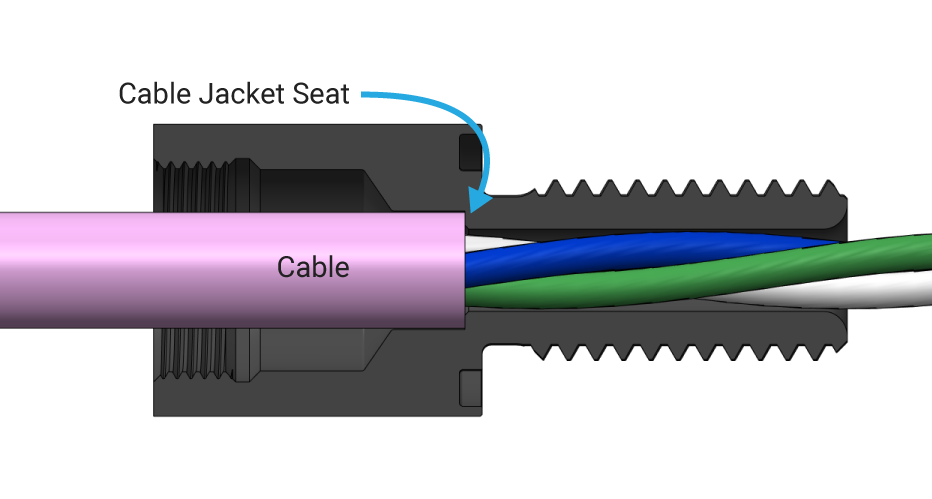
Cross section showing cable jacket sitting fully against cable jacket seat.
Inserting wires and cable into the bulkhead.
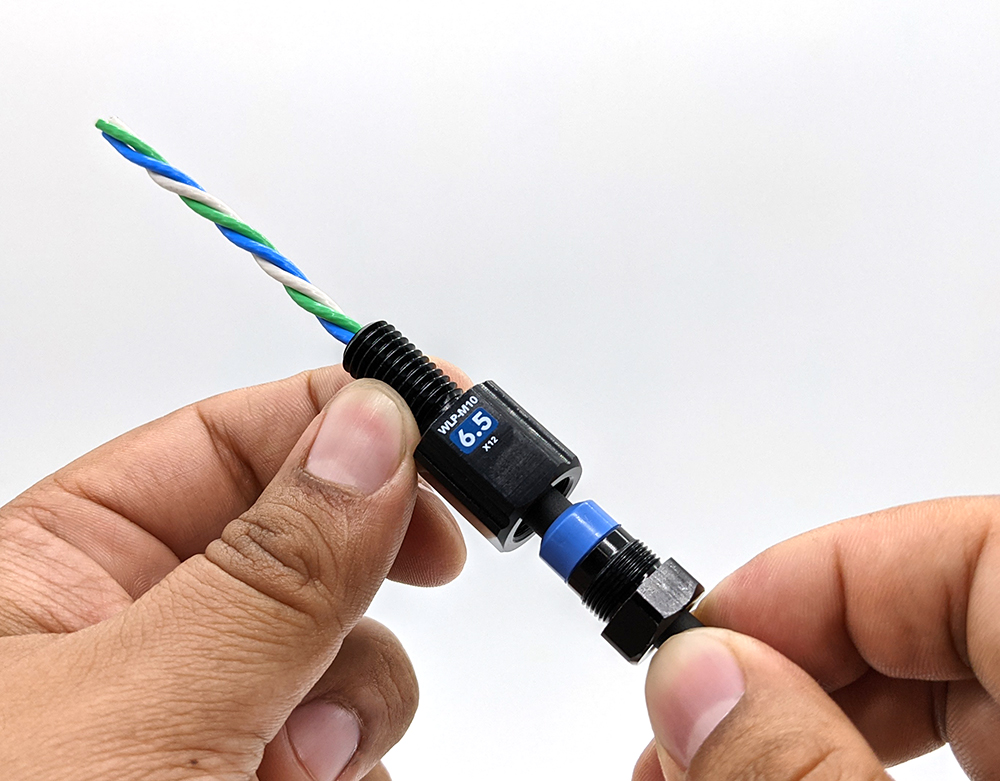
2. Slide the seal and plug down and insert them into the penetrator bulkhead. Use your fingers to thread the plug into the bulkhead. Make sure the cable jacket stays firmly seated against the cable jacket seat while doing so. It helps to gently pull on the wires on the other side of the penetrator while tightening the plug to ensure the cable stays seated against the jacket seat. Tighten until finger tight.
Plug and seal installed in bulkhead.
Completing the Assembly
The rest of the assembly process can be completed using either the recommended WLP tools or with common hand tools:
Completing Assembly Using WetLink Plug Wrench and Assembly Block
For this step you will need:
- Compatible Plug Wrench (refer to the “Choosing the Correct Tools” section above)
- Compatible square drive ratchet or torque wrench for the Plug Wrench (optional, refer to the “Choosing the Correct Tools” section above)
- WLP Assembly Block
- A way to secure the Assembly Block (a vice or 2x M6X1.0 thread bolts)
1. Secure the WLP Assembly Block to a table or work surface using a vice.
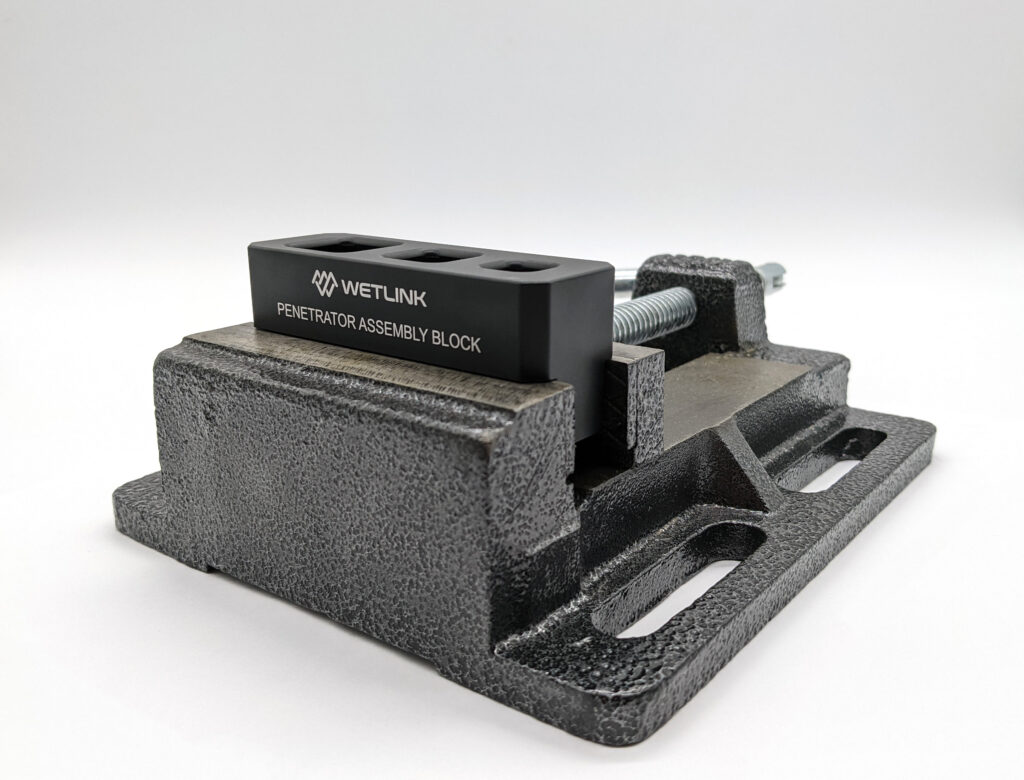
WLP Assembly Block secured with a vice.
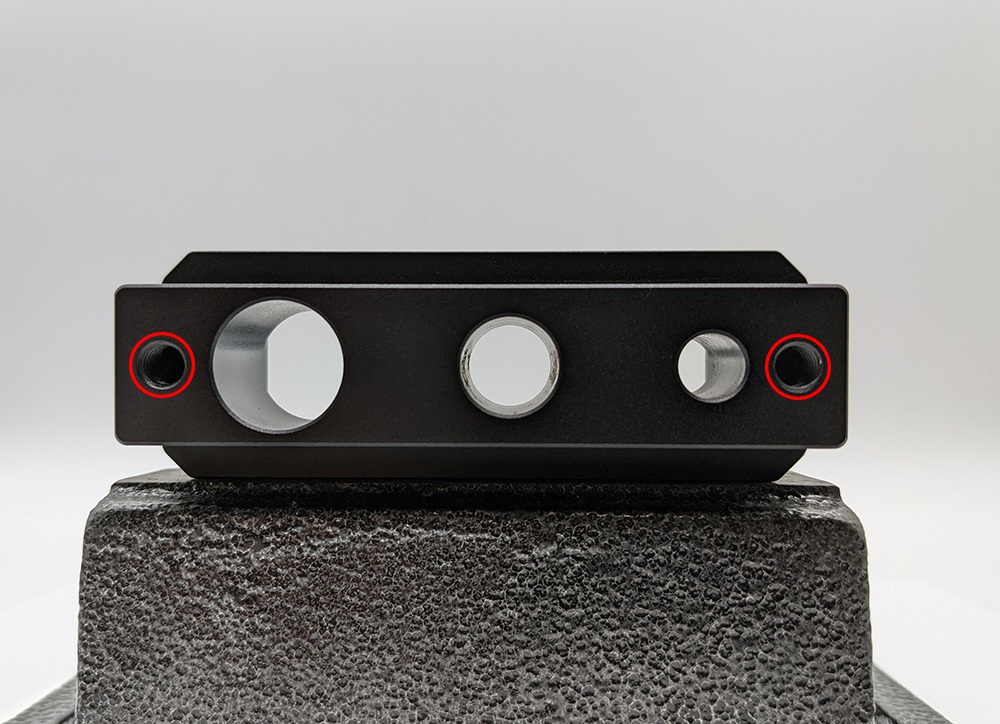
The WLP Assembly Block can also be secured using bolts through the side-mounting holes.
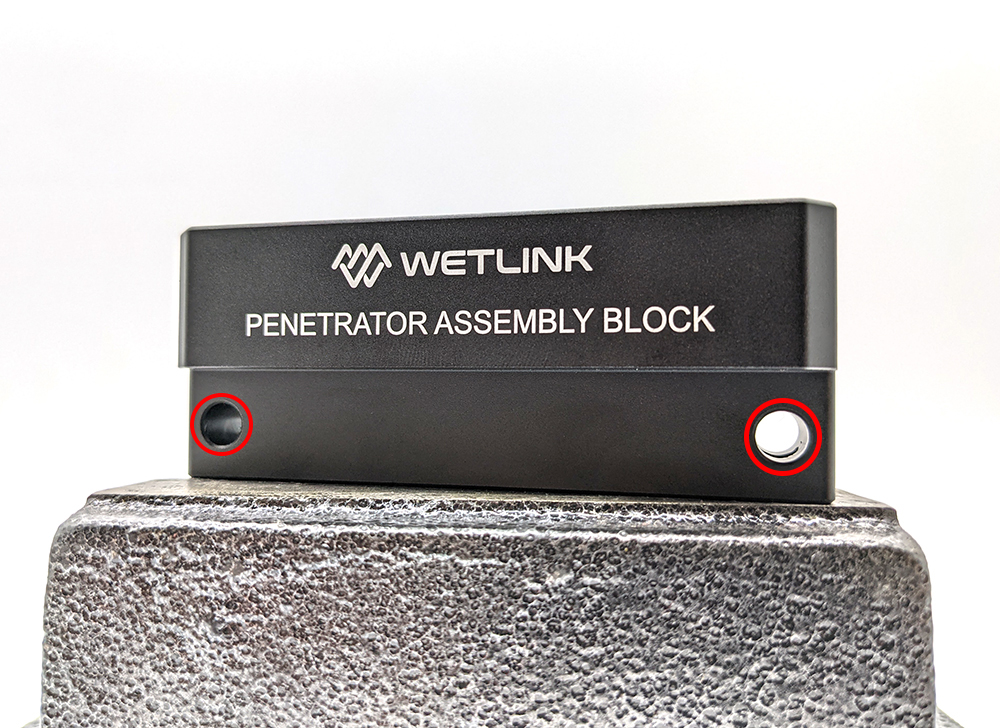
WLP Assembly Block side mounting holes.
Or with M6X1.0 thread bolts into the underside threaded mounting holes.
WLP Assembly Block underside mounting holes.
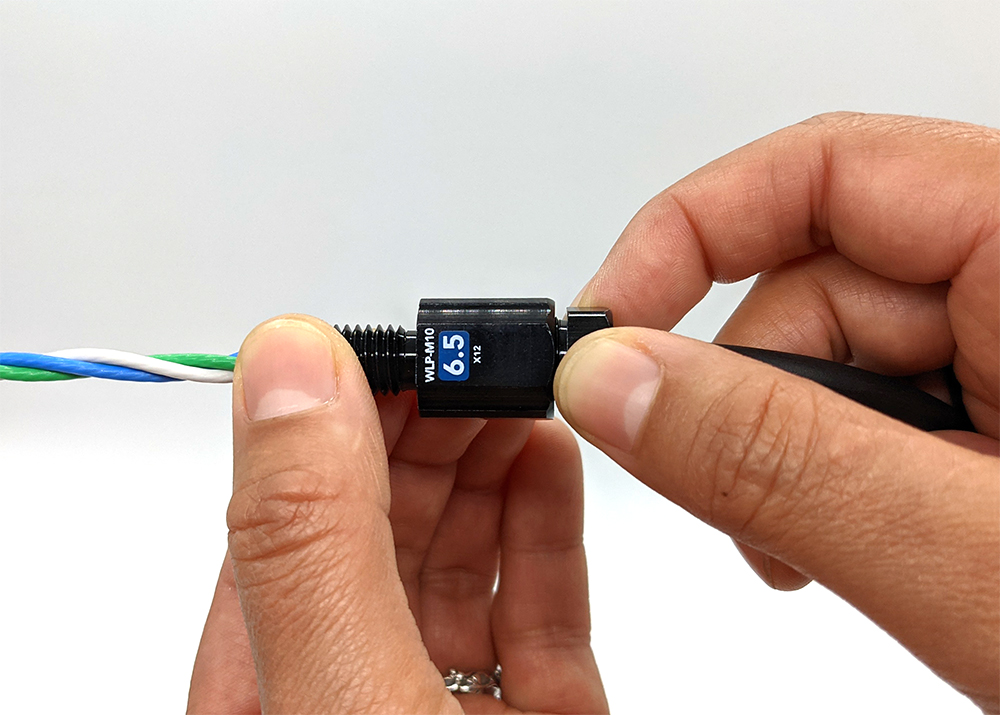
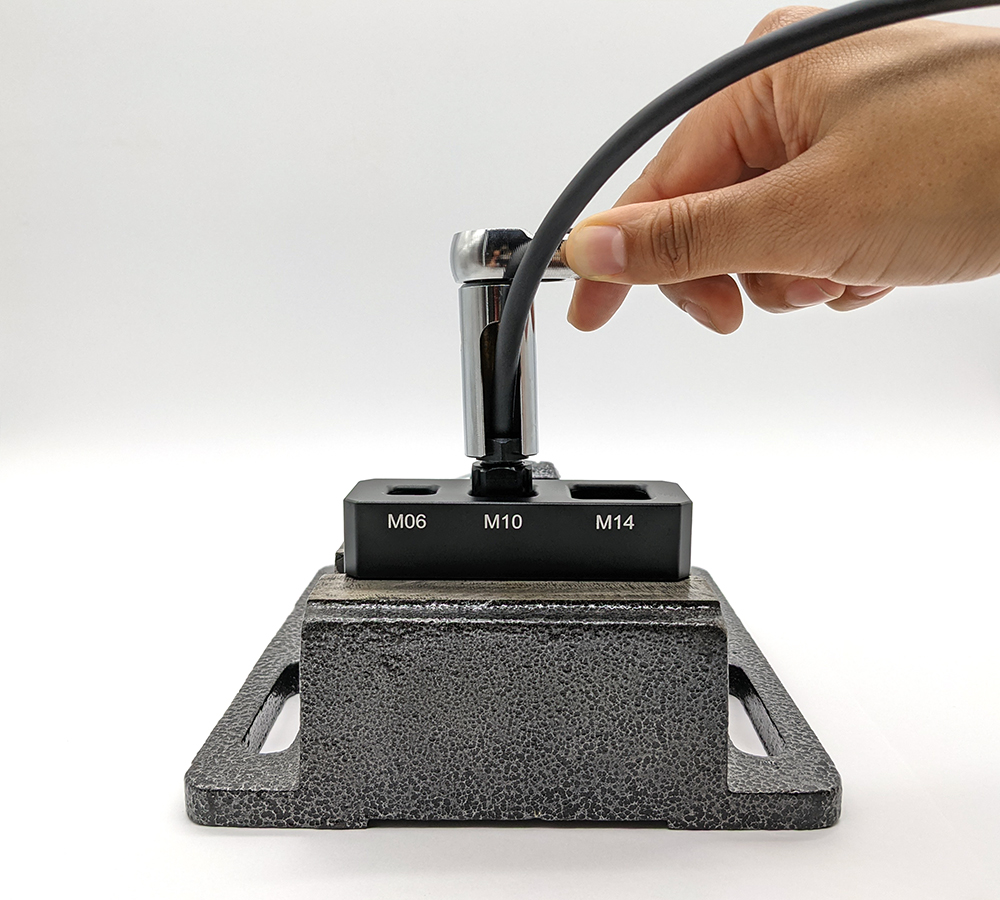
2. Insert the bulkhead with installed cable, plug, and seal into the appropriate space in the Assembly Block. The spaces are labeled according to the bulkhead size. The wires extending from the bulkhead should feed through and come out of the bottom of the Assembly Block.
Bulkhead in Assembly Block.
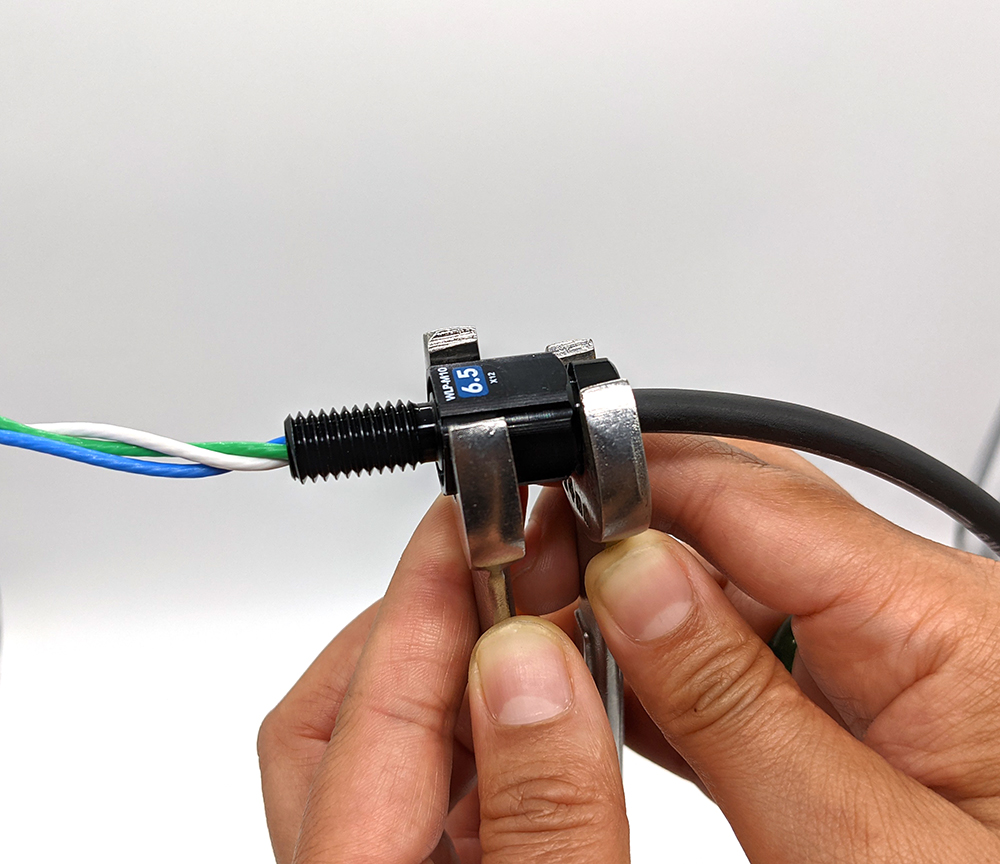
3. Attach the Plug Wrench onto a compatible square drive ratchet or torque wrench.
Plug wrench on ratchet.
Alternatively, the Plug Wrench can be turned by hand using the included lever bar.
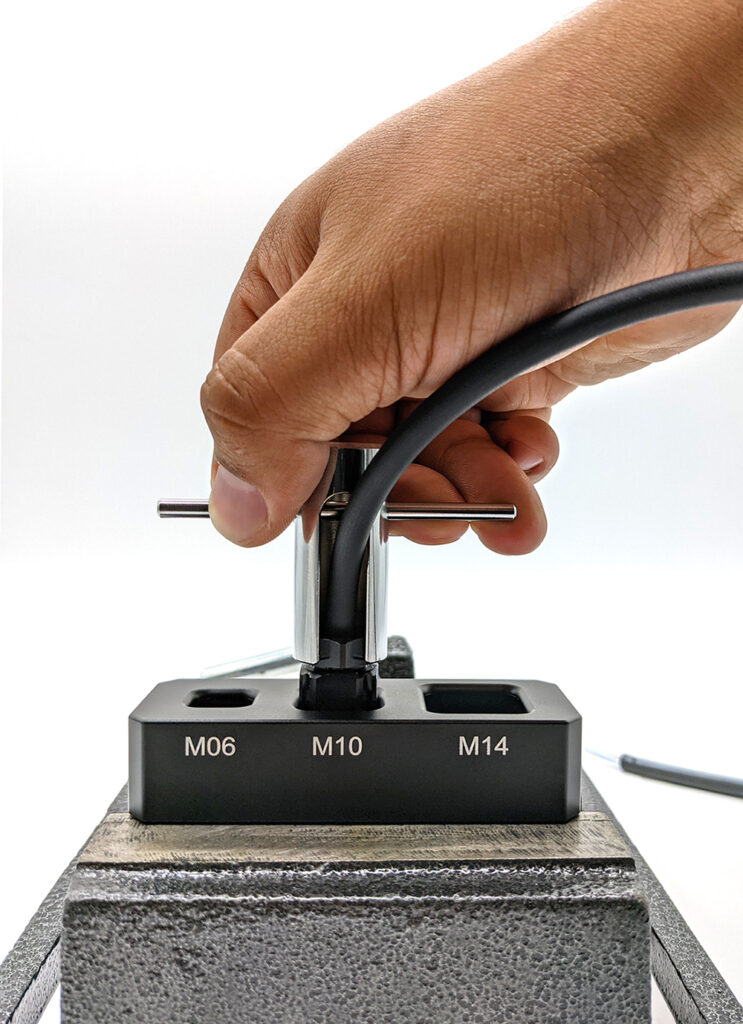
Tightening the plug with Plug Wrench and lever bar.
4. Tighten the plug using the Plug Wrench and ratchet until it completely bottoms out into the bulkhead with no gap.
Tightening the plug with Plug Wrench and ratchet.
Completing Assembly Using Hand Tools
For this step you will need compatible hand tools for the size of WetLink Penetrator you are assembling. Refer to the “Choosing the Correct Tools” section above to select a compatible open ended wrench for both the bulkhead and plug.
1. Use an open-ended wrench or adjustable wrench to hold the penetrator bulkhead while tightening the plug.
2. Use another open-ended wrench to tighten the plug. Tighten the plug until it completely bottoms out into the bulkhead with no gap.
Using hand tools.
Check Your Work!
After assembly, pull on the cable with around 5 to 10 pounds of force. The cable should stay firmly installed in the penetrator. If the cable comes out:
- the cable jacket may not have been seated all the way into the bulkhead.
- the plug may not have been tightened fully.
- you may need a WLP with higher compression or smaller seal size.
It’s also a good idea to always vacuum test newly assembled penetrators before use in the field. Visit our vacuum testing guide for more information.
Installing an Assembled WetLink Penetrator
A WetLink Penetrator isn’t waterproof on its own—it must be installed through a flat, smooth surface to form a watertight seal.
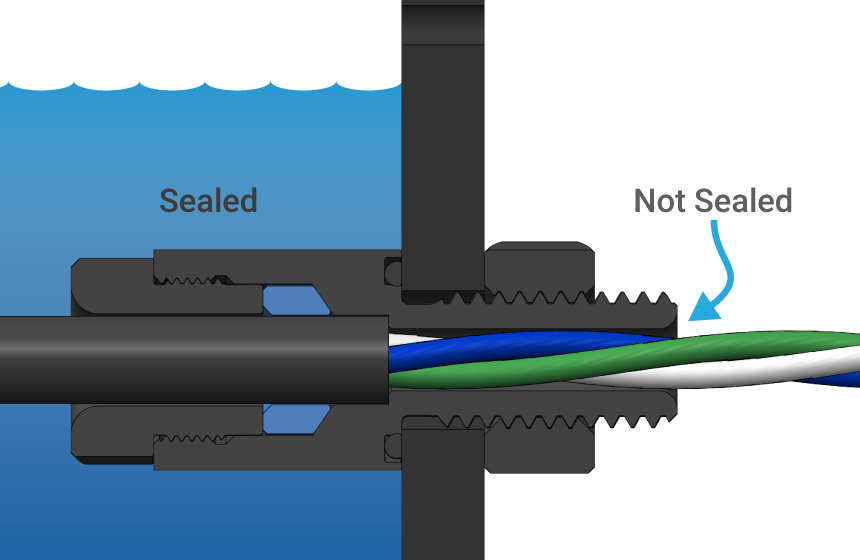
As shown in the diagram above, only the cable side of the penetrator is sealed. The back side—where the wires exit—is not sealed and must stay dry. If this side is exposed to water, moisture can travel into the cable.
Making a Hole
Blue Robotics Watertight Enclosures and Boxes come with predrilled M10 and M14 holes for installing WetLink Penetrators. If you’re working on a custom project, you can also drill your own hole—as long as it’s in a flat, smooth surface.
WetLink Penetrators can be installed in either:
- An unthreaded clearance hole (secured with the included nut), or
- A tapped hole (threaded directly into the material)
Use the table below to determine the correct drill and tap sizes for each option:
| WLP Bulkhead Size | Clearance Hole Diameter | Bit Size for Tapped Hole | Tap Thread |
|---|---|---|---|
| M6 | 6.0–6.2 mm | 5 mm | M6x1.0 |
| M10 | 10.0–10.2 mm | 8.5 mm | M10x1.5 |
| M14 | 14.0–14.2 mm | 12.5 mm | M14x1.5 |
Instructions:
- To install with a nut, drill a hole using the size under Clearance Hole Diameter.
- To install without a nut using threads, drill a hole using the Bit Size for Tapped Hole, then tap the hole using the corresponding Tap Thread size.
Installation
1. Apply a thin layer of silicone grease to the O-ring included with the WLP. Install it in the groove on the underside of the bulkhead.
2. Depending on the hole type, follow the appropriate instructions below:
- For clearance holes: Insert the bulkhead through the hole and thread the included nut onto the other side. Tighten the nut and bulkhead by hand to hold it in place.
- For tapped holes: Thread the bulkhead directly into the hole until it’s finger-tight. A penetrator nut is not needed.
3. Use a Bulkhead Wrench (or appropriate sized wrench) to fully tighten the bulkhead (or nut). When properly tightened, the bulkhead should not rotate in the hole and should not be removable by hand.
Cross section of a WetLink Penetrator installed through an end cap.
Bulkhead Adapters
If you don’t have the right size hole for the WetLink Penetrator, WetLink Bulkhead Adapters can be used to install a WLP into a hole that is too large.
Reusing a WetLink Penetrator
WetLink Penetrators can be removed and reinstalled in enclosure holes indefinitely. Each time you reinstall the penetrator in a hole, inspect the bulkhead O-ring for damage, wear, or contamination. Replace it if necessary to maintain a proper seal. Spare bulkhead O-rings available here.
However, when it comes to reinstalling the WLP on a cable, we recommend doing this no more than three times to maintain sealing performance.
Each time you reinstall a WLP on a cable:
- Replace the rubber seal (available here)
- Use an uncompressed section of cable jacket
Feedback
We’re always working to make our documentation, instructions, and user experience better. If you’d like to leave feedback about how we can make this guide better, let us know here.