
Cable Stripping
Introduction
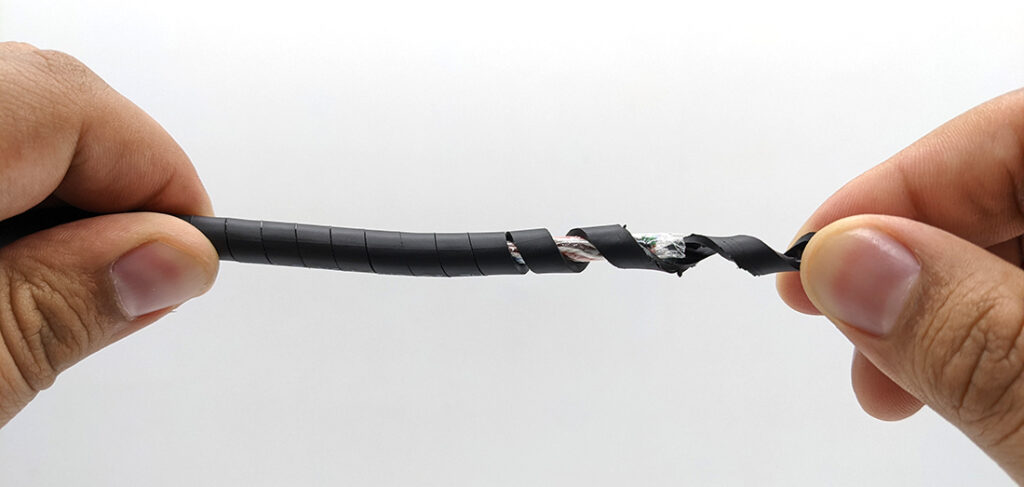
Our new line of WetLink Penetrators (WLP) make it easier than ever to install a cable penetrator on your cables. To ensure that your cable will perform well with WLP, it will need to be stripped correctly. Many cables are constructed with thick jackets, shielding, wrappers, or fillers that can make it tricky to strip. This guide will provide guidance on how to properly strip cable for use with WLP.
Safety
Parts and Tools
If you will be frequently stripping a lot of cable, we recommend getting our WetLink Cable Jacket Stripper. It is easy to use and helps get clean, consistent strips on most types of cables.
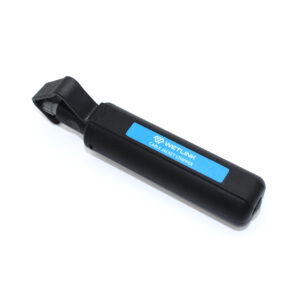
Jacket stripping can also be accomplished using a sharp knife such as a utility or X-Acto knife.
You will also need:
- Protective, cut-resistant gloves
- Wire clippers and small scissors
Parts of a Cable
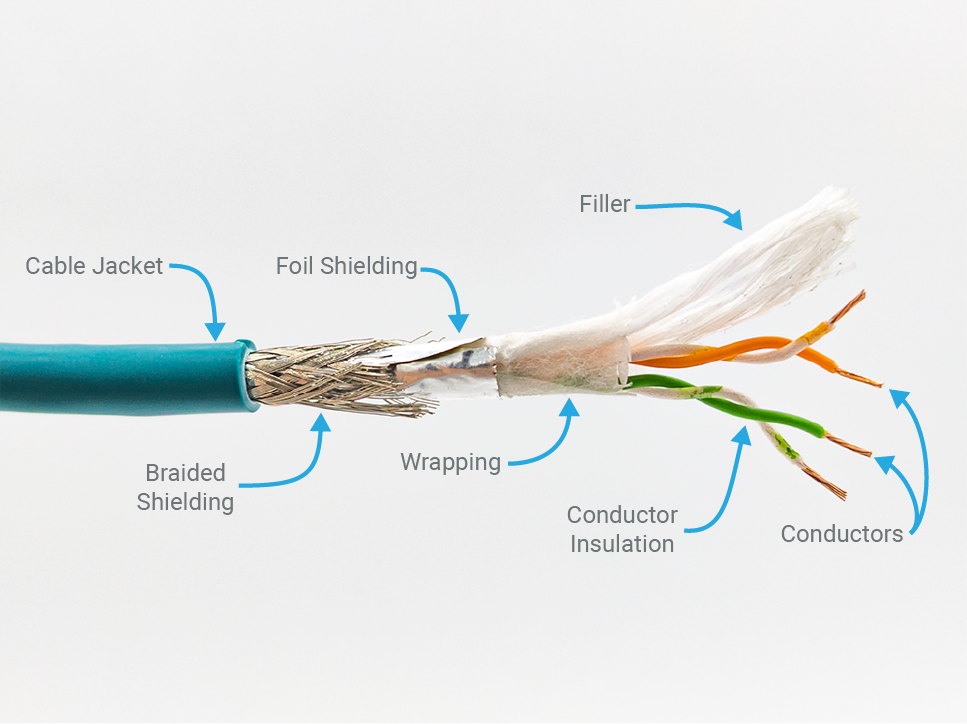
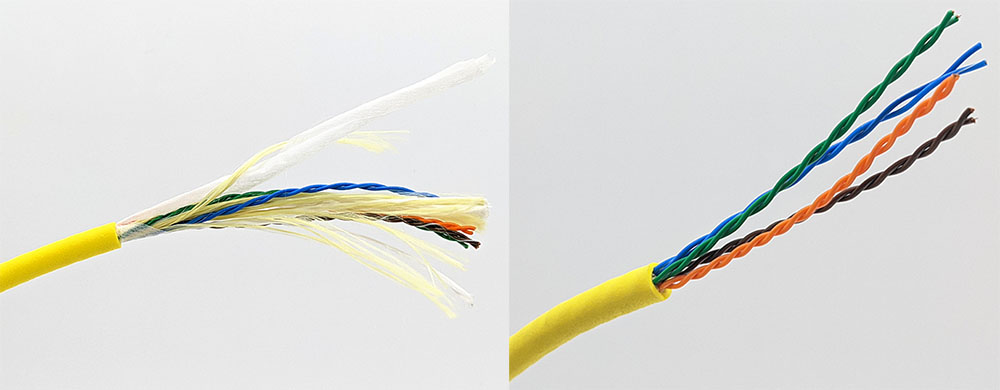
The following picture shows the different parts of a cable that this guide will be referring to. All cables will have a cable jacket and conductors. Shielding, wrapping, or fillers may or may not be present in the particular cable you are stripping.
Guidelines for Proper Stripping
The following guidelines are most important to keep in mind when stripping and prepping cable for use with WetLink Penetrators.
- The cable jacket must be cut straight across, perpendicular to the cable. A straight, perpendicular cut is necessary to allow the cable jacket to seat fully into a WetLink Penetrator and ensure proper performance. A cable jacket that is not fully seated may not seal properly.
- Cable shielding, wrapping, and fillers must be removed cleanly. Any loose shielding, wrapping, or fillers may prevent the cable from seating fully in the penetrator or interfere with the seal.
- Avoid damaging the conductor insulation. Accidentally cutting the insulation may lead to shorts between the conductors.
Stripping the Cable Jacket
The following section will show you how to properly strip a jacket using the WetLink Cable Jacket Stripper. If you are using a regular utility knife, you can skip to the next section Stripping the Cable Jacket Using a Knife.
WetLink Cable Jacket Stripper Video Tutorial
Stripping the Cable Jacket Using the WetLink Cable Jacket Stripper
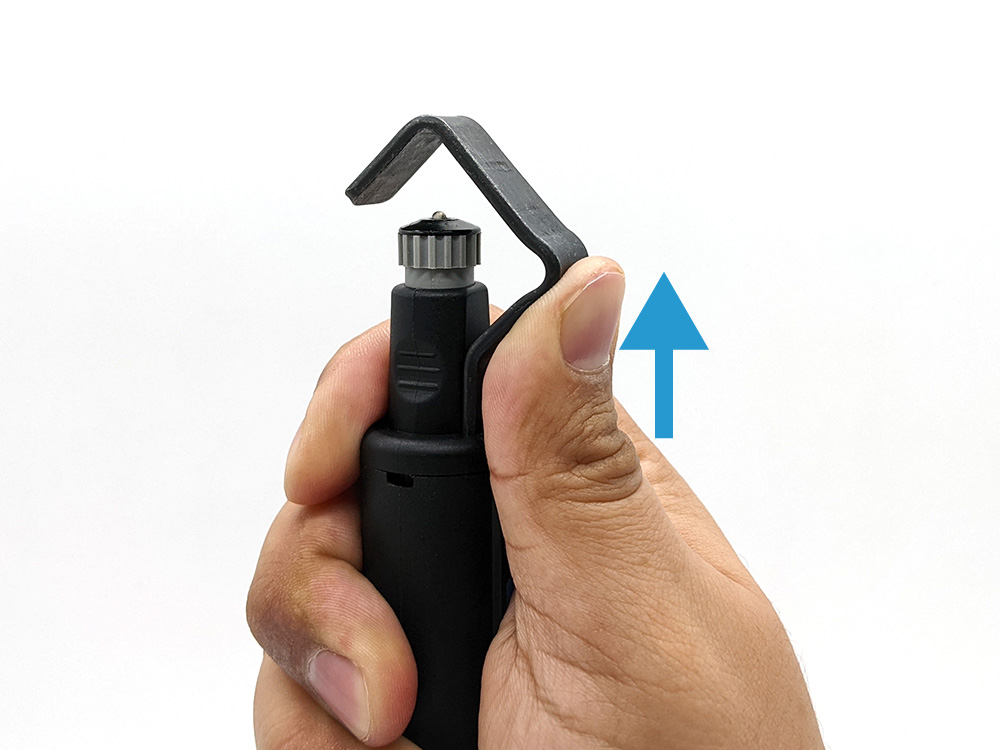
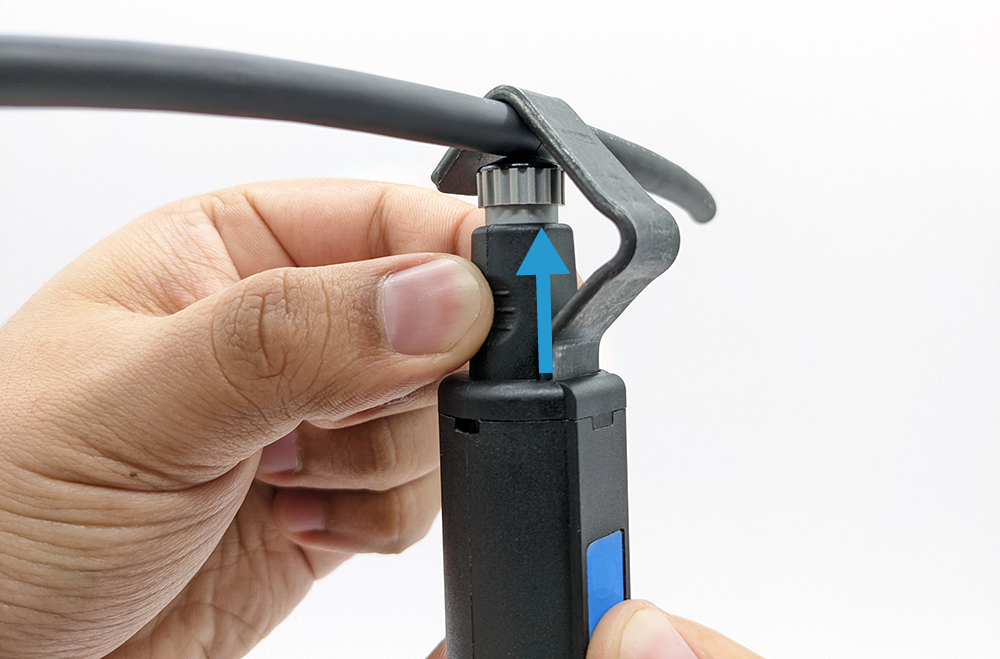
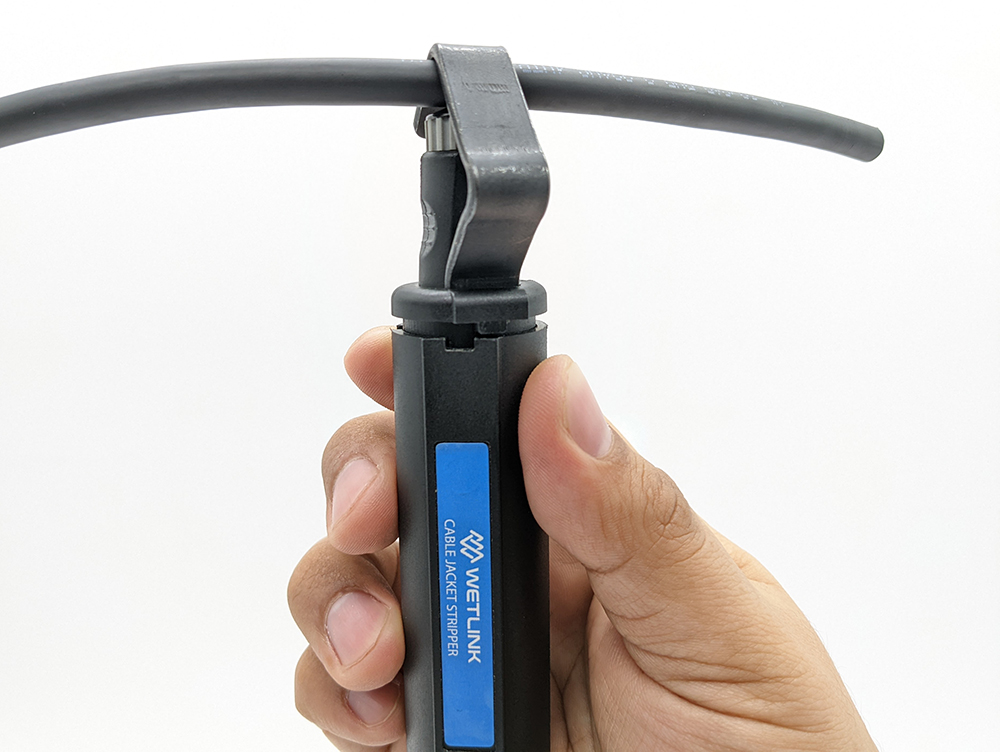
1. The WetLink Cable Jacket stripper has a spring loaded handle that can accommodate cable diameters of 4.5 mm to 29 mm. Push up on the handle and place the stripper at the end of the cable.
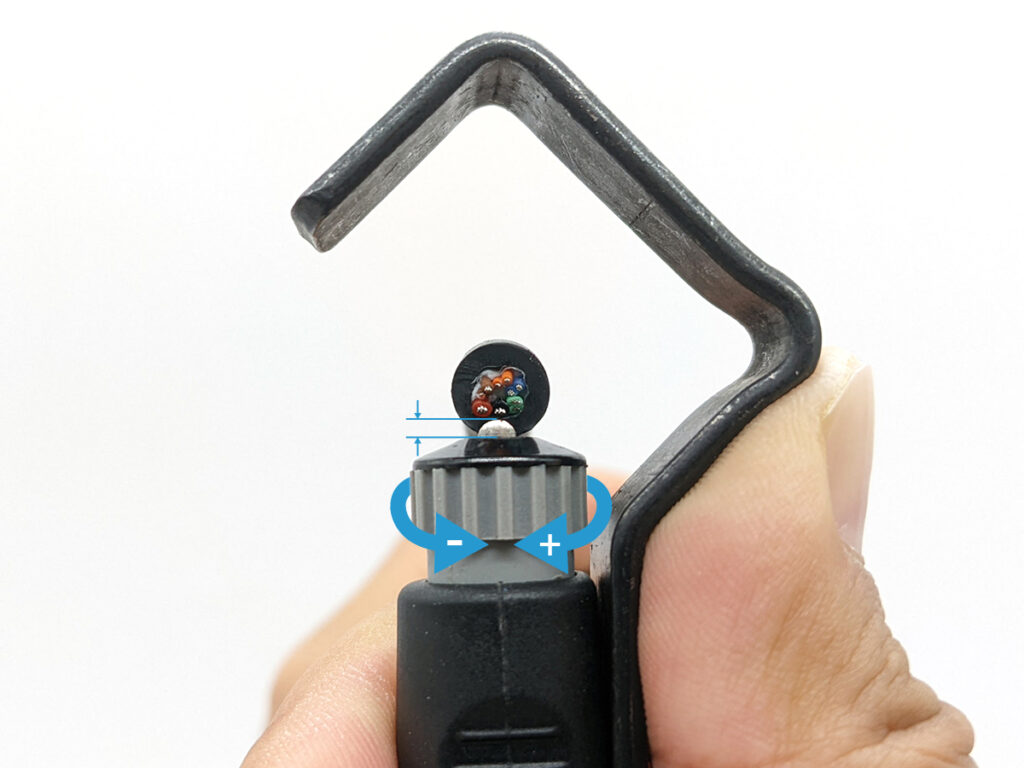
2. Adjust the blade height to match the cable jacket thickness by rotating the knurled blade head.
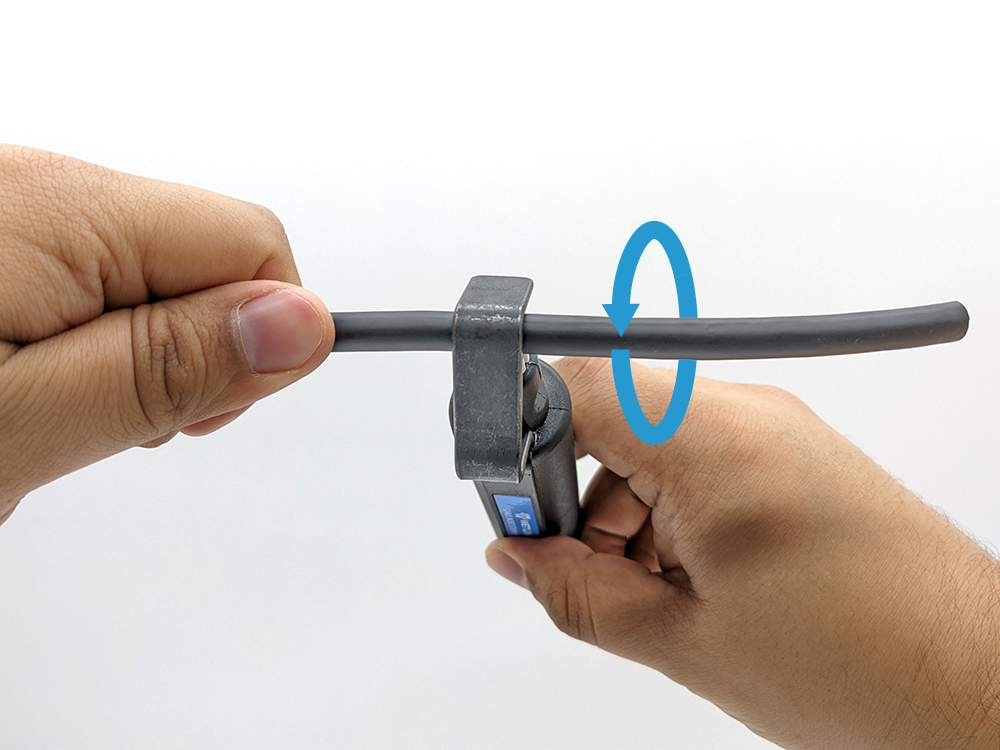
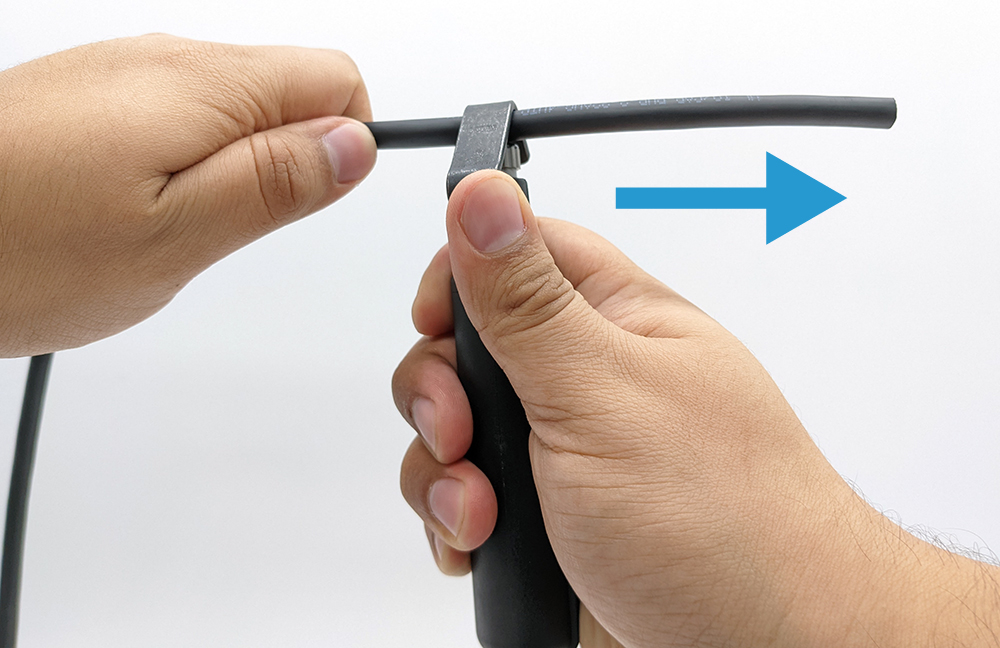
3. Place the stripper at the desired stripping point with the open side of the handle facing away from you. Rotate the stripper around the cable to perform a circular cut around the cable jacket.
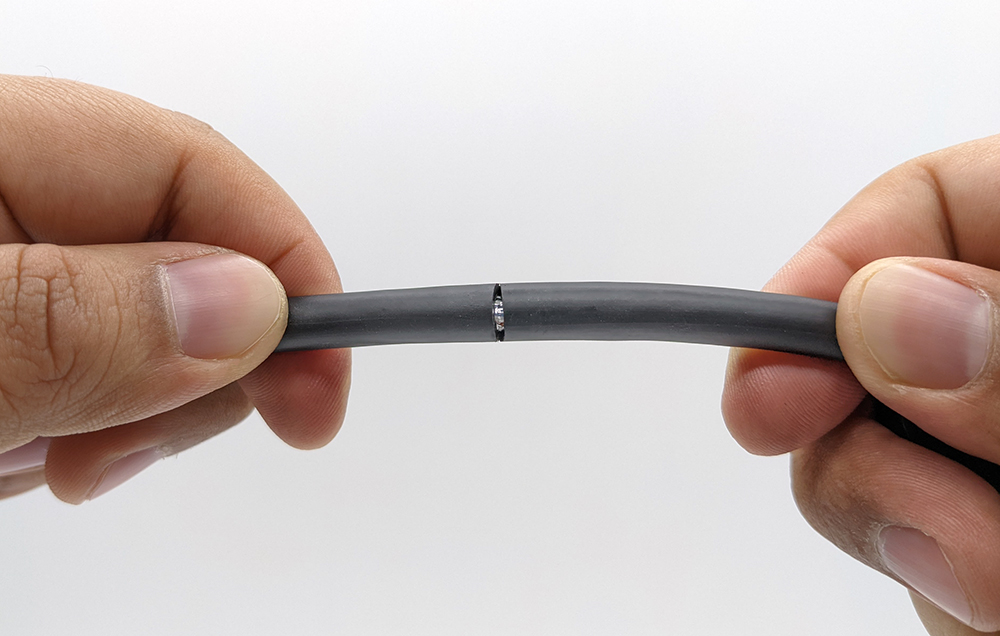
For short strip lengths the jacket can usually be pulled off easily at this point. The WetLink Cable Jacket Stipper has two additional cutting modes to facilitate stripping longer sections or harder to remove cable jackets.
Longitudinal Cut
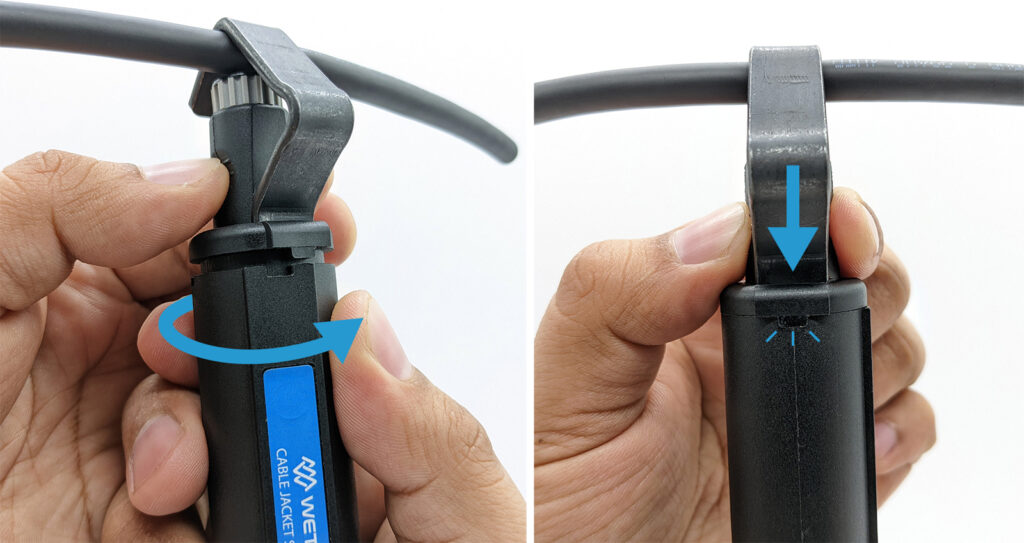
1. After performing the circular cut around the cable jacket, hold the top of the jacket stripper from the finger grooves and pull up, this will unlock the top portion of the stripper.
2. Rotate the body of the stripper about 90 degrees and push the top of the stripper back down so it locks in place at the indentation.
3. The blade is now parallel to the cable. Pull the stripper down the length of the cable to perform a longitudinal cut along the jacket.
4. Remove the cable jacket.
Spiral Cut
1. After performing the circular cut around the cable jacket, hold the top of the jacket stripper from the finger grooves and pull up, this will unlock the top portion of the stripper.
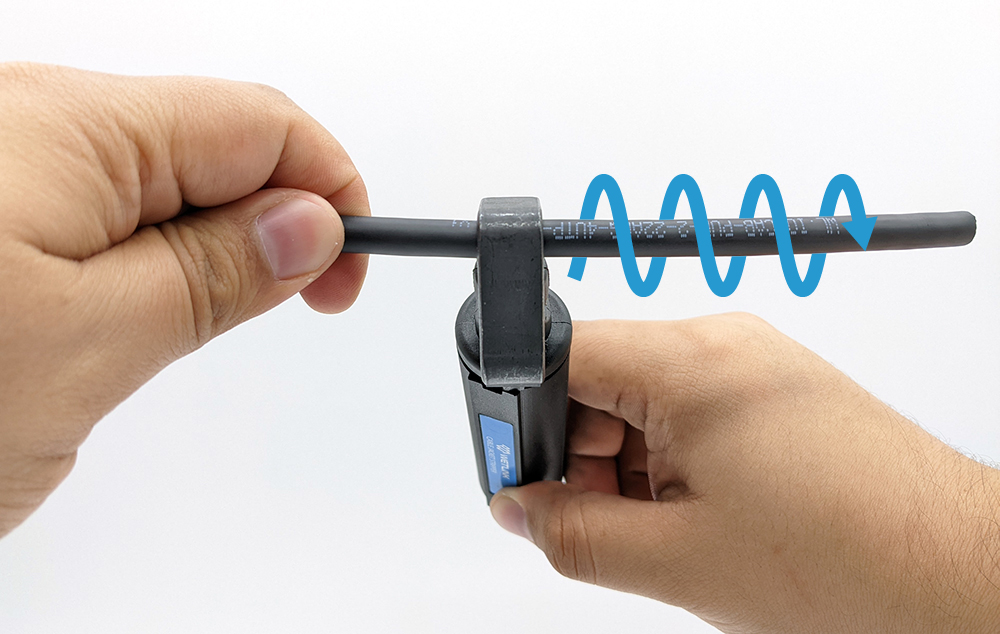
2. The blade will automatically rotate slightly to perform a spiral cut.
3. Rotate the stripper away from you around the cable jacket to perform a spiral cut towards the end of the cable.
4. Remove the cable jacket.
Depending on the construction of the cable, there may be shielding, wrapping, or fillers remaining after removing the jacket. The section Removing Shielding, Wrapping, or Fillers provides tips on how to deal with these.
Stripping the Cable Jacket Using a Knife
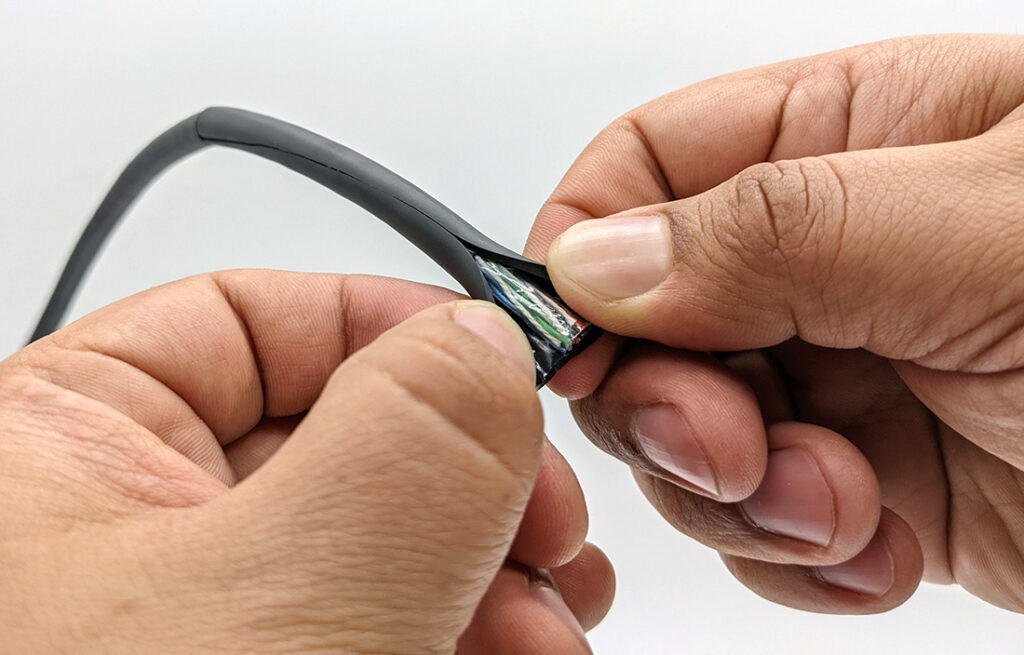
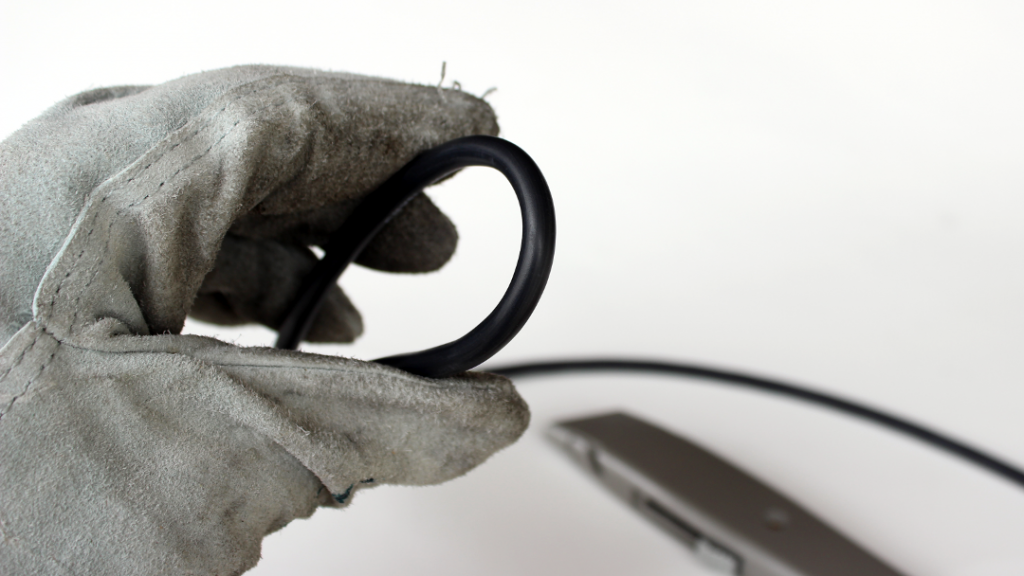
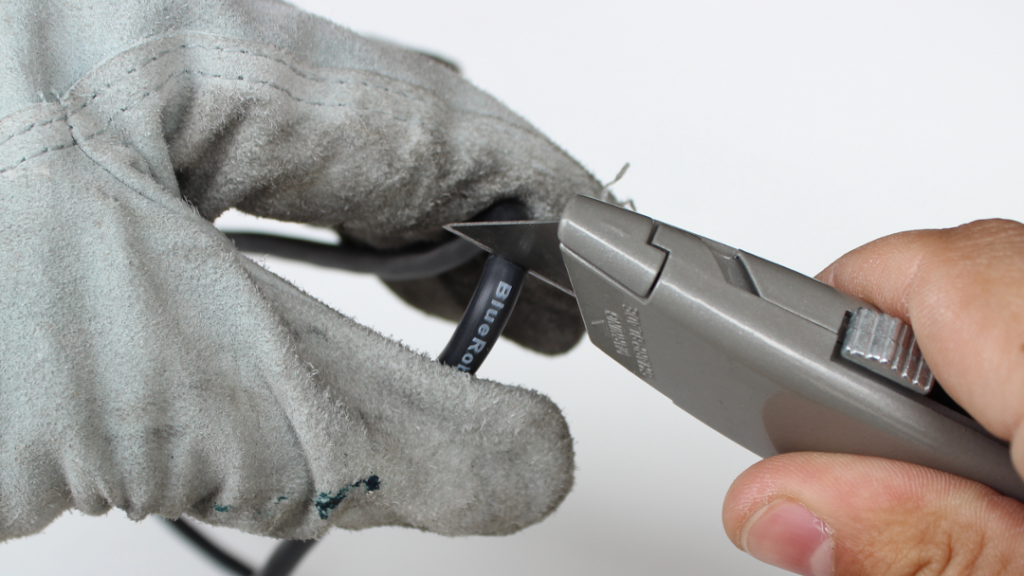
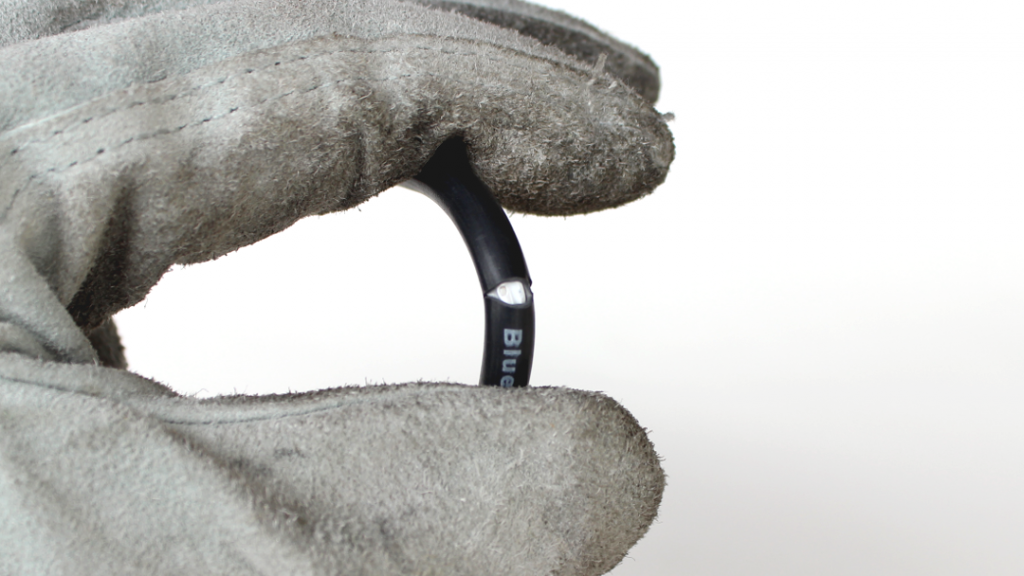
1. Wearing a protective glove, bend the cable at the point that you want to cut. Bending the cable will make the jacket naturally want to split open when cut and makes it easier to see when you have cut completely through the outer jacket.
2. Using the knife, gently slice the jacket open by pulling the blade across the cable jacket. Keep the blade straight and perpendicular to the cable so the resulting cut is straight across and perpendicular to the cable. A straight, clean, perpendicular cut is necessary for proper performance when installed in a WetLink Penetrator.
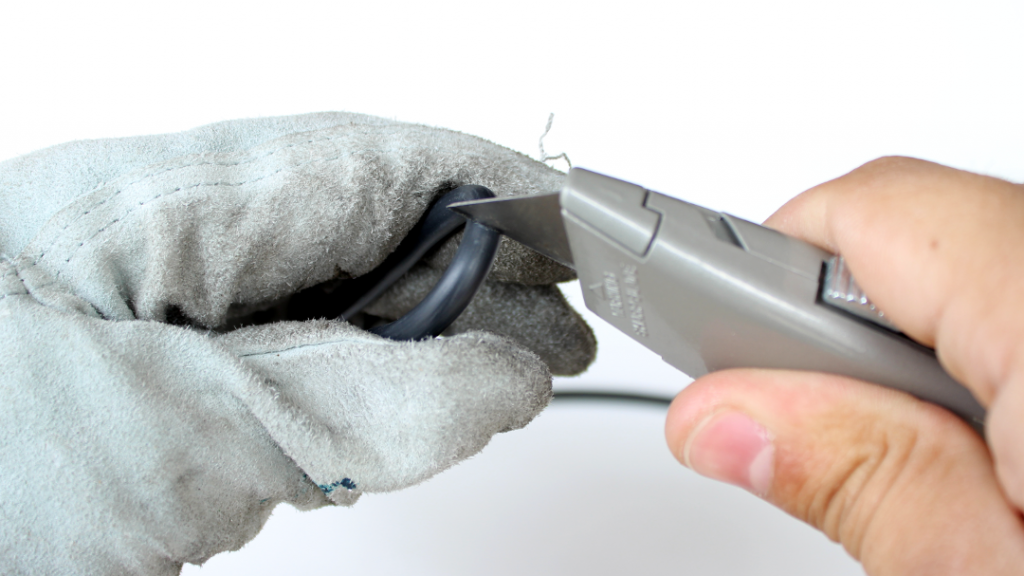
3. Stop cutting once the jacket opens and you can see the conductor insulation or shielding/wrapping underneath.
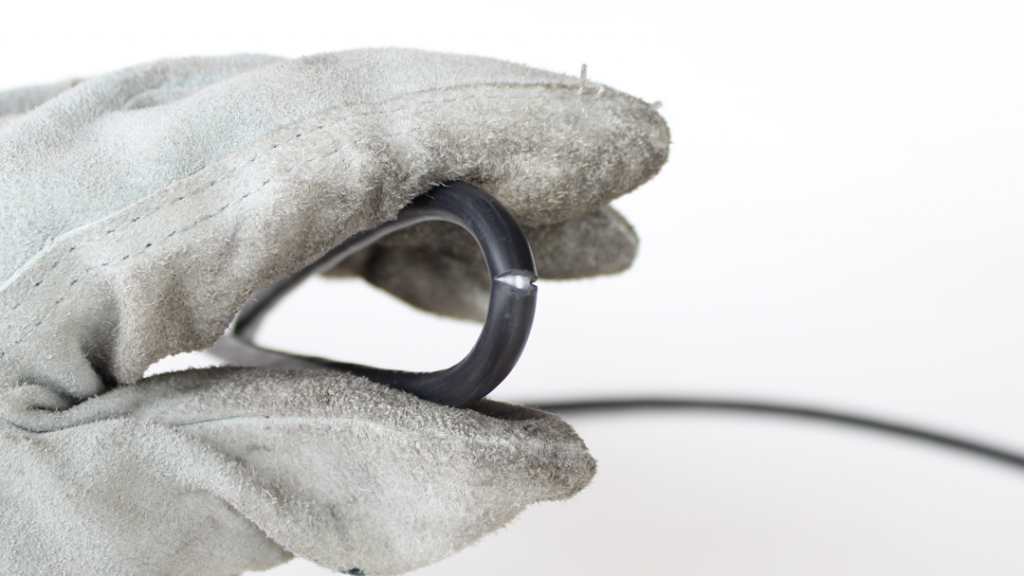
4. Turn the cable around and repeat on the other side.
5. Continue the cut so it remains straight, perpendicular to the cable. Stop cutting once the jacket opens and you can see the conductor insulation or shielding/wrapping underneath.
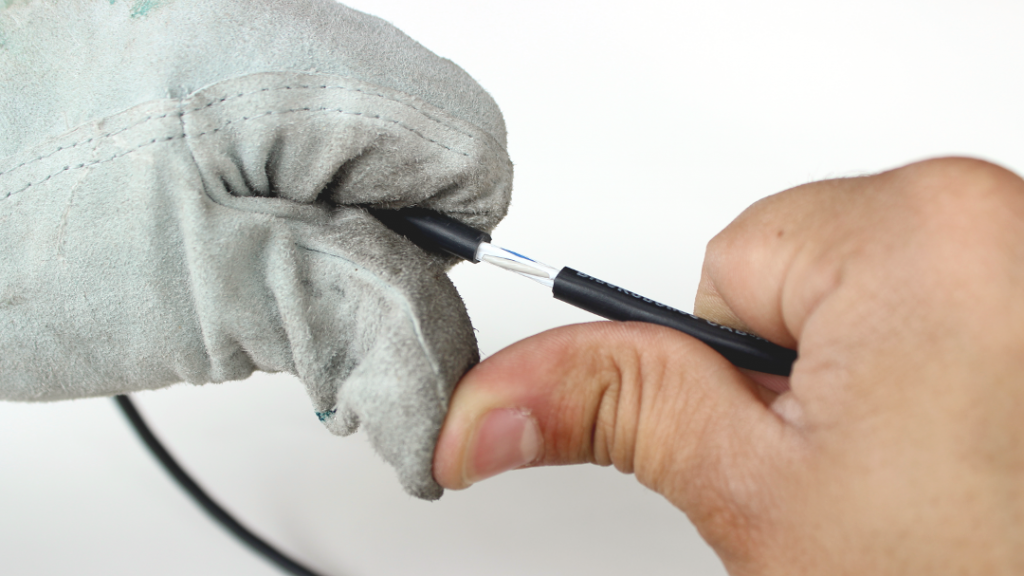
6. Pull the jacket away from the rest of the cable. Inspect the cut and trim the remaining cable jacket if it is not straight.
7. Depending on the construction of the cable, there may be shielding, wrapping, or fillers remaining after removing the jacket. The next section provides tips on how to deal with these.
Video Tutorial
Removing Shielding, Wrapping, or Fillers
Many cables have some type of shielding or wrapping around the conductors and or fillers that help the cable maintain its shape. It’s important to cut these back cleanly to ensure proper installation in a penetrator. Loose shielding, wrapping, or fillers can prevent the cable from seating fully into a cable penetrator or interfere with proper sealing against the cable.
Wrapping and Fillers
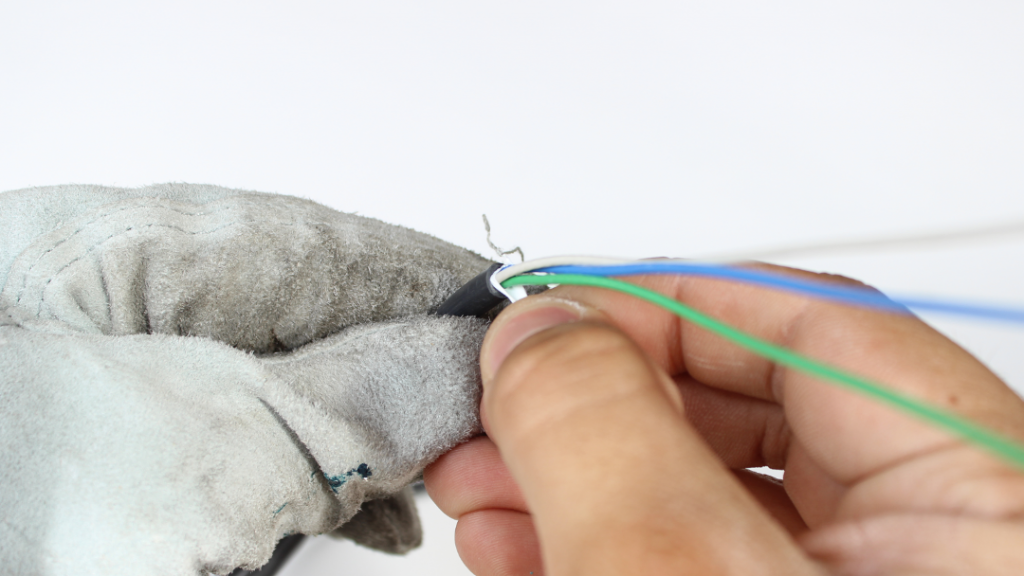
1. Remove any wrappers and cable fillers. Cut them as close to the strip as possible so they do not prevent the cable from seating fully in the penetrator or interfere with the seal.
2. If desired, certain fillers can be left intact as long as they fit completely through the penetrator bulkhead and do not prevent the cable from seating fully in the penetrator or interfere with the seal.

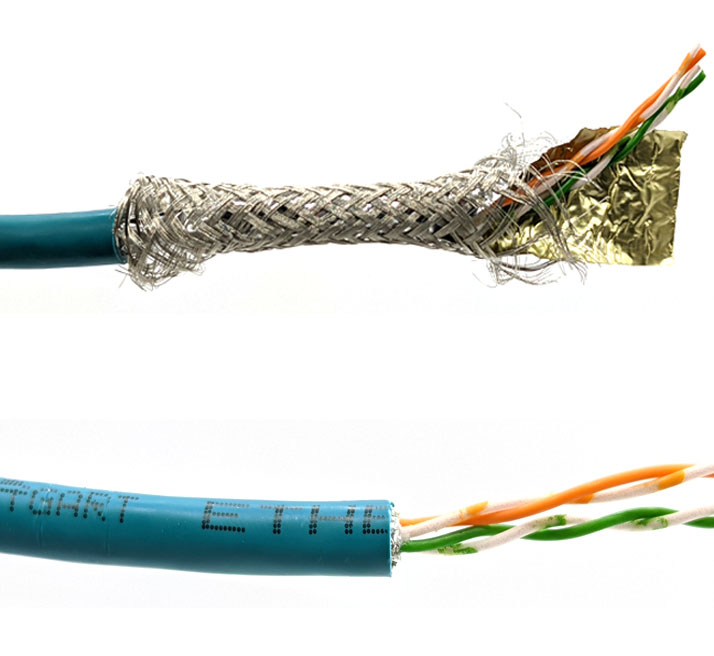
Metal Shielding
1. Metal braided shielding can be removed by pushing the shielding back on itself then clipping with wire clippers. Foil shielding can be unwrapped from the conductors and cut with scissors. Cut as close to the strip as possible so it does not prevent the cable from seating fully in the penetrator or interfere with the seal.
2. If desired, certain shielding can be left intact as long as it fits completely through the penetrator bulkhead and does not prevent the cable from seating fully in the penetrator or interfere with the seal.
Final Notes
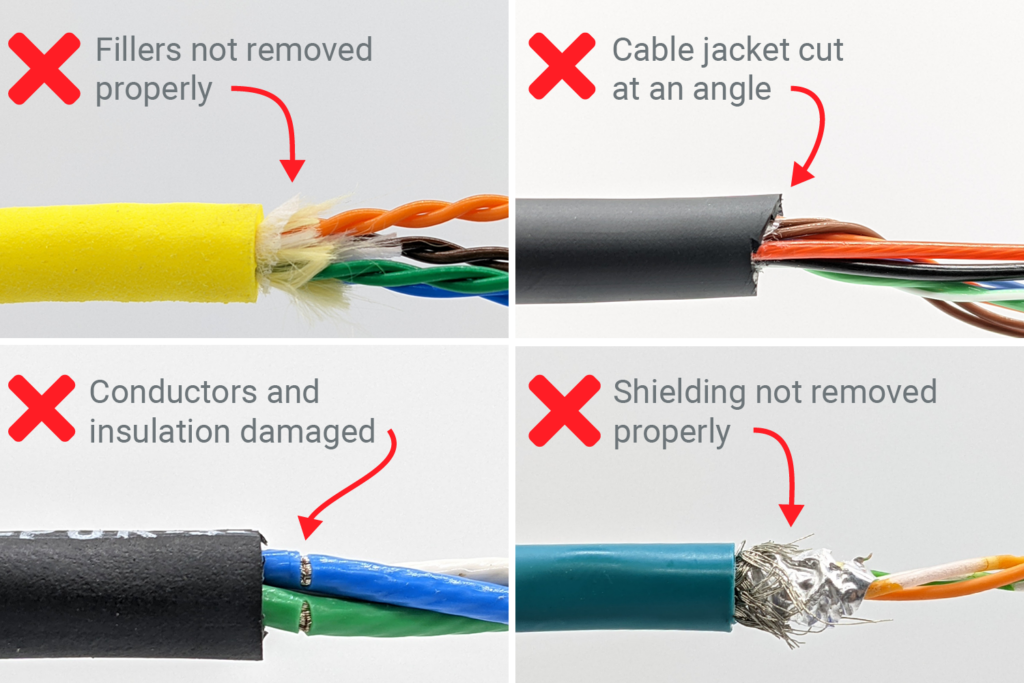
- The following picture shows examples of improperly stripped cables.
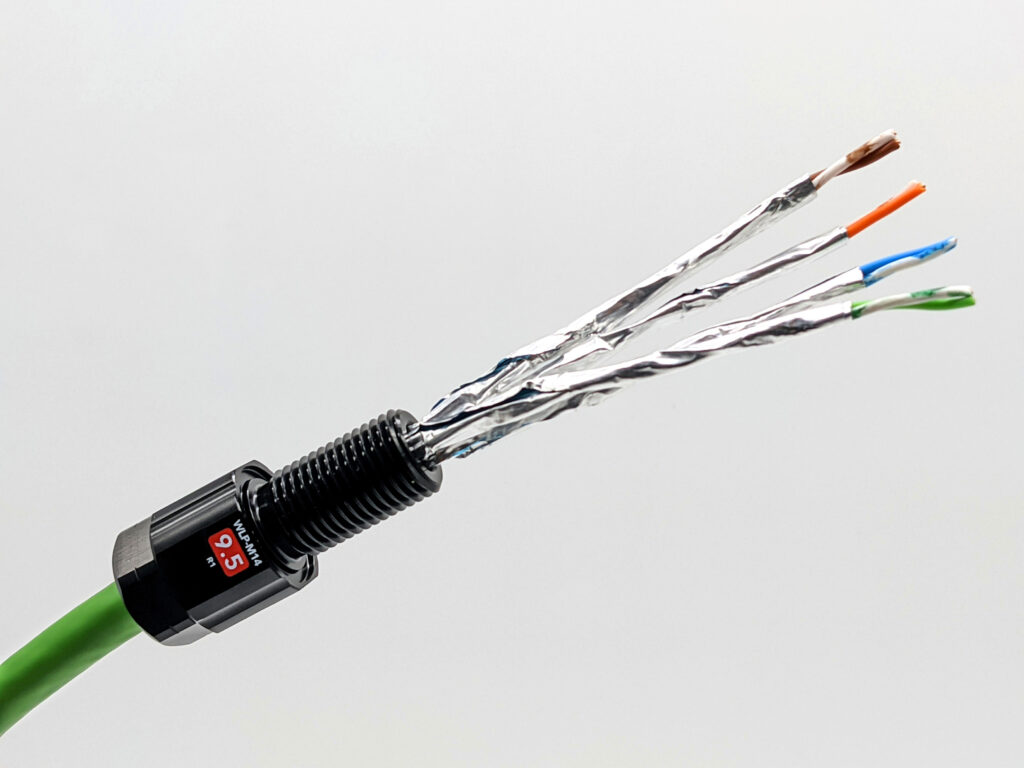
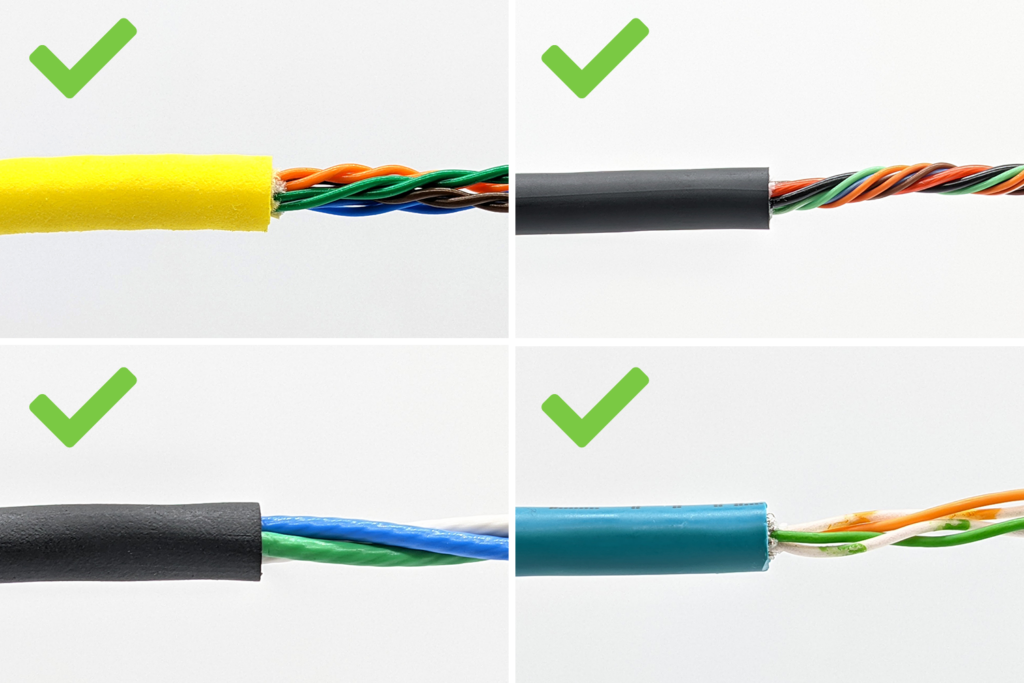
- The next picture shows examples of properly stripped cables.
- We recommend stripping the conductor insulation after the cable is installed in a penetrator. This makes it easier to insert the conductors through the penetrator bulkhead while avoiding damage to the conductors.
Authors

Rusty
Rusty is the founder and CEO of Blue Robotics. His background is in engineering but he likes to be involved in everything at Blue Robotics!

Daniel
Daniel is the Product Specialist at Blue Robotics and is an expert at working with all elements of our product line!