
Using the Vacuum Plug and Hand Pump
Introduction
The Vacuum Plug allows you to vacuum test enclosures through both the standard vent and the Pressure Relief Valve, ensuring a watertight seal. It fits a 1/4″ hose and works great with most hand-operated vacuum pumps for in-the-field testing!
We recommend performing a vacuum test whenever you assemble a new Watertight Enclosure, add or remove a bulkhead penetrator, assemble a new WetLink Penetrator, or perform O-ring maintenance, to ensure the system is watertight before use.
Parts and Tools
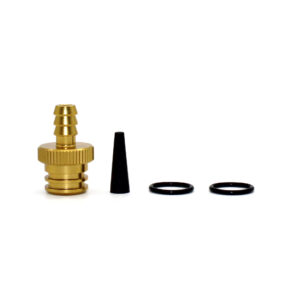
You Will Need
Attaching the Vacuum Plug to the Pump
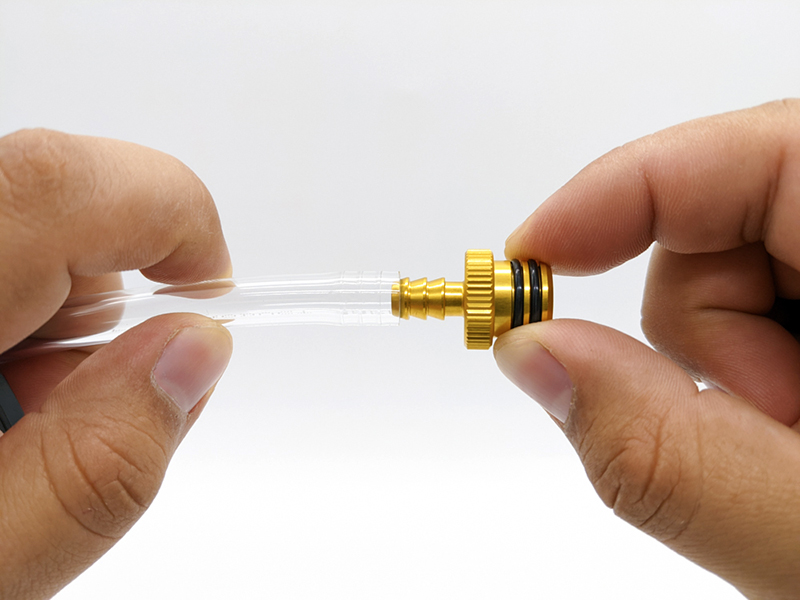
1. Attach clear vacuum hose to the pump (refer to instructions for your pump).

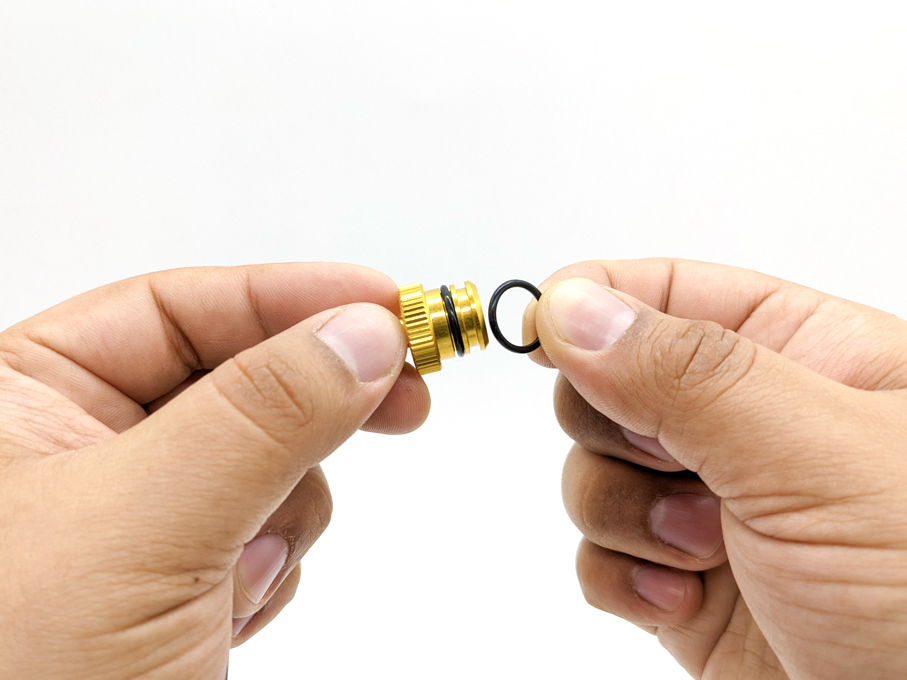
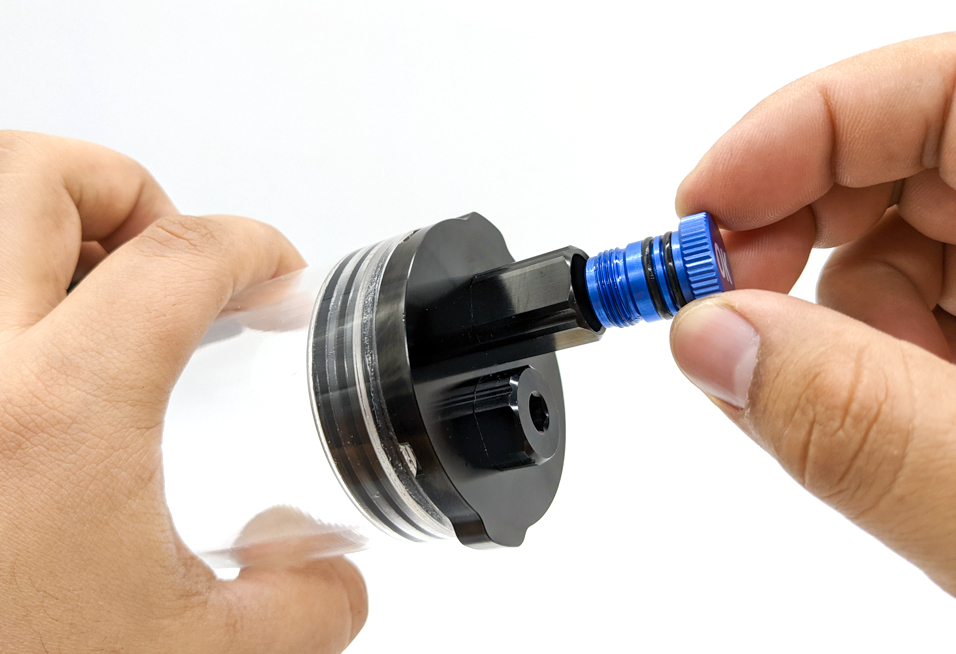
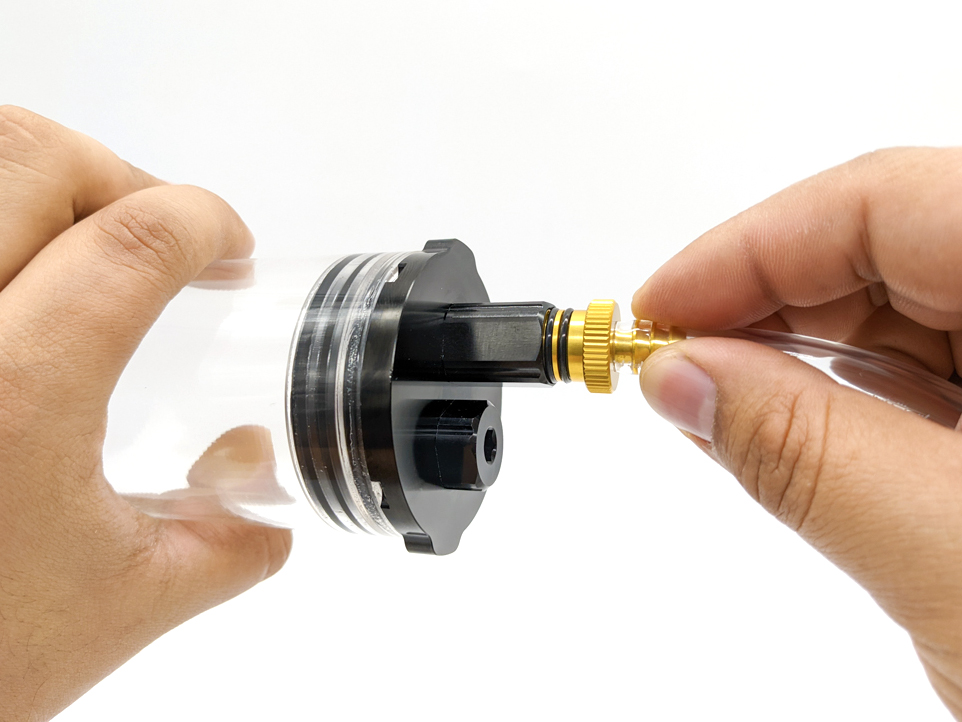
2. Install O-rings on the Vacuum Plug, lubricating lightly with silicone grease before installation.
3. Insert the barbed end of the Vacuum Plug into the vacuum hose.
Testing the Test Setup
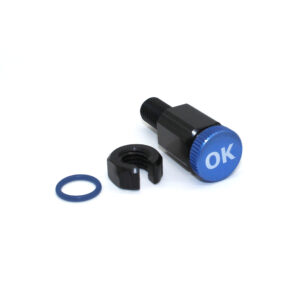
Before testing the enclosure, it’s a good idea to test the pump, hose, and Vacuum Plug alone to make sure that there are no leaks in the pump, the vacuum gauge, or the hose connections. The Vacuum Plug comes with a rubber stopper that makes this easy! The following describes how to test these parts (i.e. “testing the test setup”).
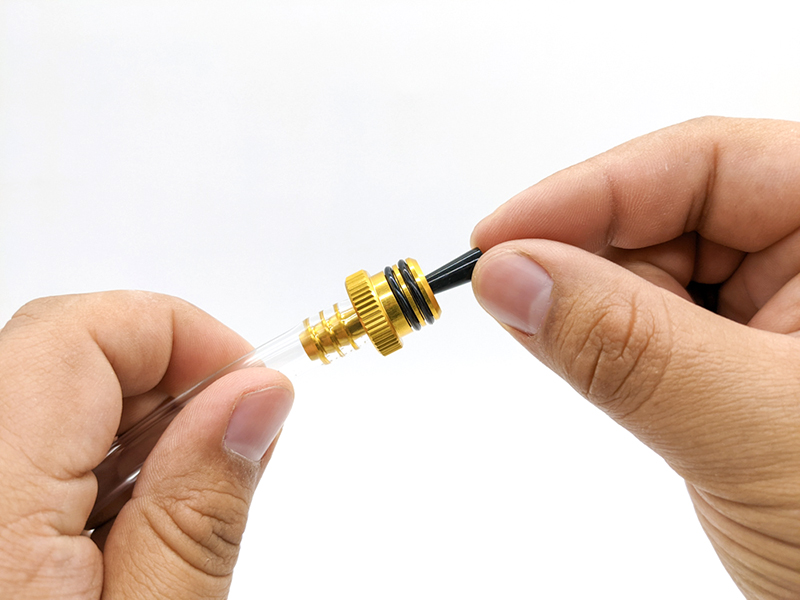
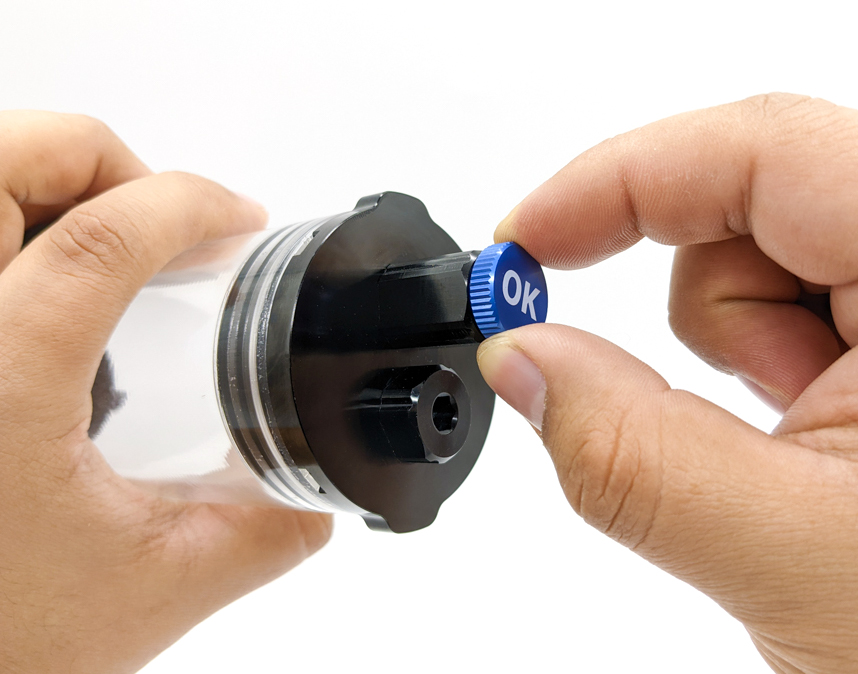
1. Insert the rubber stopper into the hole on the Vacuum Plug to seal it up.
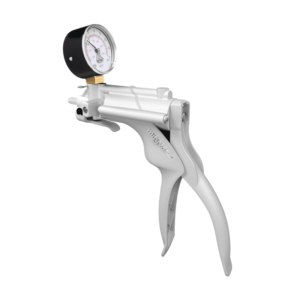
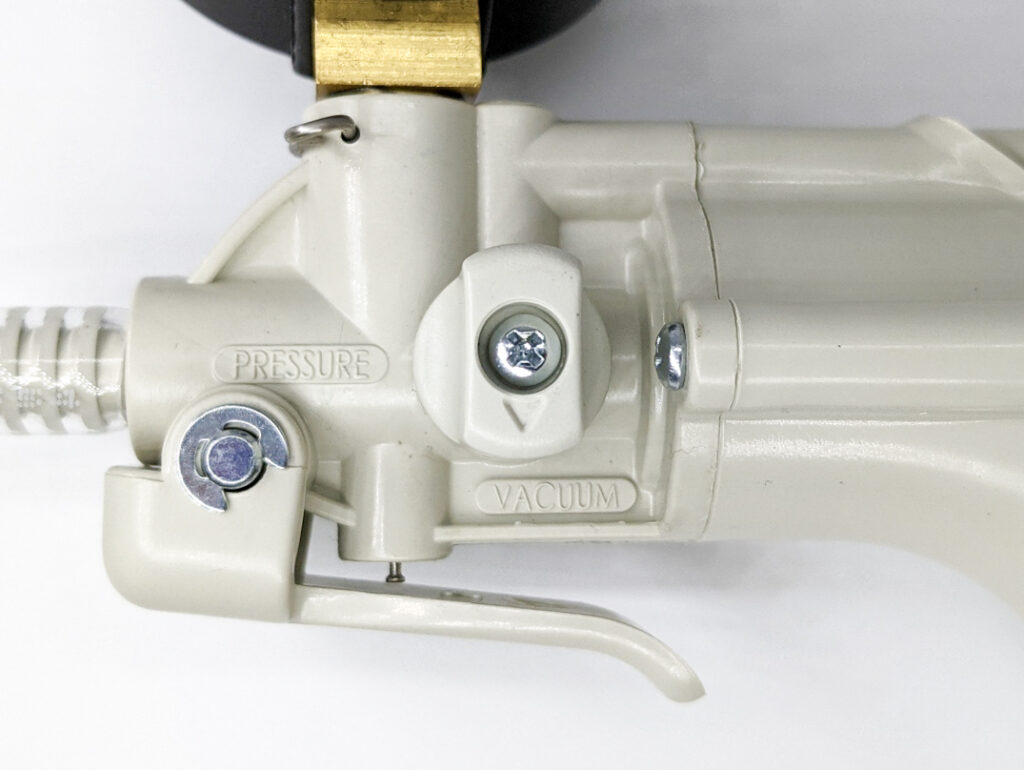
2. Turn the knob on the side of the vacuum pump so it is in the “VACUUM” setting.
3. Pump the hand pump to approximately 15 inHg, and monitor for about 30 seconds to a minute, making sure that the pressure does not decrease by more than 0.5 inHg.
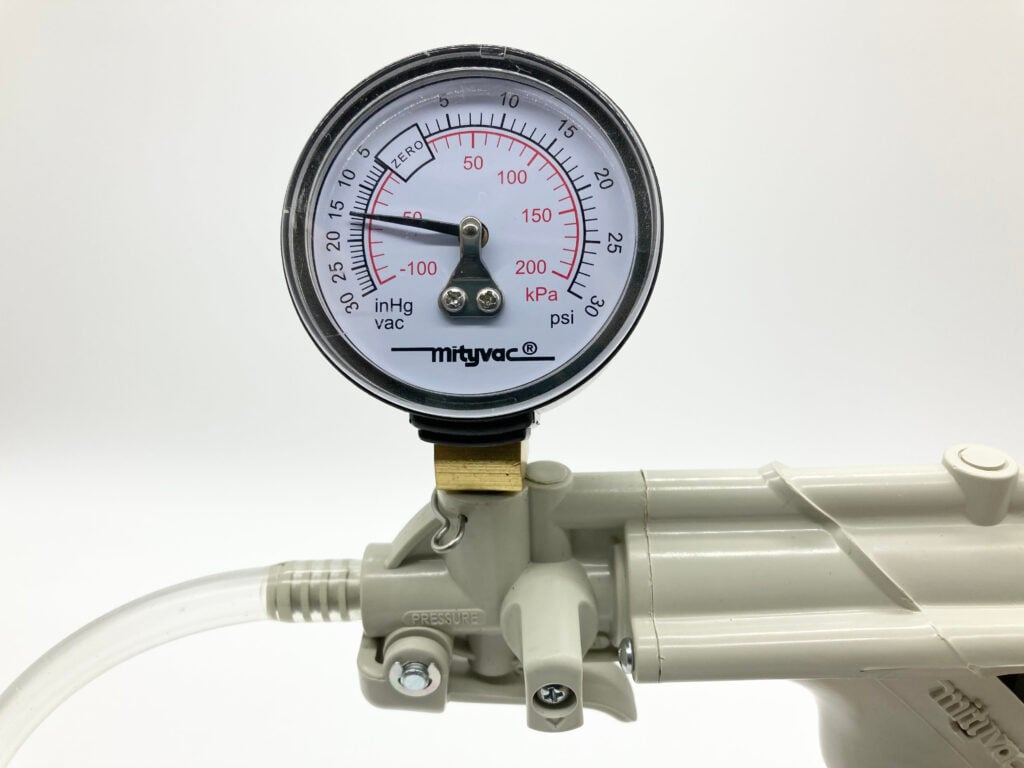
If successful, this test setup is ready to use. If not, check the following:
- Proper hose connections on the pump and on the vacuum plug.
- The vacuum pump and vacuum gauge. You can test the pump by itself by removing the hose and using the rubber stopper to plug the hole.
Testing the Enclosure
1. Remove the Vent Plug from the vent on the watertight enclosure.
2. Insert the Vacuum Plug attachment.
3. Pump the hand pump, removing air and decreasing the pressure inside the enclosure to approximately 15 inHg. This will take quite a few pumps – roughly 38 pumps for an empty 2″ enclosure, 85 pumps for an empty 3″ enclosure, and 152 pumps for an empty 4″ enclosure (using a Mityvac hand pump).
4. Monitor the gauge for about 10-15 minutes and make sure the vacuum pressure does not decrease by more than 0.5 inHg.
If successful, remove the Vacuum Plug, and replace with the original Vent Plug. If you find a leak, check the following:
- Hair, dust, or other obstructions of the O-ring seals
- Missing or damaged O-rings
- Loose cable penetrator bulkheads
- Missing O-rings under the penetrator bulkheads
- Scratches on the inside of the tube
Maintenance
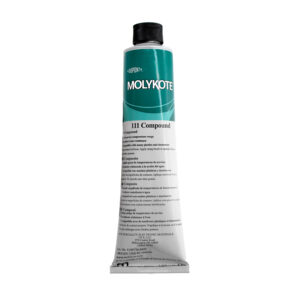
If the vacuum pump becomes difficult to pump, disassemble it and lightly lubricate the inside of the pump body cylinder following the Mityvac rebuild instructions. Use a low-viscosity silicone oil such as Super Lube Silicone oil 100 CST.
Authors

Rusty
Rusty is the founder and CEO of Blue Robotics. His background is in engineering but he likes to be involved in everything at Blue Robotics!

Daniel
Daniel is the Product Specialist at Blue Robotics and is an expert at working with all elements of our product line!