
Control the Basic ESC with the Arduino Serial Monitor
By Daniel
Introduction
This guide will show you how to use the Arduino serial monitor to control the Basic ESC. It builds from our Basic ESC R3 Example Code for Arduino so if you haven’t already, check that out first.
Parts and Tools
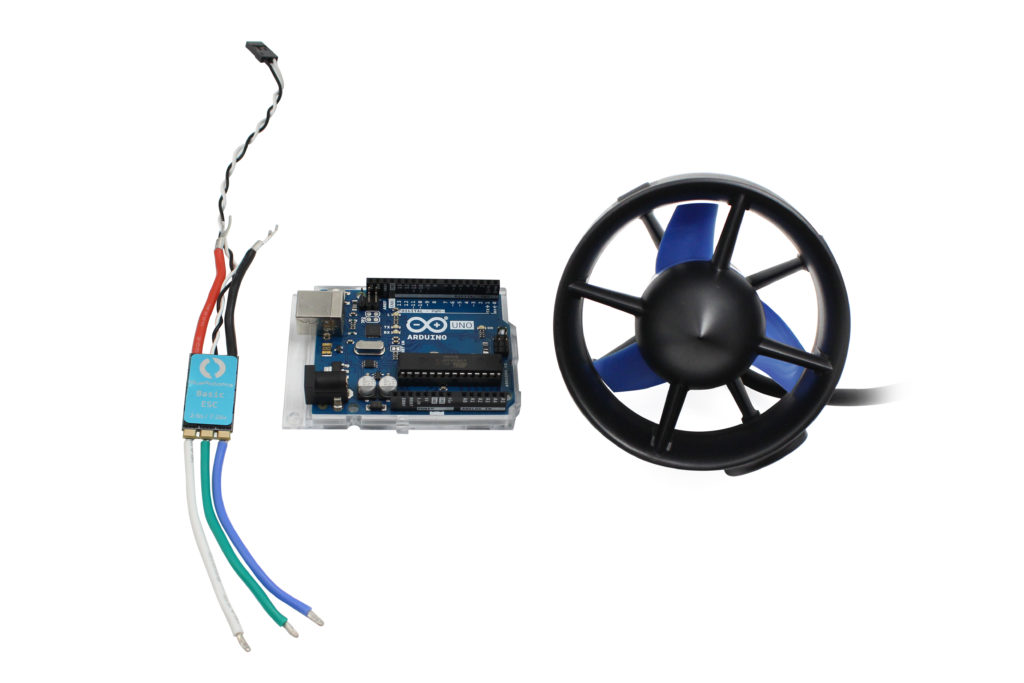
Main components used in this guide.
You Will Need
You will also need:
- Arduino Microcontroller (This tutorial uses an Arduino Uno)
- 1 x USB A to B cable (for connecting the Arduino to a computer)
- 2 x male to male Jumper Wires
- 1 x 3-position terminal strip connector (for connecting the ESC to the thruster)
- Battery or Power Source for ESC/thruster (a T200 has a maximum voltage rating of 20V DC)
- Laptop or computer with Arduino IDE
Wire Connections
Connecting the ESC
1. Connect the thruster to the ESC by matching the green, white, and blue wires from the ESC to the green, white, and blue wires from the thruster.
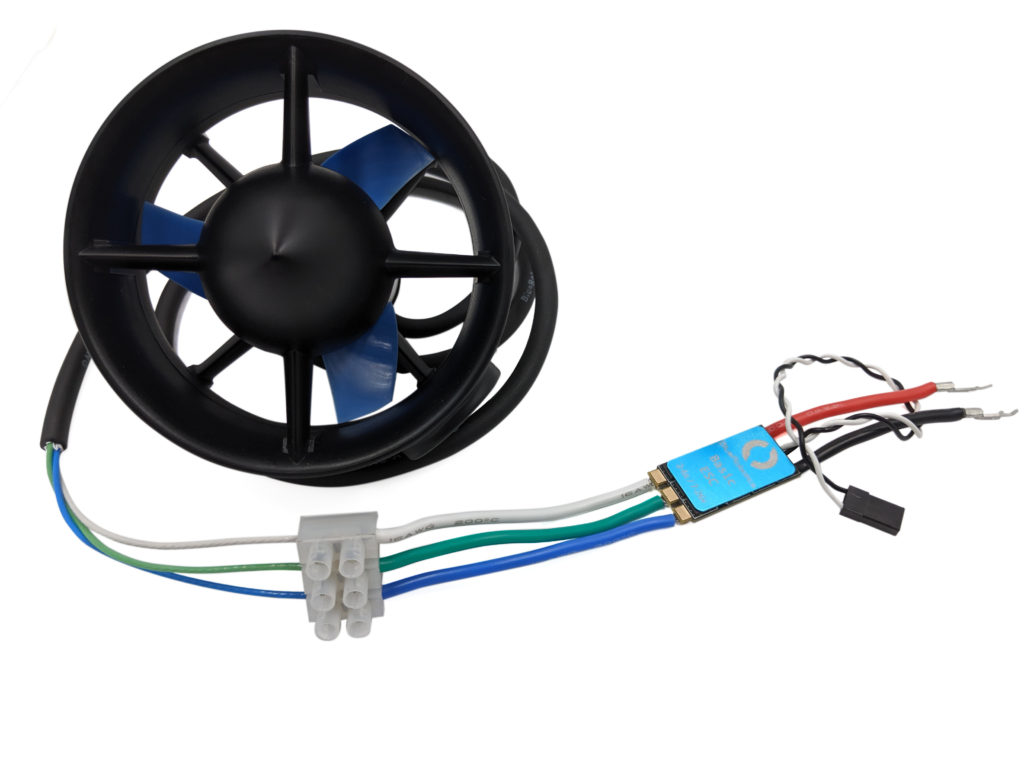
ESC motor wires to thruster.
2. Connect the white signal wire from the ESC to digital pin 9 using a male to male jumper wire.
3. Connect the black (ground) wire from the ESC to a ground pin (labeled GND) on the Arduino using a male to male jumper wire.
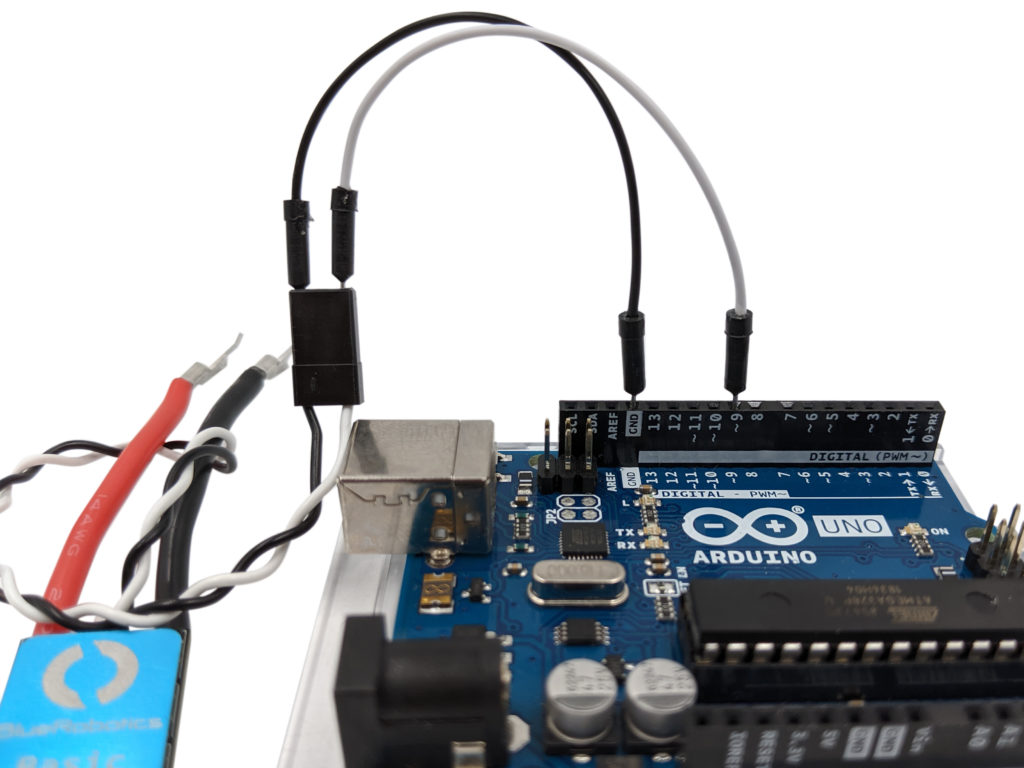
ESC signal wires to the Arduino.
4. Connect the ESC to the power source.
Using the Example Sketch
1. Connect the Arduino to the computer with the USB cable.
2. Copy the code from the example sketch into a new sketch in the Arduino IDE.
#include <Servo.h>

byte servoPin = 9;
Servo servo;

void setup() {

 Serial.begin(9600);
 servo.attach(servoPin);

 servo.writeMicroseconds(1500); // send "stop" signal to ESC.

 delay(7000); // delay to allow the ESC to recognize the stopped signal
}

void loop() {

  Serial.println("Enter PWM signal value 1100 to 1900, 1500 to stop");

  while (Serial.available() == 0);

  int val = Serial.parseInt();

  if(val < 1100 || val > 1900)
  {
    Serial.println("not valid");
  }
  else
  {
    servo.writeMicroseconds(val); // Send signal to ESC.
  }
}
3. Upload the sketch to the Arduino. The ESC should arm after a few seconds.
4. Open up the serial monitor by going to “Tools” > “Serial Monitor”.

5. Set the baud rate on the serial monitor to 9600 baud and line ending to “No line ending”.
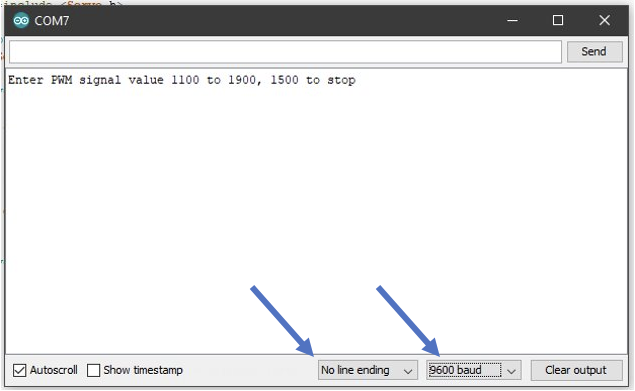
6. Type in a PWM signal value, 1100 to 1900, in the input field and click “Send” or hit Enter. This will set the throttle of the thruster. Values greater than 1500 to 1900 will set throttle forward, values less than 1500 to 1100 will set throttle reverse. 1500 will stop the thruster.
Troubleshooting
- The ESC doesn’t arm after uploading the sketch.
- If the Arduino was powered on before the ESC then the ESC might have missed the arming signal. Press the reset button on the Arduino.
- The serial monitor says “not valid” after every input.
- It’s detecting the end of line character as an input. Set the option on the bottom of the serial monitor to “No line ending”.
- The serial monitor isn’t displaying anything.
- Set the baud rate option to “9600 baud” on the serial monitor.
Next Steps
After you have everything working with the Arduino serial monitor, you can try our guide on controlling the Basic ESC with a potentiometer and Arduino.
Do you need a little more help? Try posting on the community forums.
What did you think of this guide? Can we improve it? Let us know here!
Authors

Daniel
Daniel is the Product Specialist at Blue Robotics and is an expert at working with all elements of our product line!