
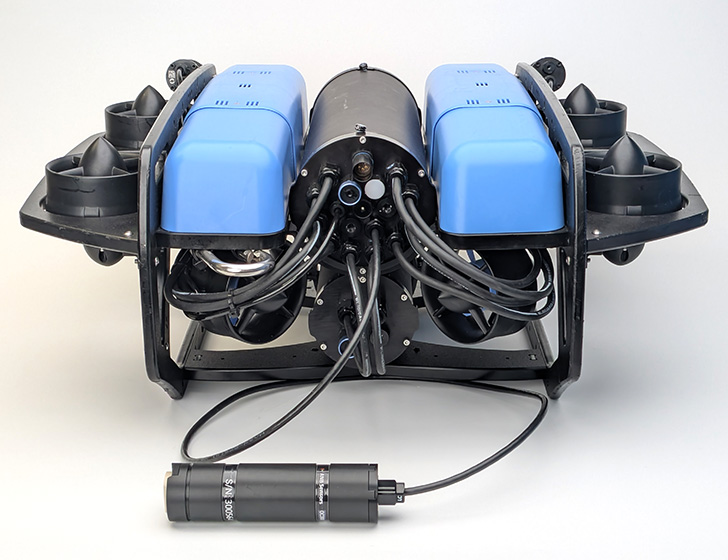
Integrating the ANB Sensors pH Sensor on the BlueROV2
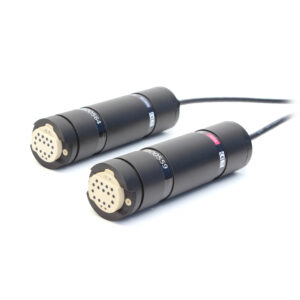
The ANB Sensors pH sensor is calibration-free and installs easily on the BlueROV2. It comes in two versions:
- AQ5 – rated to 5 meters depth, with a 3-meter cable
- OC300 – rated to 300 meters depth, with a 1-meter cable
The OC300’s 300-meter depth rating makes it best suited for ROV use, so that’s the version we’ll use in this guide.

Before Installation
Before installing the pH sensor on your BlueROV2, take a moment to get familiar with how it works by connecting it to your computer and completing the following steps. You’ll need a BLUART USB to RS-485 adapter (or similar RS-485 FTDI adapter) to connect. For initial testing, it’s also helpful to have the front of the sensor immersed in a cup of water to trigger the immersion sensor.
1. Visit ANB’s documentation to learn how to operate the sensor using their software tools.
- Note: ANB’s documentation references a Data Transfer Unit (DTU) for connecting the device. In this guide, we use the BLUART adapter instead.
2. Download ANB’s desktop software from their website (Windows only):
- anb_utils – a terminal-based program used to update the pH sensor’s firmware and configure its measurement settings.
- ANB GUI – provides a user-friendly interface for viewing sensor output and general operation.
3. Connect the 4-pin JST GH connector from the pH sensor to the RS-485 input on the BLUART, then use a micro USB cable to connect the BLUART to your computer.
- You’ll need to know the correct COM port for the sensor. If you have other USB devices connected, it can be hard to tell them apart—open Windows Device Manager, navigate to Ports (COM & LPT), and watch for the new entry as you plug in the BLUART.
Once the sensor is connected and you’ve identified the COM port, launch anb_utils and connect to the sensor. If a firmware update is available, the program will notify you (this requires an internet connection). Follow the on-screen instructions to update.
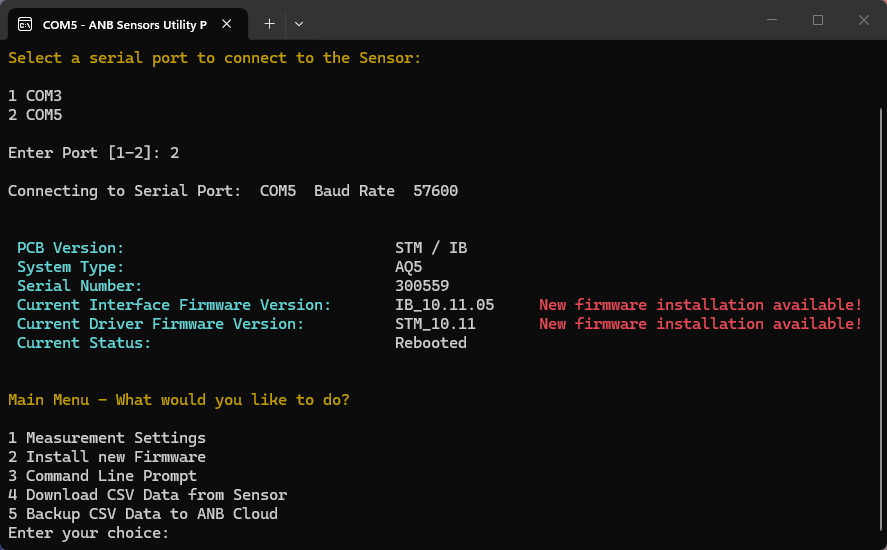
You can also configure the sensor’s measurement settings through anb_utils. Each setting option is explained here.
- The default settings work fine for most situations.
- In some cases, enabling Profiling Mode can provide a faster response to pH changes, at the expense of accuracy.
Close anb_utils when you’re finished.
5. Launch ANB GUI and select the COM port from the dropdown. The sensor’s information should appear in the Sensor Details area at the top.
6. Select START to begin scanning. The sensor takes a few minutes to self-calibrate before displaying its first measurements—please be patient! After a few minutes (~ 4 minutes), you should see values plotted on screen.

Once you’re satisfied with initial testing, you can move on to installing the sensor on the vehicle.
Parts and Tools Required
Along with the pH sensor itself and your ROV, you’ll need the following to complete installation:
- 1 x BLUART
- 1 x Short micro USB cable (like this or similar)
- 1 x M10 Bulkhead Wrench
- 1 x 2.5 mm hex tool
Be sure to also check the Mounting the Sensor section below for any additional parts or tools needed for your preferred mounting method.
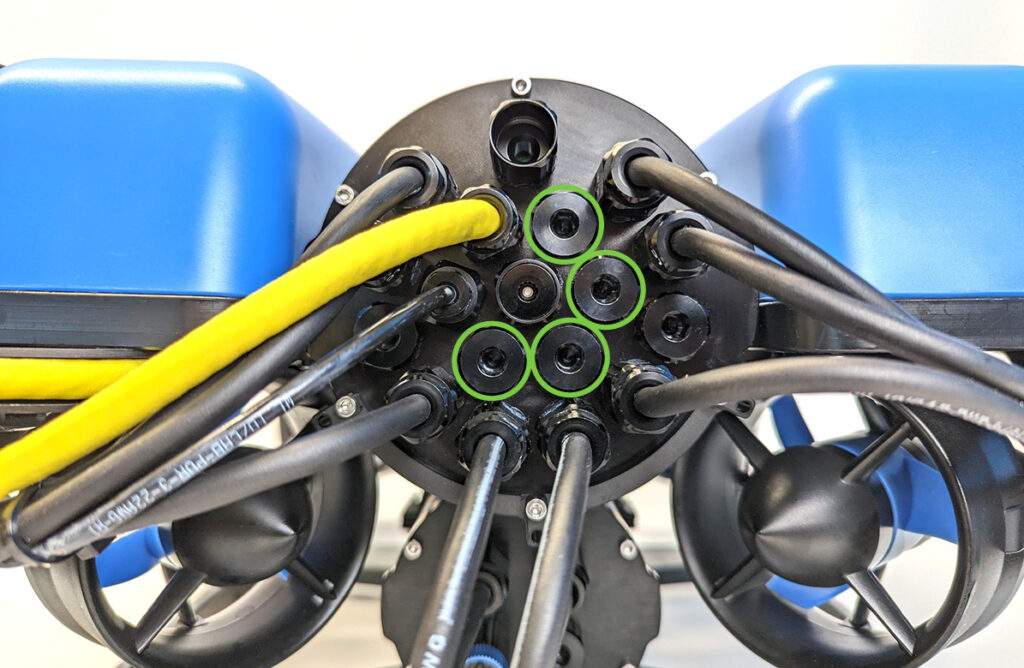
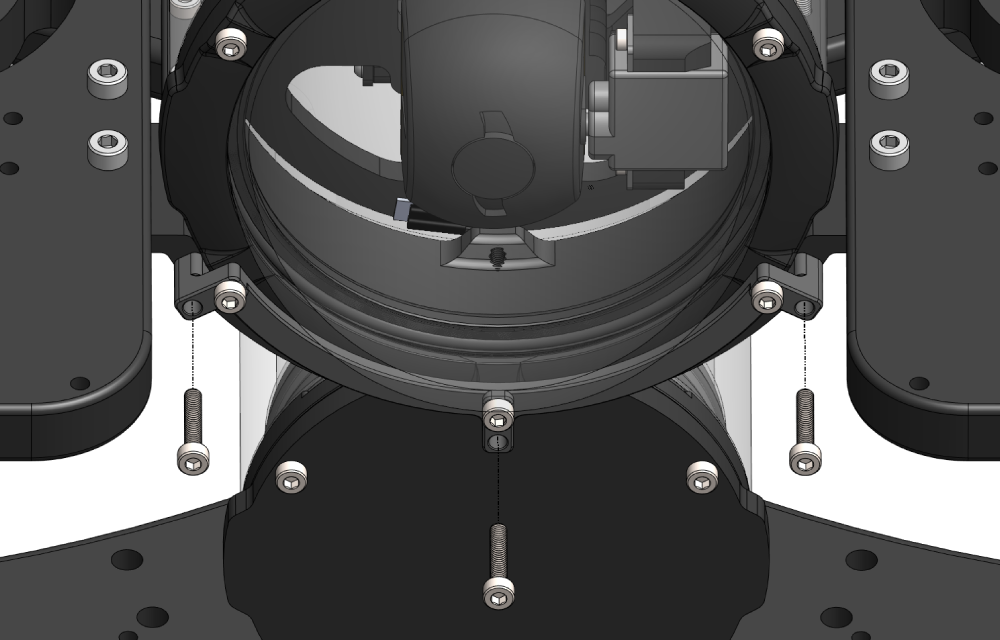
Remove a Blank Penetrator
In this section, you’ll open the BlueROV2 electronics enclosure and remove one of the blank penetrators. You’ll need:
- 1 x 2.5 mm hex driver
- 1 x M10 Bulkhead Wrench
If you’re unsure about any step in this section, more detailed instructions can be found in the Servicing the BlueROV2 section of the BlueROV2 Operation guide.
1. Make sure your BlueROV2 is completely powered off by disconnecting the battery.
2. Use the 2.5 mm hex to remove the M3x16 mounting screws that secure the enclosure mounting clips to the cradles, remove the PRV or vent plug, and remove the electronics enclosure tube from the electronics enclosure assembly.
3. Choose one of the blank penetrators in the middle of the end cap and use the bulkhead wrench to remove it.
Install the Sensor Bulkhead
To install the sensor bulkhead penetrator into the end cap, you’ll need:
- The pH sensor
- 1 x M10 bulkhead nut (included with sensor)
- 1 x -013 bulkhead O-ring (included with sensor)
- 1 x M10 Bulkhead Wrench
- Silicone grease (included with sensor)
1. Ensure the area around the hole left by the removed blank penetrator is clean and free of dust or debris.
2. Remove the bulkhead nut, O-ring, and silicone grease from the small box included with the pH sensor. Inspect the O-ring to confirm it’s clean and undamaged, then apply a thin layer of silicone grease and install it in the groove on the underside of the sensor bulkhead.
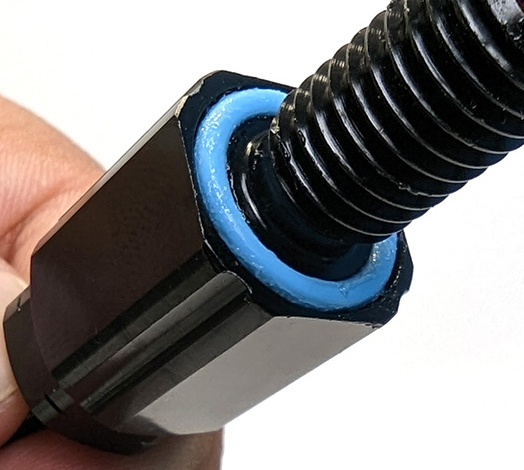
3. Insert the bulkhead into the hole and fasten the bulkhead nut on the opposite side. Tighten by hand until finger-tight, then use the bulkhead wrench to fully secure the connection. When properly installed, the bulkhead should sit firmly in place with no rotation, and you should not be able to loosen it by hand.
Connect the Sensor
The ANB pH sensor communicates via RS-485, so you’ll need a USB-to-RS-485 adapter, such as the BLUART, to connect it to the internal Raspberry Pi.
1. Connect the 4-pin JST GH connector from the pH sensor to the RS-485 input on the BLUART.
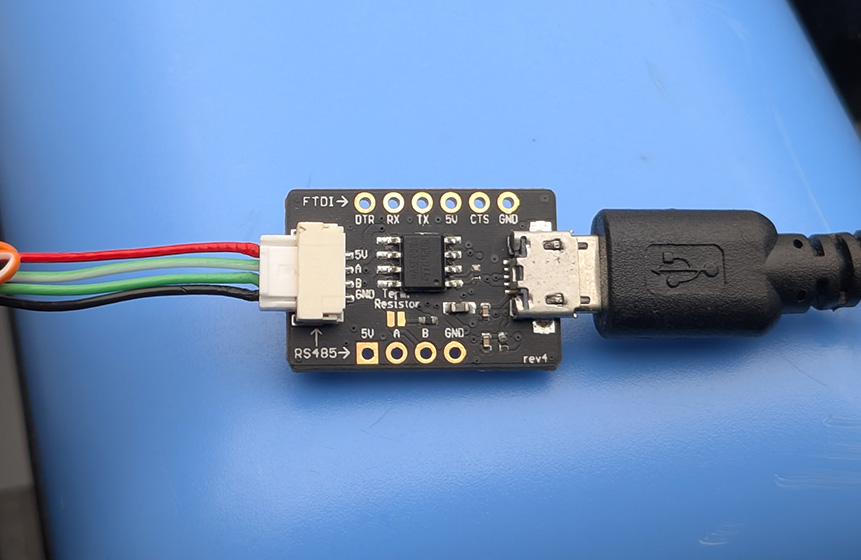
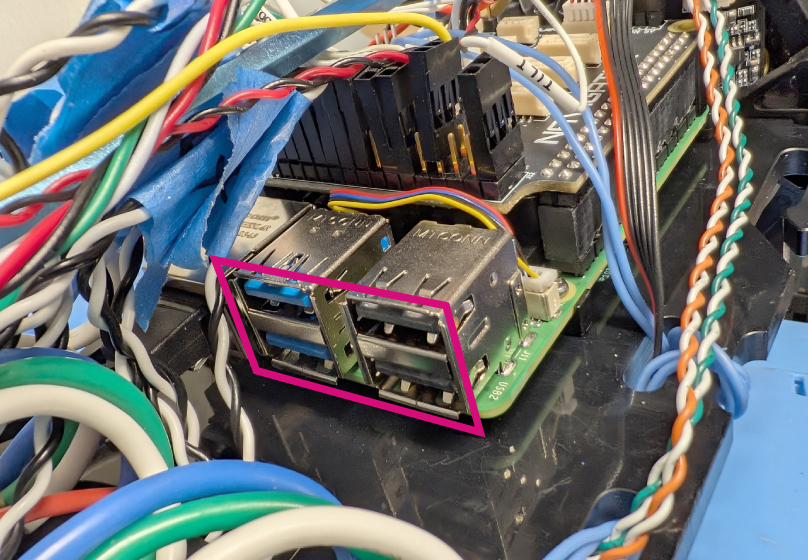
2. Use a micro USB cable to connect the BLUART to one of the USB ports on the Raspberry Pi.
Reassemble the ROV
Once the sensor is installed and connected, you can close up and reassemble the ROV. You’ll need:
- 1 x 2.5 mm hex driver
- The M3 mounting screws you removed from the ROV previously
1. Reinstall the tube and dome assembly onto the flange. If the ROV has a locking-style enclosure, make sure the rotation locking tab sits inside the slot in the tube.
2. If your ROV has a locking cord, insert it through the slot.
3. Reinstall the PRV or vent plug back in the bulkhead, turning it clockwise until it stops to seal it.
4. Place the electronics enclosure on the enclosure cradles, aligning the mounting clips with the screw holes on the cradles. Use the 2.5 mm hex tool to install the screws through the mounting clips and into the front and rear enclosure cradles.
At this point the pH sensor’s cable should be connected to the ROV and ready to mount to the frame.
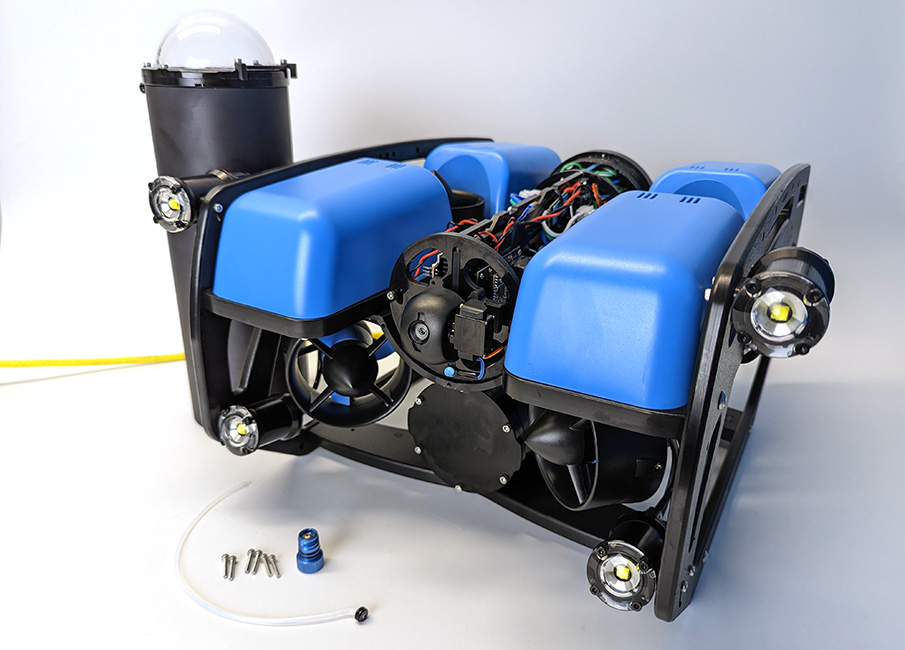
Mounting the Sensor
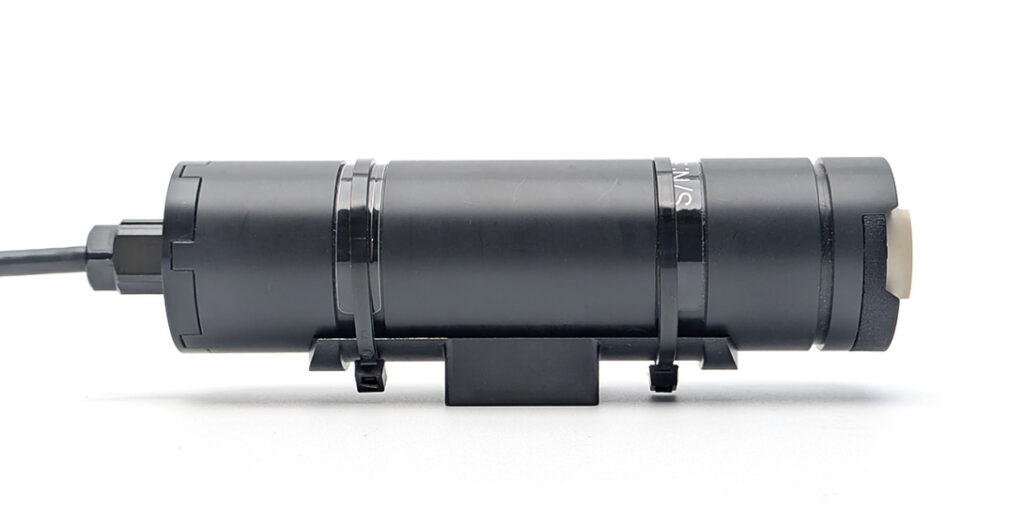
The ANB pH sensor includes a mounting bracket and hardware and can be mounted in any orientation, giving you flexibility when installing it on the BlueROV2. The following sections describe three mounting methods.
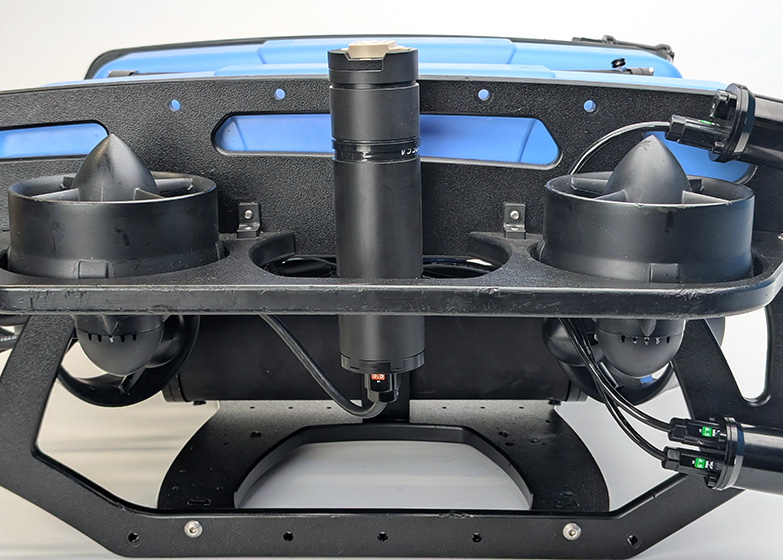
Using Cable Ties Only
This method is quick and easy, but still very secure. Use the included cable ties to attach the sensor to a convenient spot on the ROV frame.
- Wherever you choose to mount it, make sure the sensor and its cable don’t obstruct a thruster.
- Seat the cable ties in the sensor’s mounting grooves to prevent it from sliding out over time.
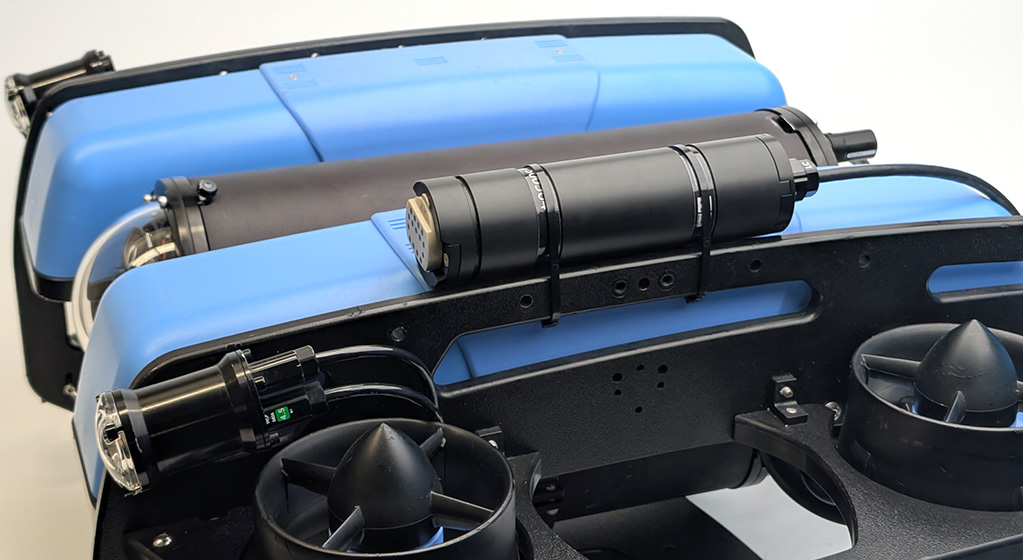
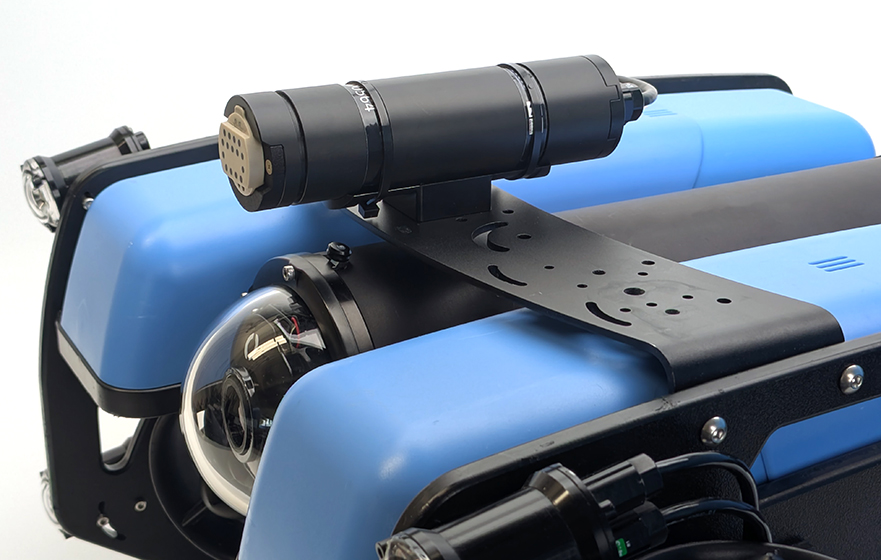
Using the Mounting Bracket
The mounting bracket provides a more permanent mounting option by attaching directly to the ROV frame with screws. This method requires drilling four mounting holes through the frame.
You’ll need:
- Drill with 3 mm (~⅛ inch) drill bit
- 1 x 2.5 mm hex tool
- Mounting template (print at 100% scale)
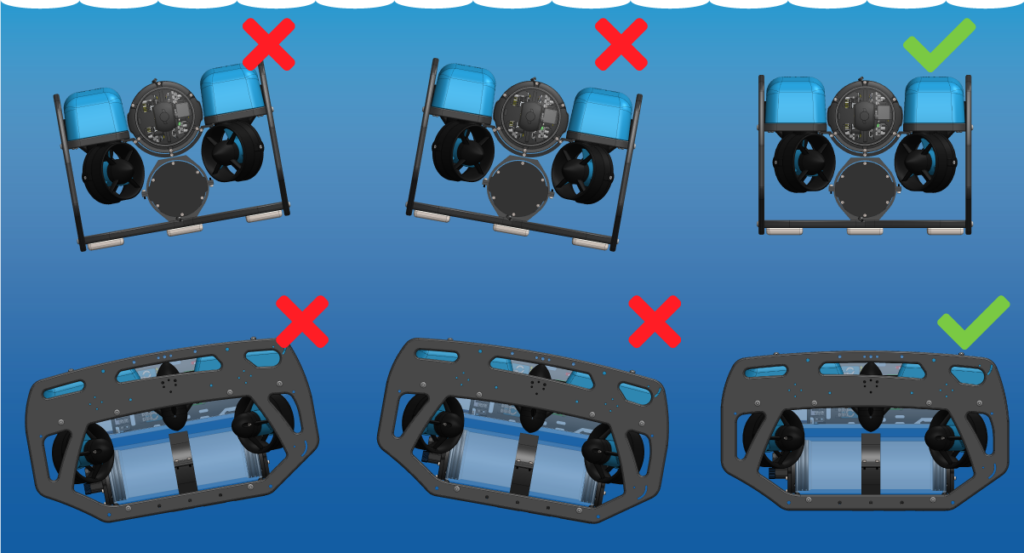
1. Choose a location on the ROV frame for the sensor and mounting bracket, making sure the sensor and its cable won’t obstruct any thrusters.
2. Print the mounting template at 100% scale and use it to mark the four mounting hole locations on the frame.
- Printing at a different scale will cause incorrect hole spacing.
3. Drill the four mounting holes in the frame.
4. Use the two included cable ties to secure the sensor to the mounting bracket, ensuring the ties are seated in the sensor’s mounting grooves and wrap around both the sensor body and the bracket.
5. Use the four included M3×16 screws and the 2.5 mm hex tool to secure the bracket to the frame. The screws should pass through the frame and thread directly into the bracket.
Using the BlueROV2 Roof Rack
The mounting bracket can also attach to the BlueROV2 Roof Rack.
You’ll need:
- 1 x Roof Rack (not included; review its installation guide for required tools)
- 1 x 2 mm hex tool
1. Use the two included cable ties to secure the sensor to the mounting bracket, ensuring the ties are seated in the sensor’s mounting grooves and wrap around both the sensor body and the bracket.
2. The mounting bracket can be installed in any of these positions on the Roof Rack.
3. Use the four included M3×8 screws and 2 mm hex tool to secure the sensor to the Roof Rack.
4. Follow the Roof Rack installation guide to mount the rack to the ROV.
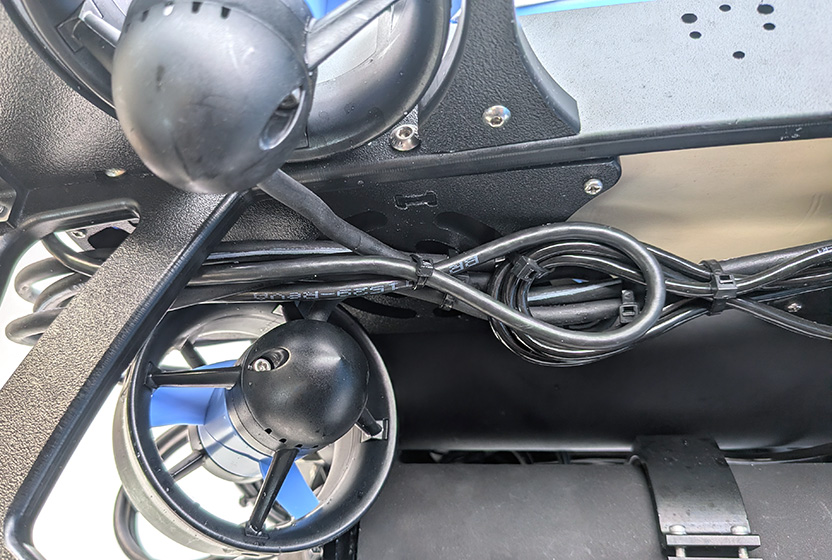
Cable Management
Good cable management ensures that loose cables are secured to the ROV frame, preventing them from getting caught on obstacles or damaged by the thruster propellers. Use cable ties to fasten the cable to the frame, ensuring there are no loose sections. Once secured, double-check that no cables can reach a thruster propeller.
Adjusting the Ballast on the Frame
The pH sensor adds weight to the BlueROV2 frame, so the ROV’s ballast must be adjusted to maintain neutral buoyancy and balance in the water. Remove or reposition ballast weights on the bottom of the frame as needed.
For detailed instructions on adjusting ballast, refer to the Servicing the BlueROV2 section in the BlueROV2 Operation guide.
Install ANB Sensors BlueOS Extension
The ANB Sensors GUI BlueOS extension looks and functions just like the ANB GUI desktop application, providing a user-friendly interface for viewing sensor data and general operation. It can be installed from the BlueOS extensions store.
1. Power up your BlueROV2 and connect it to your computer. If you don’t know how to do that, please check out the BlueROV2 Software Setup guide first.
2. Access BlueOS (the BlueROV2’s operating system) by entering 192.168.2.2 or blueos.local into a web browser address bar.
3. Connect the BlueROV2 to a Wi-Fi network.
4. Update to the latest stable release of BlueOS using the instructions here, then return to this guide.
5. Go to the Extensions menu in BlueOS and install the ANB SENSORS GUI extension.

6. After it’s installed, open it from the left sidebar. Expand the Device Identification panel and select the “FTDI” device from the list.
- If there is more than one FTDI (BLUART) device listed, you can determine by the USB port it’s physically connected to.

7. The sensor’s information should appear in the Sensor Details area at the top. Select START to begin scanning. The sensor takes a few minutes to self-calibrate before displaying its first measurements—please be patient! After a few minutes (~ 4 minutes), you should see values plotted on screen.
Sensor Data in Autopilot Logs
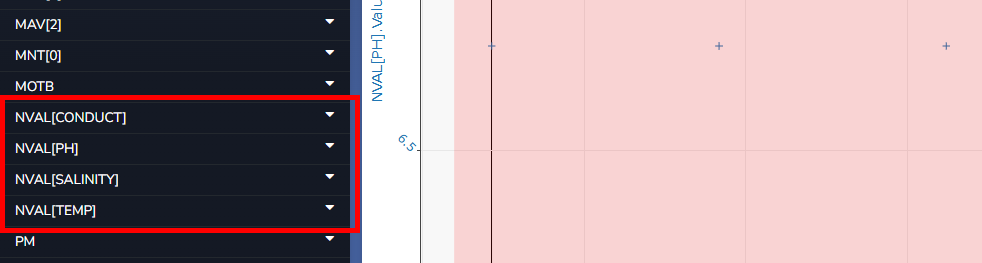
While the sensor is used with the ANB Sensors GUI extension, measured data is automatically logged in the vehicle’s autopilot log. The data is saved as a “named value float” and can be found by searching “nval” in BlueOS log viewer.
Next Steps
Make sure to refer to ANB Sensors’ documentation to learn how to effectively operate and get the most out of the pH sensor. The following sections are particularly useful: