
Installing the BlueROV2 Roof Rack
Introduction
The BlueROV2 Roof Rack provides convenient mounting points to attach more stuff on top or in front of your BlueROV2. It has mounting points to attach Watertight Enclosure Clamps, Lumen Lights, Newton Gripper, Ping360 Sonar, Sonoptix ECHO Sonar, and standard 1/4-20 UNC tripod mounts.

This guide will show you how to install it on your BlueROV2.
Mounting Positions
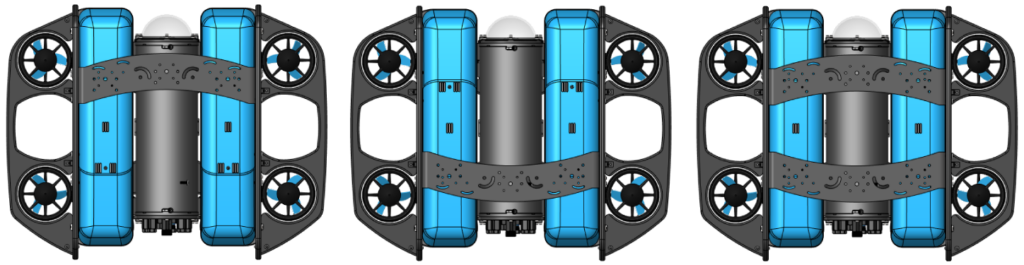
The Roof Rack can be mounted on top of the BlueROV2 or in the front.
Top Mounting
The Roof Rack can be mounted in the forward or rear mounting position, or both at the same time.
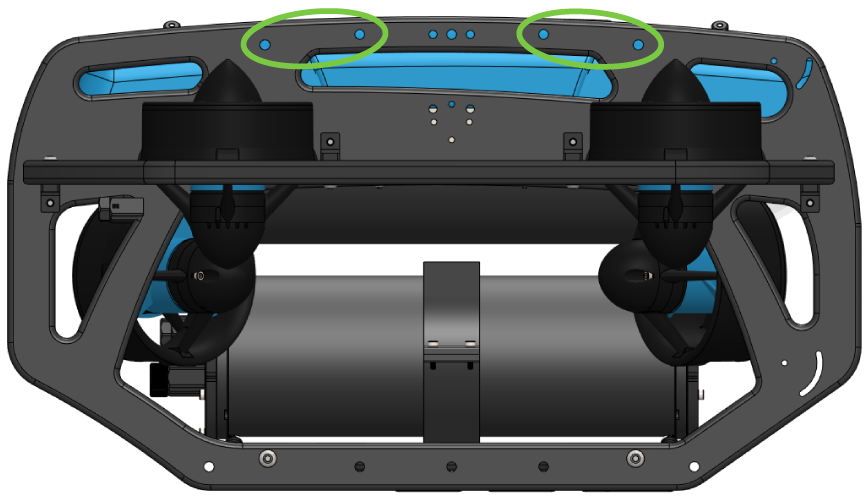
Use the existing mounting holes in the BlueROV2 side panels to top mount the Roof Rack.
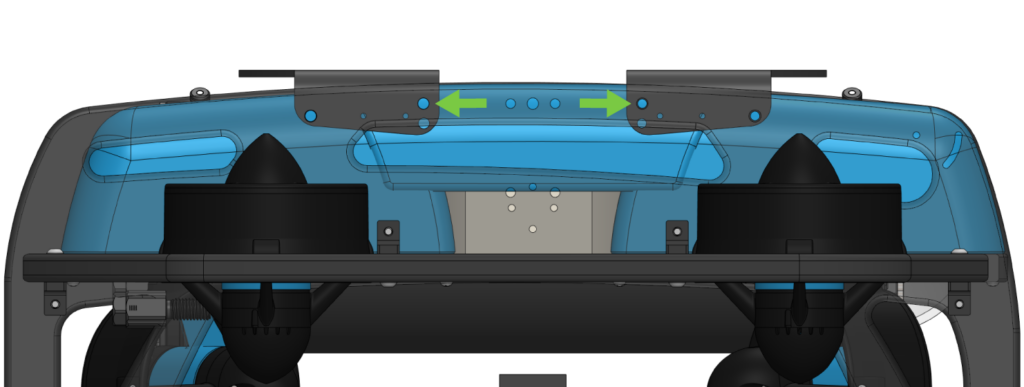
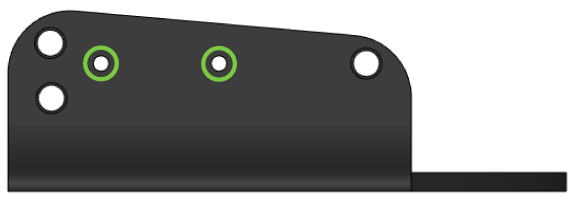
When top mounting, the rack can be mounted so it is level or at a 10° angle:
Use the higher set of mounting holes on the rack to mount it level.
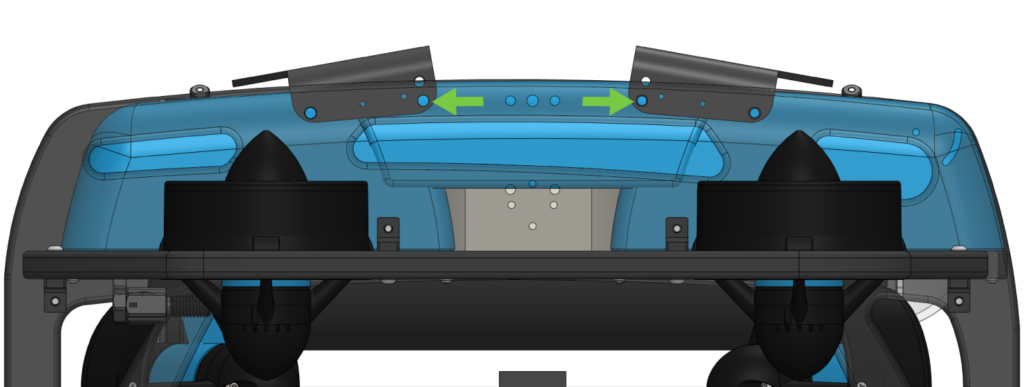
Use the lower set of mounting holes on the rack to mount it at a 10° angle.
Front Mounting
The Roof Rack can also be mounted to the front of the ROV using the existing Lumen Light mounting points.
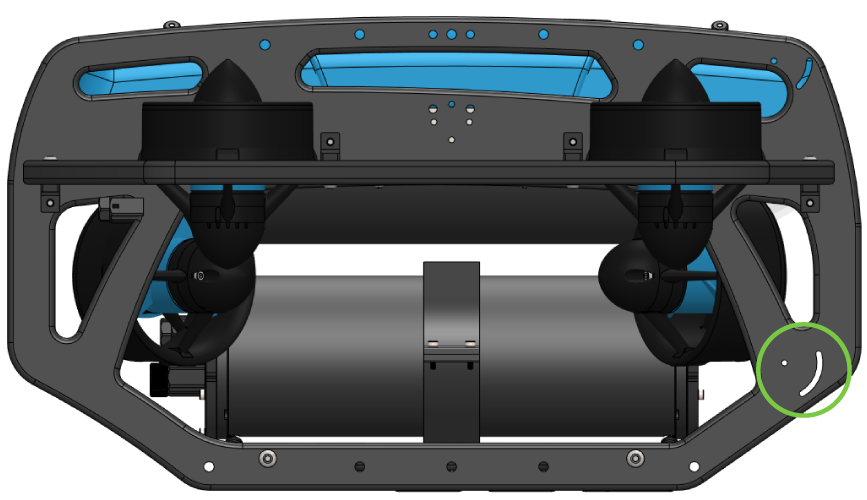
Use the smaller mounting holes on the rack to front mount it.
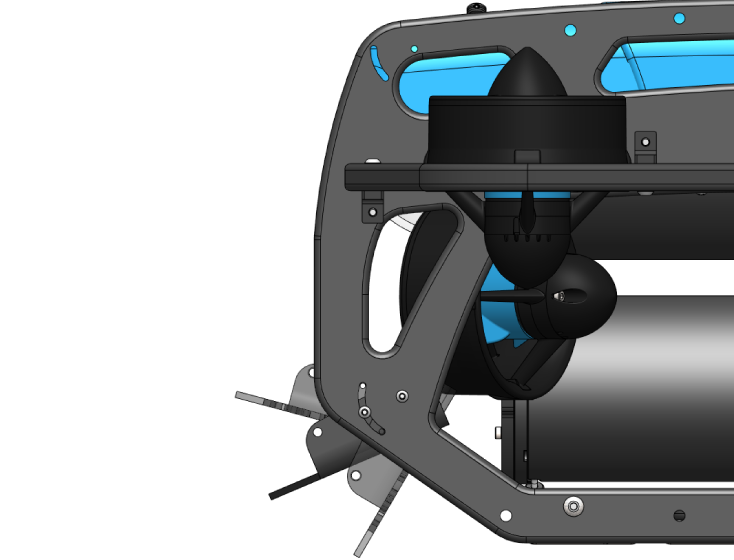
When front mounting the rack, mount the rack upside down. The mounting angle of the rack can be freely adjusted within the mounting slot.
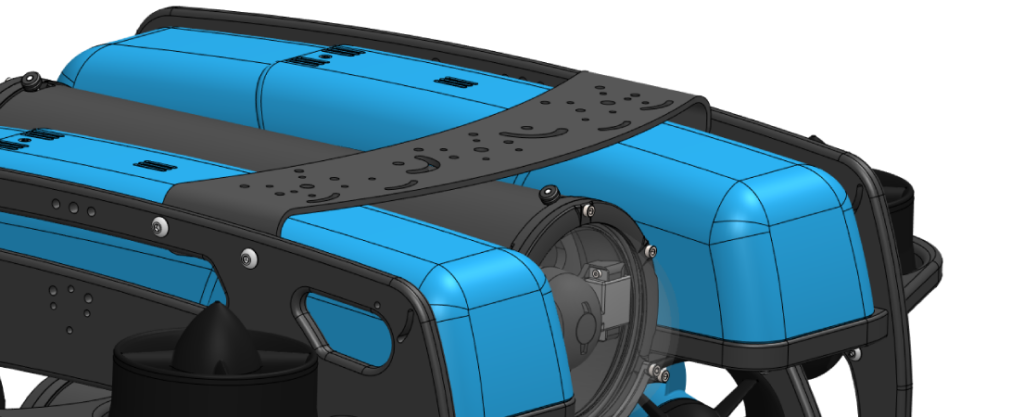
Accessory Mounting Points
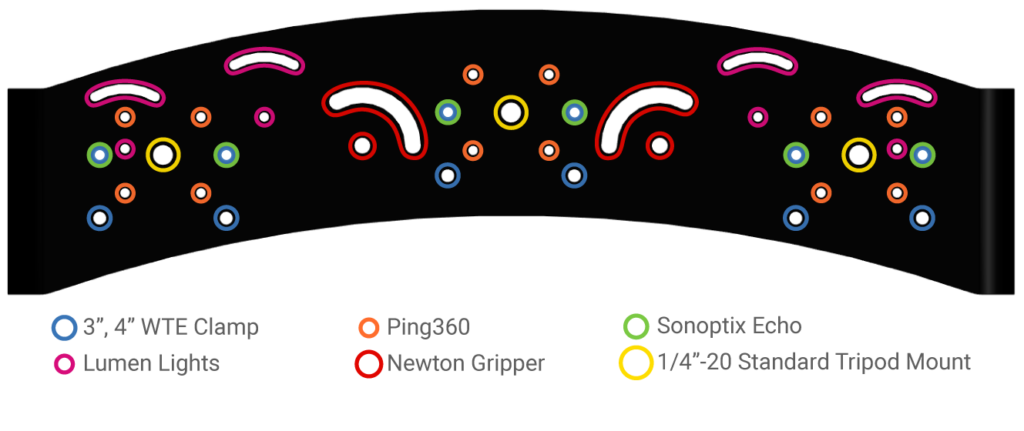
The Roof Rack doesn’t do much on its own (other than look cool), you will likely be attaching some other accessories to it. The diagram below shows which mounting holes to use for supported accessories. Refer to the installation guide for the accessory you are mounting for more information about the additional tools and hardware you will need. Make sure to mount the equipment to the Roof Rack before installing the Roof Rack on the ROV.
Installation
Parts and Tools
To top mount the Roof Rack on the BlueROV2, you will need:
- 4 x M5x12 button head screws (included with the Roof Rack)
- A 3 mm hex driver
To front mount the Roof Rack on the BlueROV2, you will need:
- 4 x M3x12 socket head screws (included with the Roof Rack)
- A 2.5 mm hex driver
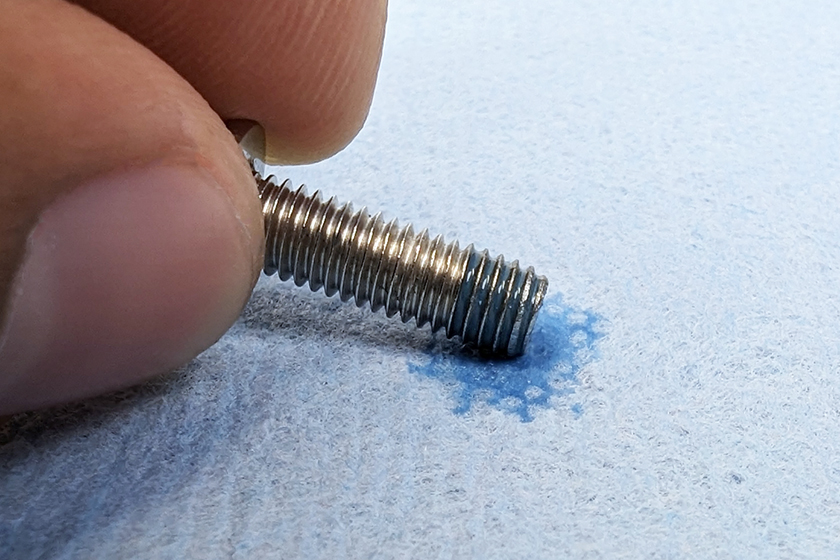
You will also need a bottle of medium-strength (blue) threadlocker such as Loctite 242 or 243.
1. Mount the accessory to the Roof Rack first. Refer to the installation guide for the accessory you are mounting for more information about the additional tools and hardware you will need.
2. Take the appropriate screws and add a drop of threadlocker to the end of each screw. Roll the screw on a paper towel to evenly spread the threadlocker and remove any excess.
3. Align the correct mounting holes and use the hex driver to install the screws.
If you are using the front mounting position, tighten the screws in the mounting slots until they indent the plastic slightly.

Feedback
We’re always working to make our documentation, instructions, software, and user experience even better. If you have any ideas on how we can improve this guide, feel free to let us know here.