
Installing the DWE exploreHD on the BlueROV2
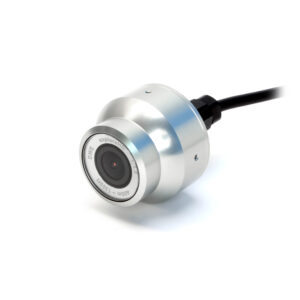
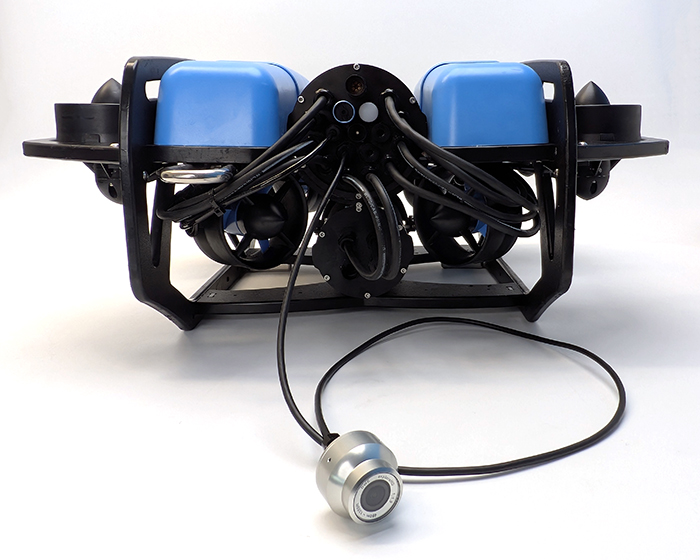
The DeepWater Exploration exploreHD is a 400-meter depth-rated USB camera that easily connects to the BlueROV2 to provide an additional live video stream.

This guide will show you how to install it on the BlueROV2.
Parts and Tools for Installation
In addition to the DWE exploreHD camera, you will need the following for installation:
- 1 x M10 Bulkhead Wrench
- 1 x 2.5 mm hex driver
- 1 x #1 Phillips head screwdriver
- Silicone grease (Molykote 111)
- Cable ties for cable management
Additional Hardware
The exploreHD does not include hardware for attaching the bracket to the ROV. The required tools and fasteners will depend on where and how you choose to mount it. See the Mounting the DWE exploreHD section of this guide for mounting options and recommended hardware.
Hardware Installation
Installing the camera requires opening the BlueROV2 Electronics Enclosure and removing a bulkhead penetrator. To do that, you’ll need:
- 1 x 2.5 mm hex driver
- 1 x M10 Bulkhead Wrench
If you’re unsure about any step in this section, more detailed instructions can be found in the Servicing the BlueROV2 section of the BlueROV2 Operation guide.
1. Make sure your BlueROV2 is completely powered off by disconnecting the battery.
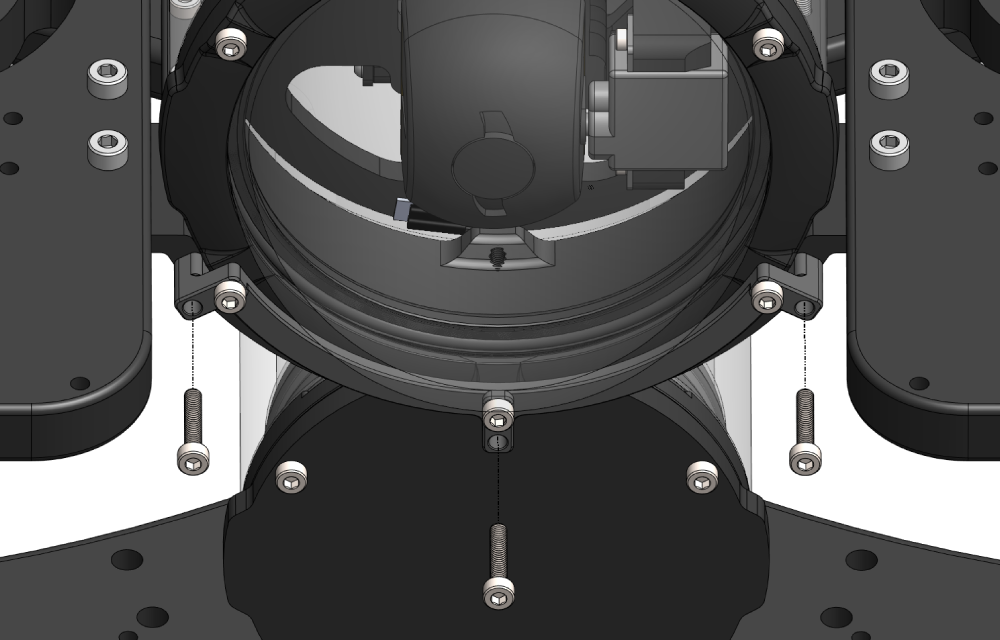
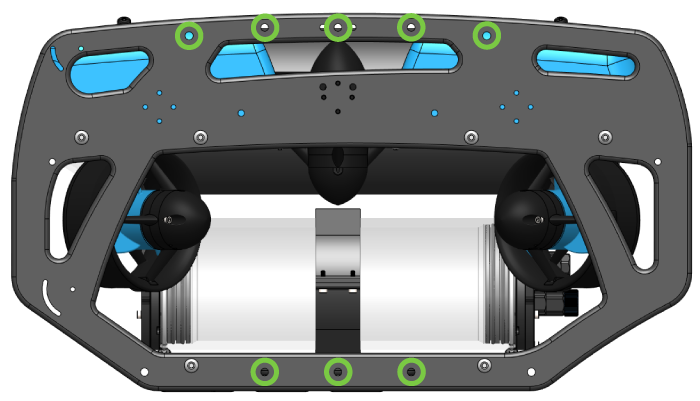
2. Use the 2.5 mm hex to remove the M3x16 mounting screws that secure the enclosure mounting clips to the cradles, remove the PRV or vent plug, and remove the Electronics Enclosure tube from the Electronics Enclosure assembly.
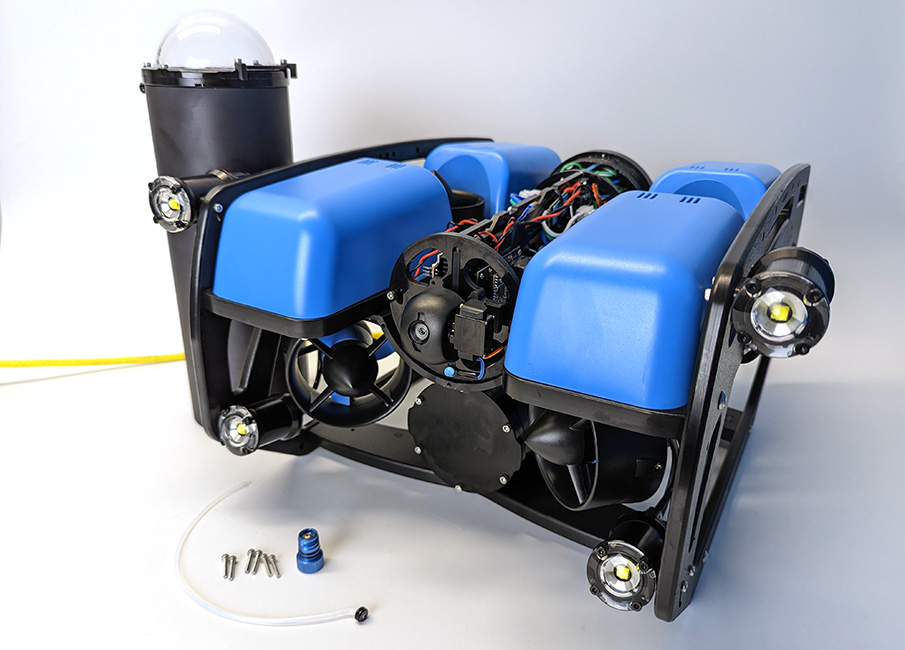
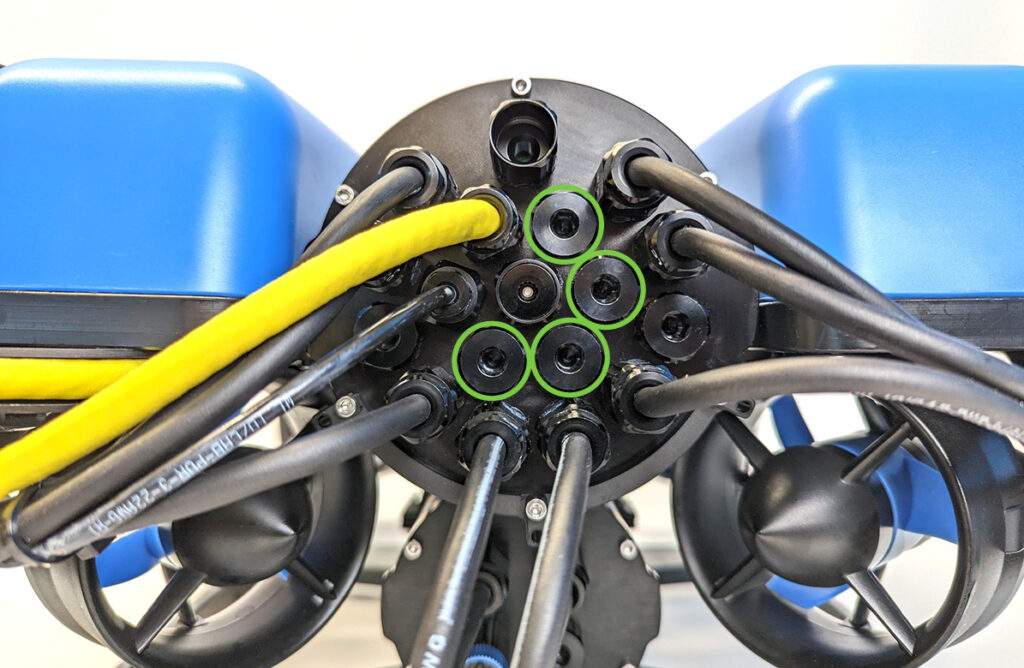
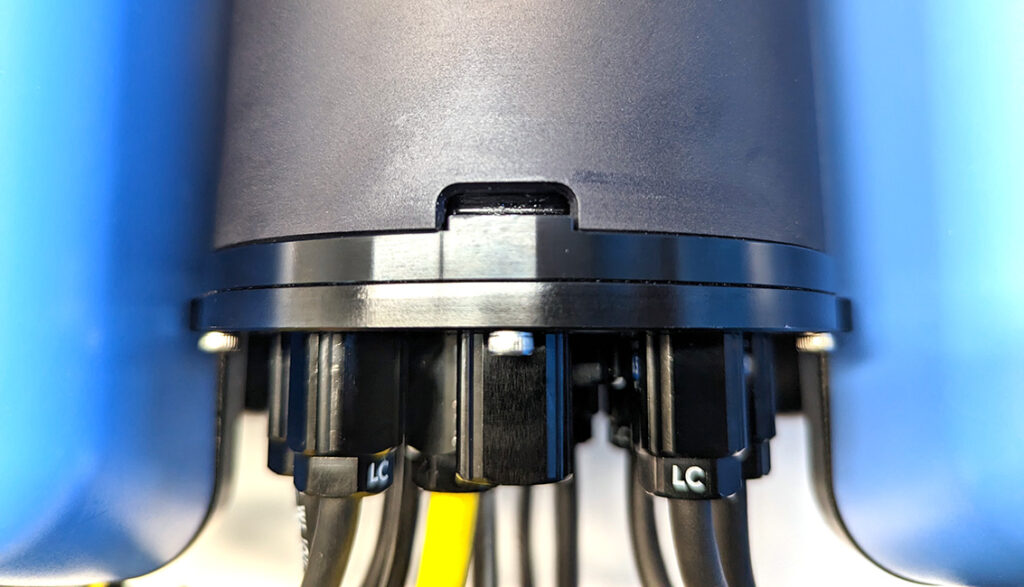
3. Choose one of the blank penetrators in the middle of the end cap and use the M10 Bulkhead Wrench to remove it. If you are installing multiple cameras, remove a blank penetrator for each one.
Installing the Bulkhead Penetrator
To install the camera bulkhead penetrator into the end cap, you will need the following parts and tools:
- The camera
- 1 x M10 bulkhead nut (included with the camera)
- 1 x -013 O-ring (included with the camera)
- 1 x M10 Bulkhead Wrench
- Silicone grease (Molykote 111)
1. Wipe the exterior surface of the end cap around the hole where you removed the blank bulkhead penetrator. Ensure area around the hole clean and free of dust or debris.
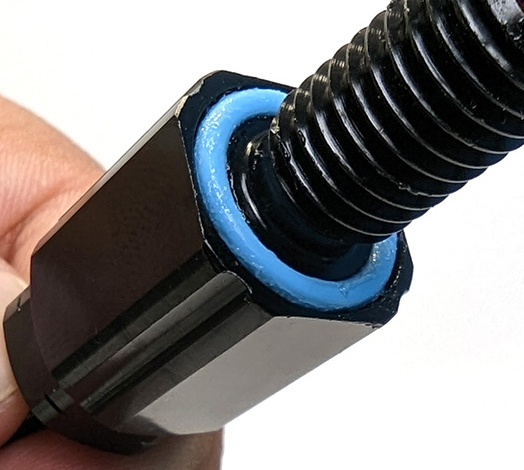
2. Inspect the bulkhead O-ring to make sure it is not dirty or damaged.
3. Lubricate the O-ring with a thin layer of silicone grease and install it in the groove on the underside of the bulkhead penetrator.
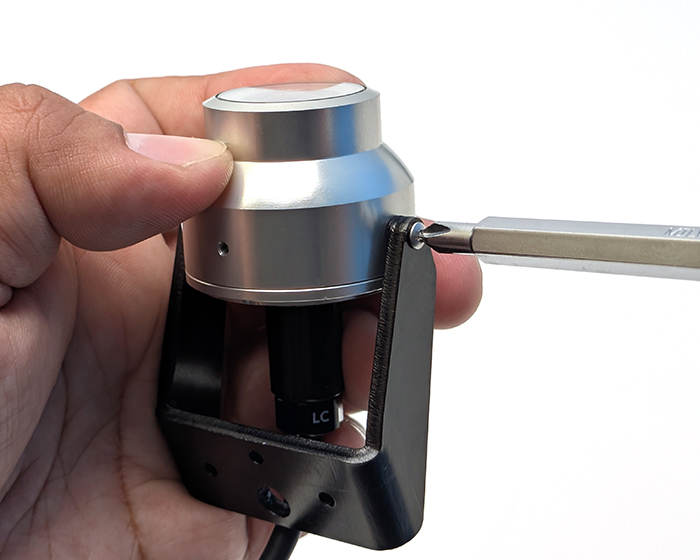
4. Insert the bulkhead in the hole and fasten the bulkhead nut on the opposite side. Tighten the nut by hand until it is finger-tight, then use the bulkhead wrench to fully secure the connection. When properly installed, the bulkhead should be fixed in place with no rotation, and you should not be able to loosen it by hand.
Wire Connections and Reassembly
For this step you will need:
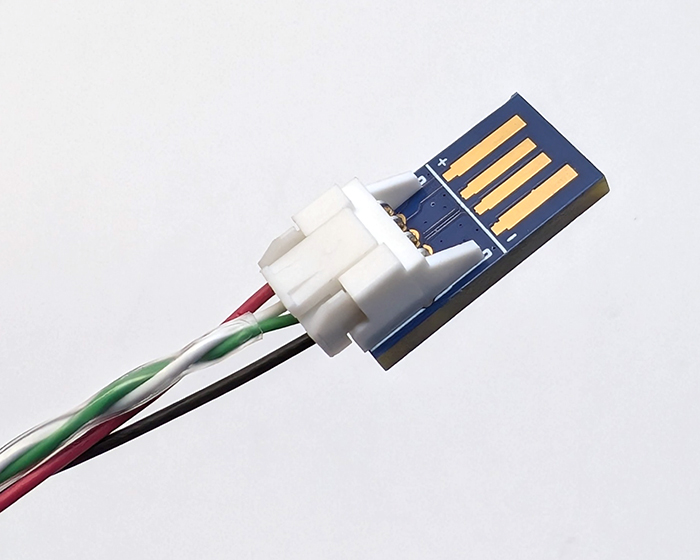
- 1 x JST to USB-A adapter (included with the camera)
1. Connect the adapter to the JST connector at the end of the camera cable.
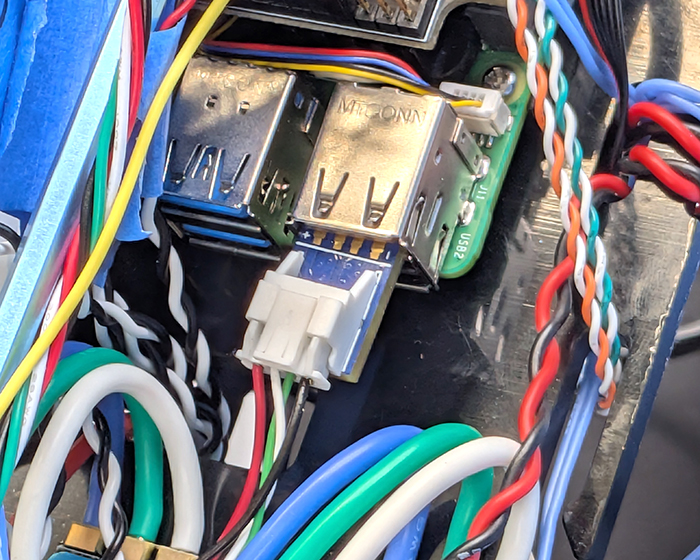
2. Plug in the cable with adapter into one of the Raspberry Pi’s USB ports.
3. That’s it! You can now close up the ROV to finish installation. Reinstall the tube and dome assembly onto the flange. If the ROV has a locking-style enclosure, ensure the rotation locking tab sits inside the slot in the tube.
4. If your ROV has a locking cord, insert it through the slot.
5. Reinstall the PRV or vent plug back in the bulkhead. Turn the plug clockwise until it stops to seal it.
6. Place the Electronics Enclosure on the enclosure cradles and line up the mounting clips with the screw holes on the cradles. Use the 2.5 mm hex to install the screws through the mounting clips and into the front and rear enclosure cradles
Mounting the DWE exploreHD
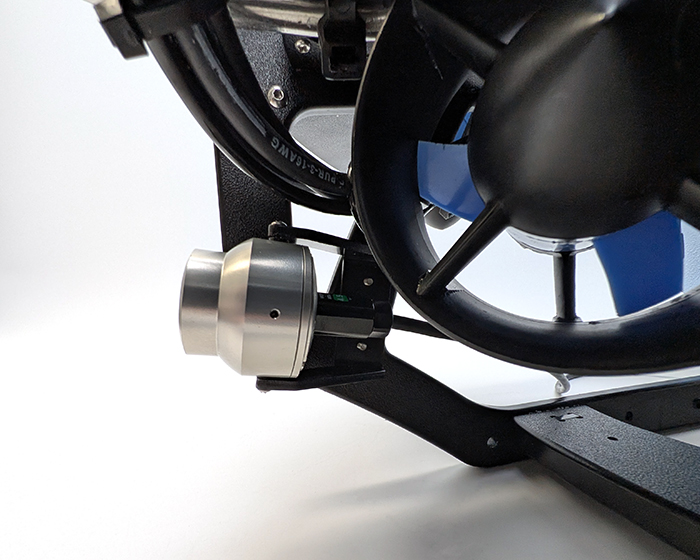
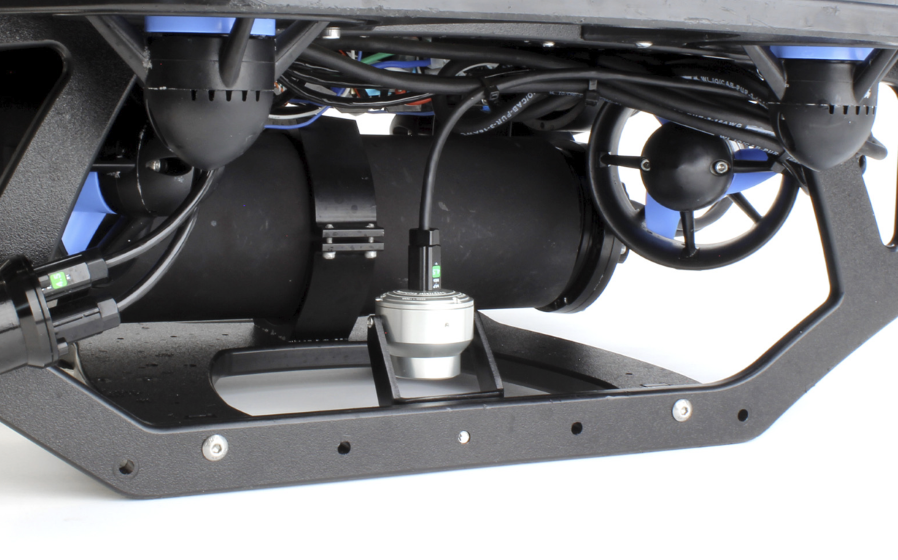
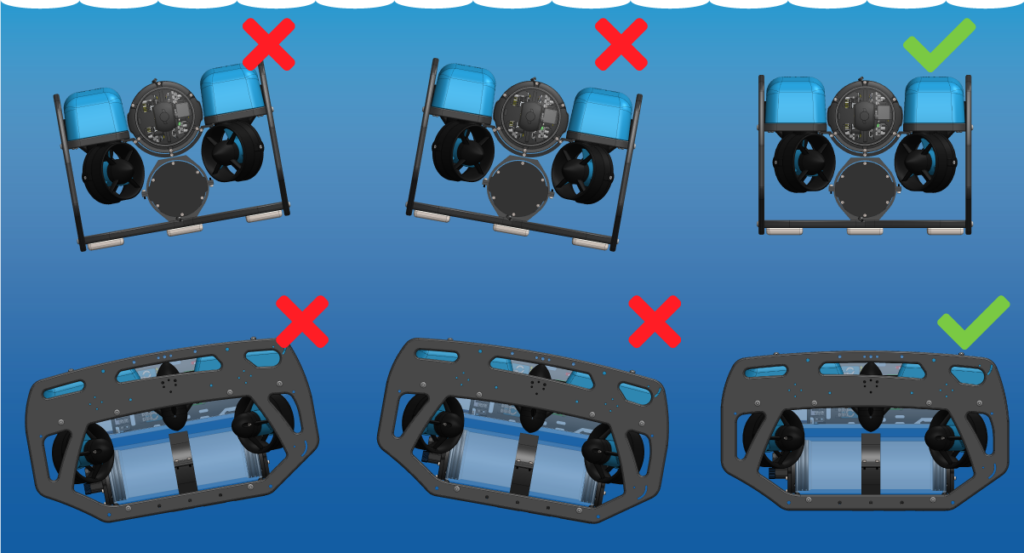
The exploreHD is very compact, giving you plenty of flexibility in where you mount it on the ROV. Just avoid placing it where it could obstruct a thruster or other devices. The included mounting bracket features two different hole patterns for securing it to the ROV:
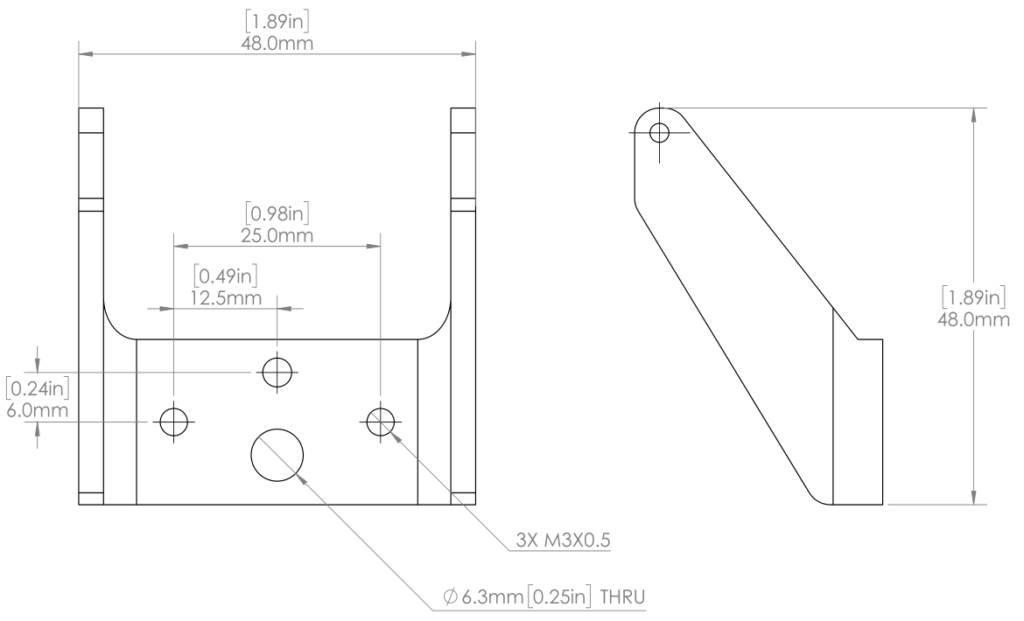
Using the Threaded M3 Holes
These are the three smaller holes on the bracket, threaded for M3x0.5 screws.
- Use the bracket as a template to mark hole positions on the frame (two holes are usually sufficient).
- Drill the mounting holes using a ~3.3 mm or 1/8″ bit.
- Use M3x0.5×16 mm screws to secure the bracket to the frame.
Using the Large Clearance Hole
This is the single larger hole on the bracket, sized for M6 or #12 hardware.
- Drill a ~6.3 mm or 1/4″ clearance hole through the mounting location.
- Secure the bracket with an M6 or #12 nut and bolt.
- You can also use one of the existing holes in the BlueROV2 side panels with an M6x12 mm screw to thread directly into the plastic frame—no drilling required.
Once you’ve chosen a mounting location and drilled the appropriate holes, you can install the camera in the bracket:
- Place the included plastic washers between the bracket and the camera.
- Use a #1 Phillips screwdriver and the two M2x6 screws to secure the camera to the bracket.
- The “exploreHD” text on the front of the camera indicates the top of the camera.
Cable Management
Good cable management ensures that loose cables are secured to the ROV frame, preventing them from getting caught on obstacles or damaged by the thruster propellers. Use cable ties to fasten the camera cable to the frame, ensuring there are no loose sections. Once secured, double-check that it can’t reach a thruster propeller.
Adjusting the Ballast on the Frame
If needed, refer to the Adjusting Ballast section of the BlueROV2 Operation Guide to keep the BlueROV2 neutrally buoyant and balanced in the water.
Software Setup
BlueOS automatically handles setting up the video stream for the exploreHD, so software setup couldn’t be easier!
1. Power up your BlueROV2 and connect it to your computer. If you don’t know how to do that, please check out the BlueROV2 Software Setup Guide first.
2. Open a web browser and go to 192.168.2.2 or blueos.local to access BlueOS (the BlueROV2’s operating system).
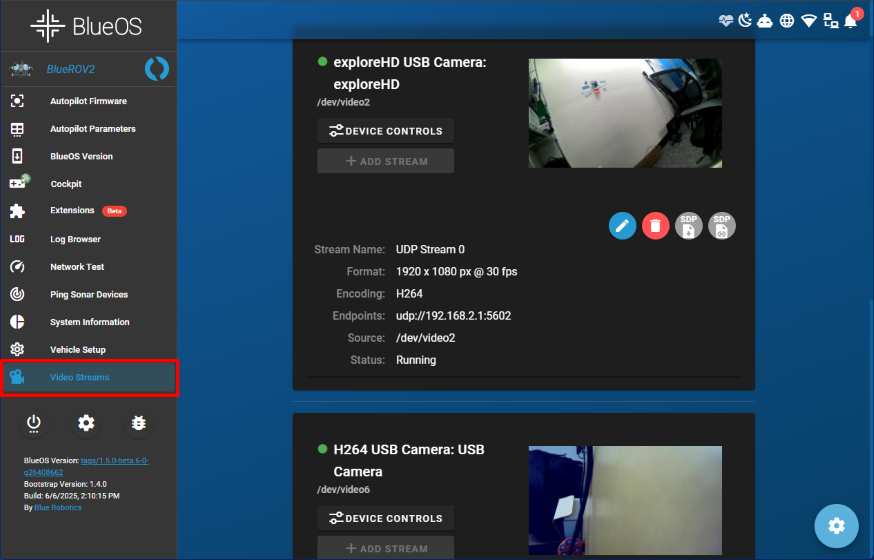
3. From the left sidebar, click Video Streams. You should see each connected exploreHD camera listed here, along with any other cameras. This means the camera streams are ready to view in Cockpit or QGroundControl!
If the camera doesn’t appear or the stream isn’t configured, follow the troubleshooting steps below:
- Make sure you are on the latest stable version of BlueOS. Follow these instructions to check for updates.
- Try a BlueOS soft restart or full reboot, then check the Video Streams page again.
- Click the gear icon in the bottom-right corner of the Video Streams page to reset video stream settings.
Viewing Additional Cameras in QGroundControl
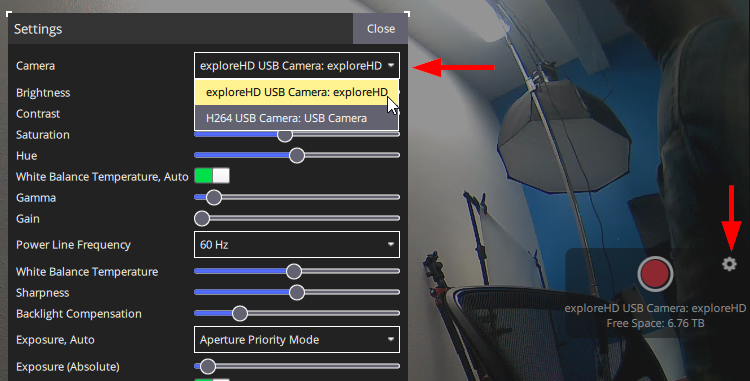
QGroundControl doesn’t support picture-in-picture or simultaneous multi-camera viewing, but you can switch between available camera streams. To change the active video stream:
1. Click the gear icon next to the video recording tool.
2. In the video settings window, use the Camera dropdown to select the stream you want to view.
Viewing Additional Cameras in Cockpit
Cockpit lets you customize your layout however you like. Here’s how to add another camera view to your interface:
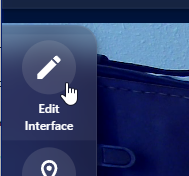
1. Open the main menu and select Edit Interface.
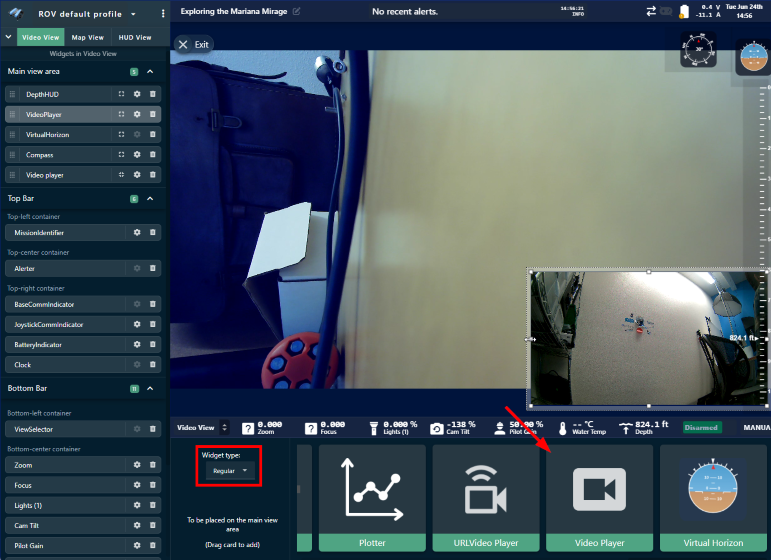
2. In the layout editor, go to regular widgets and scroll to find the Video Player widget. Drag and drop the widget into the display area.
- Move and resize the video widgets however you like to fit your layout.
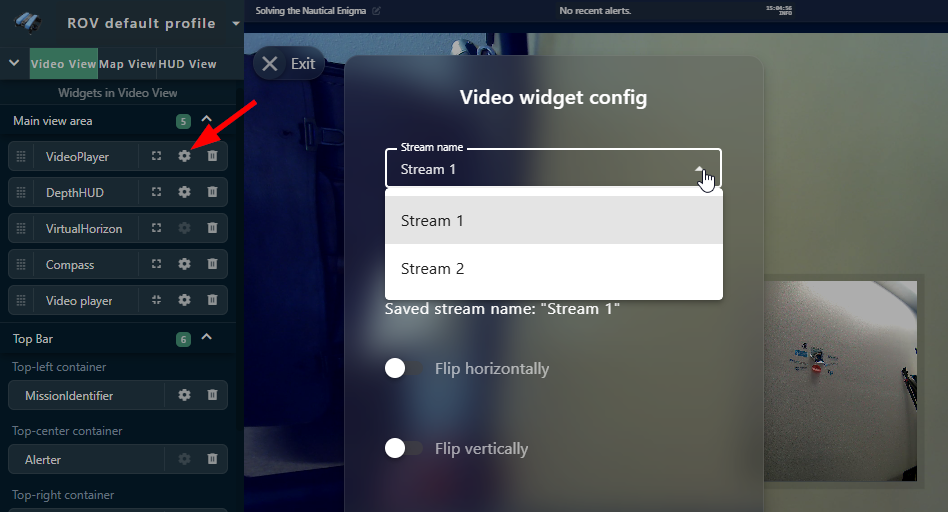
3. Click the gear icon on any video widget to choose which camera stream it displays.
Adjusting Bitrate and Advanced Settings
The bitrate for each DWE camera can be adjusted to suit your network. If you’re running multiple high-bandwidth devices, lowering the camera bitrate can help reduce overall bandwidth usage and prevent issues like video lag, stuttering, or connection instability. You can adjust the bitrate for each camera using the DWE OS extension in BlueOS.
1. Extensions support requires BlueOS version 1.1.0 or later. If your system is out of date, follow these instructions to update BlueOS then come back to this guide.
2. Go to the Extensions menu in BlueOS and install the DWE OS extension by DeepWater Exploration.
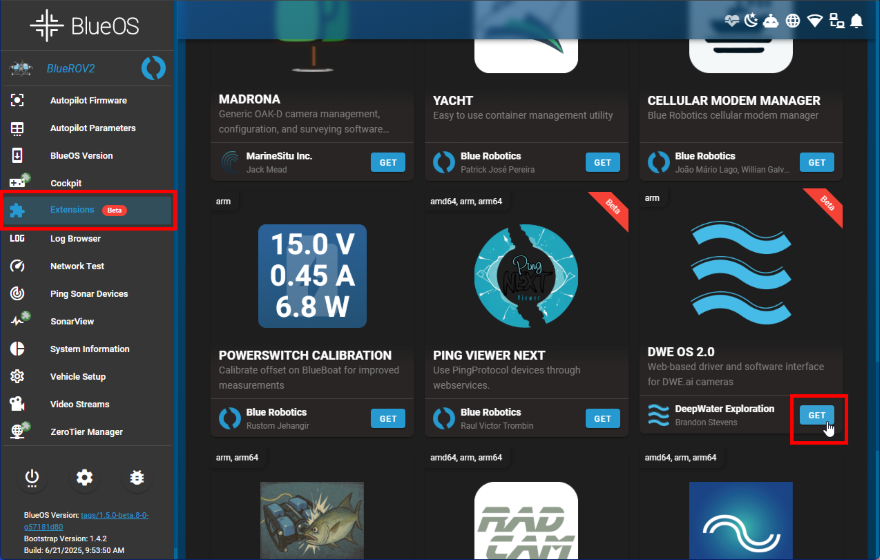
3. After the extension is installed, it will appear in the left sidebar. Click on it to launch it.
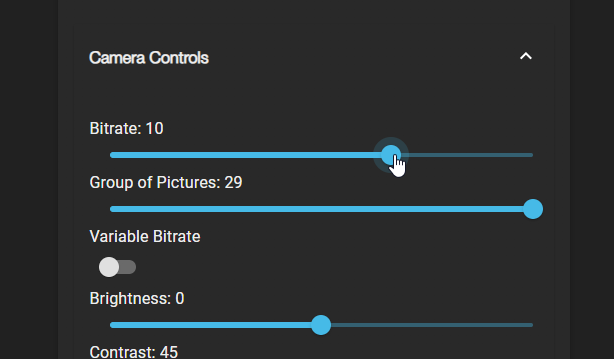
4. Expand the Camera Controls section and use the Bitrate slider to adjust the camera’s bitrate.
- Lowering the bitrate reduces data usage and overall bandwidth load, which can help if you’re seeing video lag or running multiple streams—but it also reduces image quality.
- Increasing the bitrate improves video clarity and detail but uses more bandwidth per stream, which can impact performance if your network is already busy.
Adjust the bitrate to find a balance between image quality and system performance that works best for your setup.
The DWE OS extension also gives you access to advanced settings you can tweak for each camera.