
Installing the DWE exploreHD on the BlueBoat
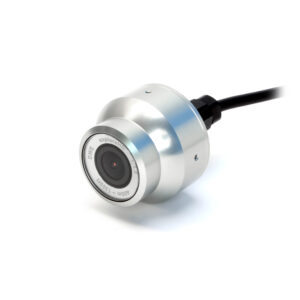
The DeepWater Exploration exploreHD is a waterproof USB camera that easily connects to the BlueBoat to provide a live video stream.

This guide will show you how to install it on the BlueBoat.
Parts and Tools for Installation
In addition to the DWE exploreHD camera, you will need the following for installation:
- 1 x M10 Bulkhead Wrench or 16 mm wrench
- 1 x 2.5 mm hex driver
- 1 x #1 Phillips head screwdriver
- Silicone grease (Molykote 111)
Additional Tools and fasteners
The exploreHD does not include hardware for attaching the bracket to the BlueBoat. The required tools and fasteners will depend on where and how you choose to mount it. See the Mounting the DWE exploreHD section of this guide for mounting options and recommended hardware.
Hardware Installation
The camera cable is installed through the starboard hatch lid. To do that, you’ll need:
- Camera with included bulkhead O-ring and C-nut
- 1 x JST to USB-A adapter (included with the camera)
- M10 Bulkhead Wrench or 16 mm wrench
- 2.5 mm hex key
- Silicone grease (Molykote 111)
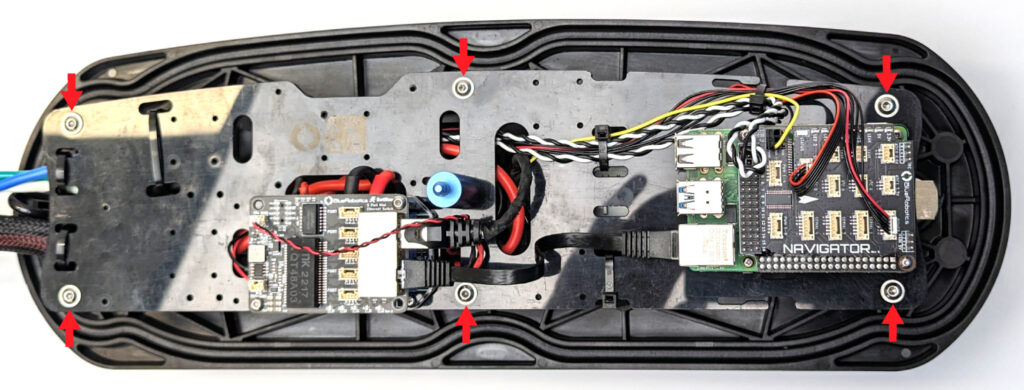
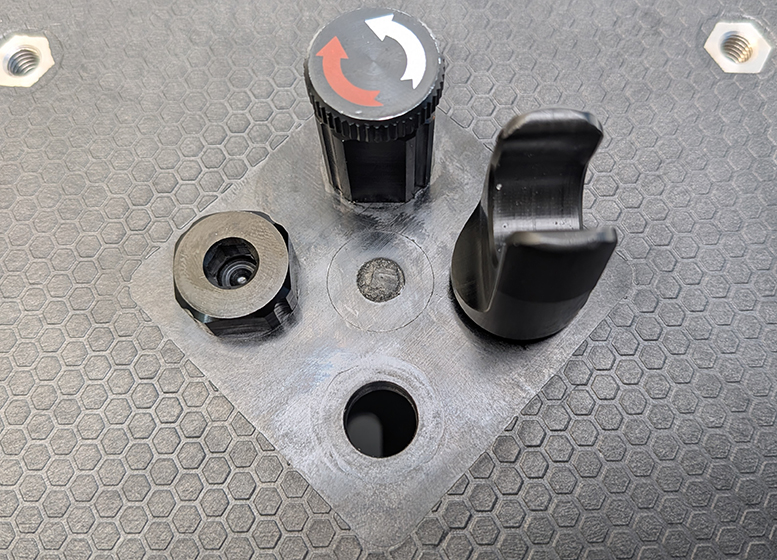
1. Make sure the BlueBoat is powered off and remove the starboard hatch lid assembly from the BlueBoat by disconnecting all cables.
2. Remove the cover from the starboard hatch lid assembly by unscrewing the thumb nut.
3. Use the 2.5 mm hex key to remove the six hex nuts from the electronics tray (on older boats these will be flange head screws). Move the electronics tray to the side but be careful not to pull on the wires too much.
4. Use the M10 Bulkhead Wrench or a 16 mm wrench to loosen the C-nut from one of the blank penetrators.

5. Apply a thin, even layer of silicone grease (Molykote 111) to the camera bulkhead O-ring and install it in the groove on the underside of the penetrator.
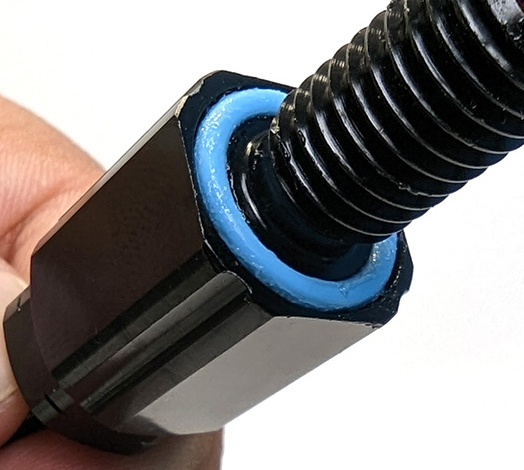
6. Install the camera bulkhead penetrator into the hole and fasten the C-nut on the opposite side. Tighten it by hand, then use the wrench to fully secure it.
On older BlueBoats, the hatch lids have recesses shaped to hold the bulkhead in place and prevent it from turning. In this case, make sure the bulkhead is fully seated in the recess, and only use the wrench to turn the C-nut—do not attempt to rotate the bulkhead itself.
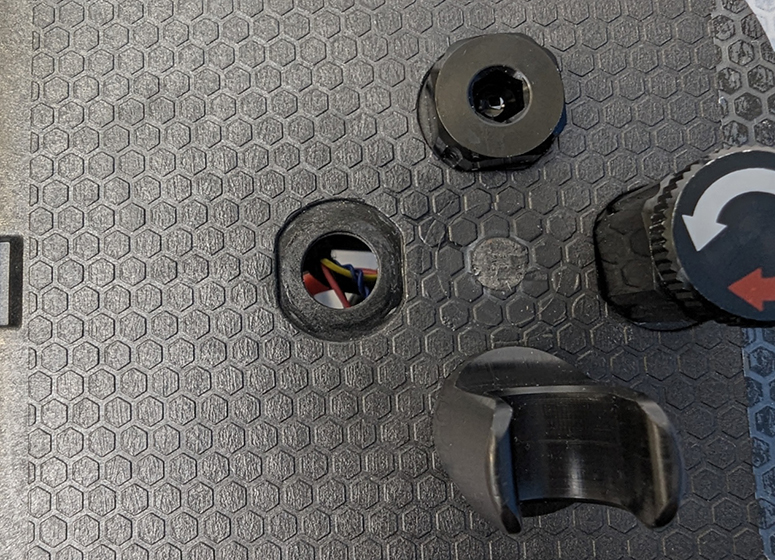
7. Mount the electronics tray back on the standoffs using the nuts or screws you removed earlier.
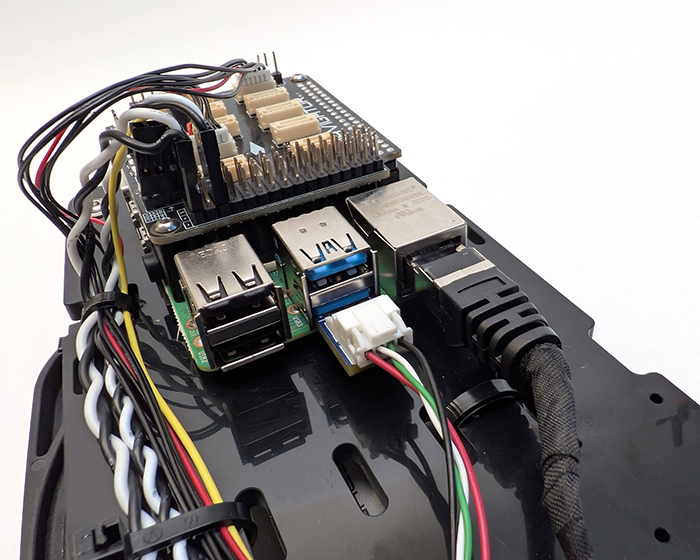
8. Connect the adapter to the JST connector at the end of the camera cable.
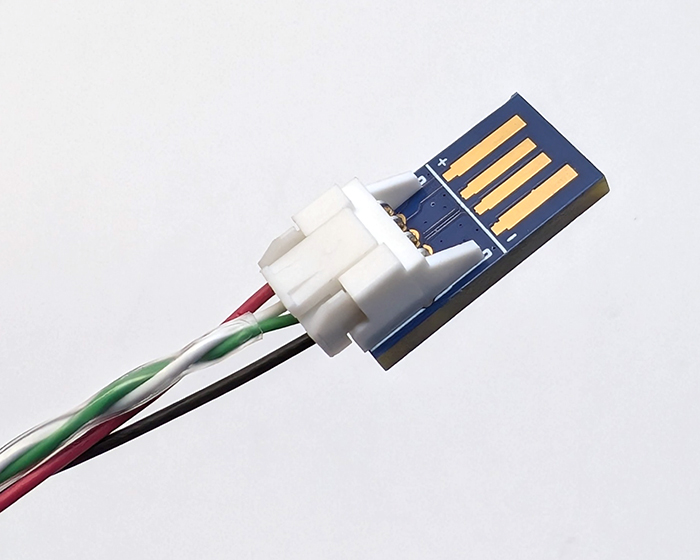
9. Plug in the cable with adapter into one of the Raspberry Pi’s USB ports.
10. That’s it! The hatch lid should now look like this:
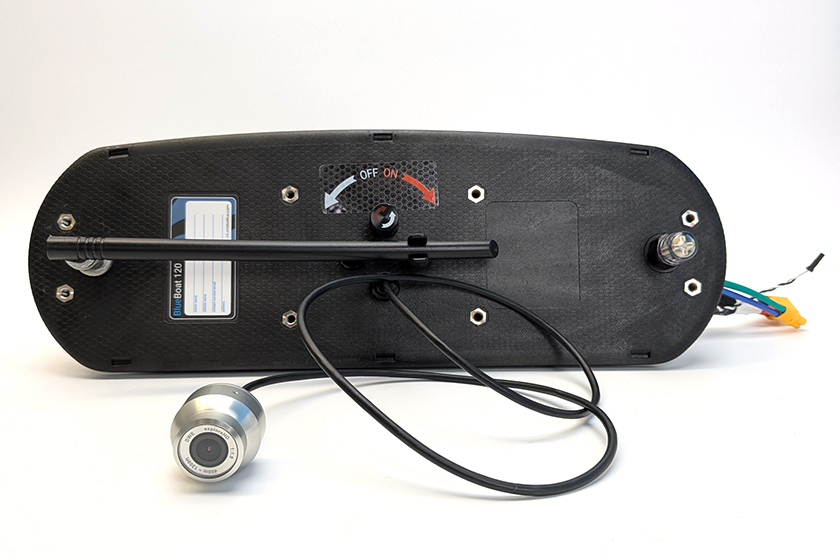
Put the cover back on the hatch lid assembly and reconnect all the cables.
Mounting the DWE exploreHD
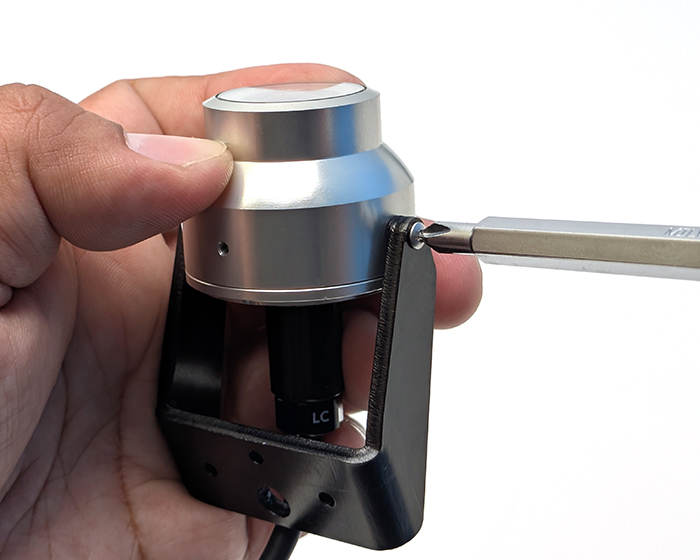
Install the camera in the bracket:
- Place the included plastic washers between the bracket and the camera.
- Use a #1 Phillips screwdriver and the two M2x6 mm screws to secure the camera to the bracket.
- The “exploreHD” text on the front of the camera indicates the upright orientation.
Choosing a Mounting Location
The BlueBoat has many locations where the camera can be mounted.
Using the M6 Mounting Holes
The top of the BlueBoat is peppered with M6x1.0 mounting holes.
- Use an M6x1.0x12 mm fastener to secure the camera bracket to these mounting points.

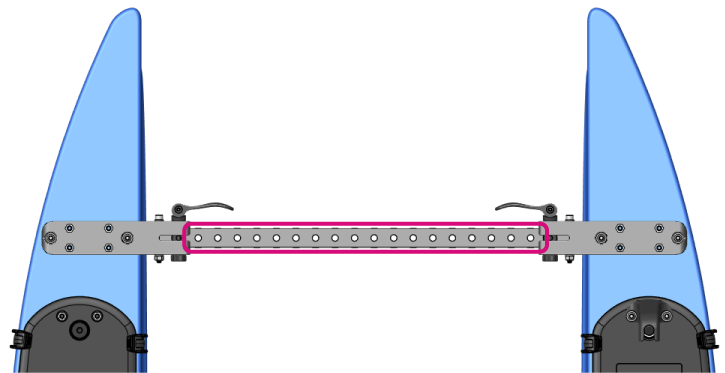
Using the Crossbars
The camera can be mounted anywhere on the crossbars.
- Install a plastic frame bushing (included with the BlueBoat) in the hole opposite the camera.
- Secure the bracket with an M6 nut and bolt.
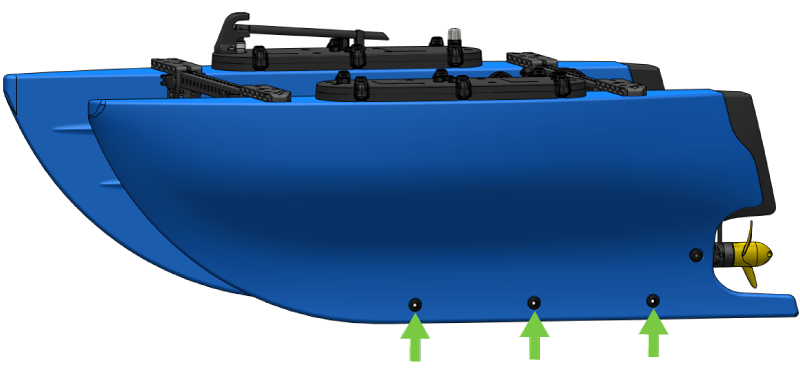
Using the Hull Mounting Points
The camera can be mounted below the waterline using the hull mounting holes
- Use these mounting holes together with hull mount bushings.
- Secure the bracket with an M6x1.0x20 mm bolt and nut.
Software Setup
BlueOS automatically handles setting up the video stream for the exploreHD, so software setup couldn’t be easier!
1. Power up your BlueBoat and BaseStation and connect it to your computer. If you don’t know how to do that, please check out the BlueBoat Software Setup guide first.
2. Open a web browser and go to 192.168.2.2 or blueos.local to access BlueOS (the BlueBoat’s operating system).
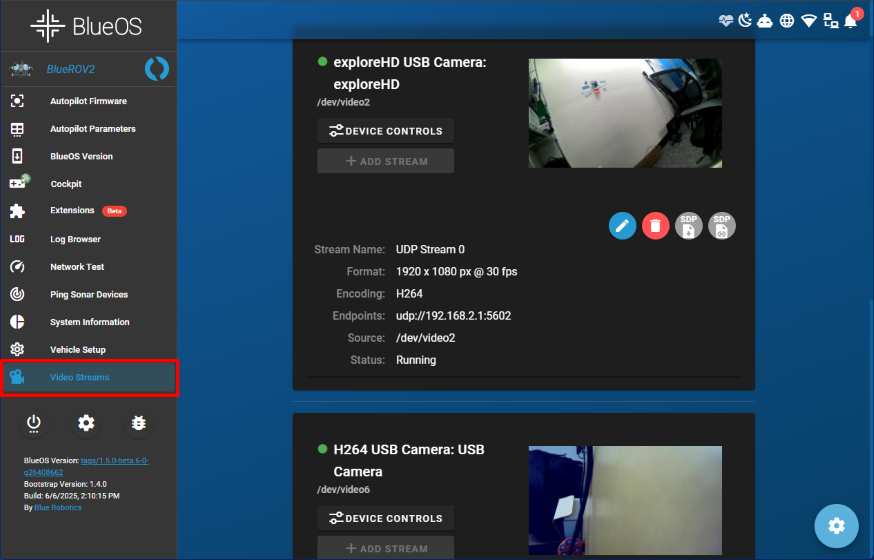
3. From the left sidebar, click Video Streams. You should see each connected exploreHD camera listed here. This means the camera streams are ready to view in Cockpit or QGroundControl!
If the camera doesn’t appear or the stream isn’t configured, follow the troubleshooting steps below:
- Make sure you are on the latest stable version of BlueOS. Follow these instructions to check for updates.
- Try a BlueOS soft restart or full reboot, then check the Video Streams page again.
- Click the gear icon in the bottom-right corner of the Video Streams page to reset video stream settings.
Viewing Additional Cameras in QGroundControl
QGroundControl doesn’t support picture-in-picture or simultaneous multi-camera viewing, but you can switch between available camera streams. To change the active video stream:
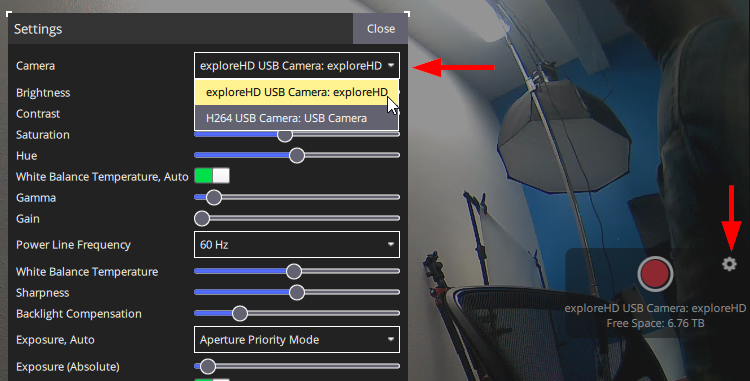
1. Click the gear icon next to the video recording tool.
2. In the video settings window, use the Camera dropdown to select the stream you want to view.
Viewing Additional Cameras in Cockpit
Cockpit lets you customize your layout however you like. Here’s how to add another camera view to your interface:
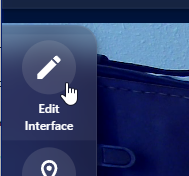
1. Open the main menu and select Edit Interface.
2. In the layout editor, go to regular widgets and scroll to find the Video Player widget. Drag and drop the widget into the display area.
- Move and resize the video widgets however you like to fit your layout.
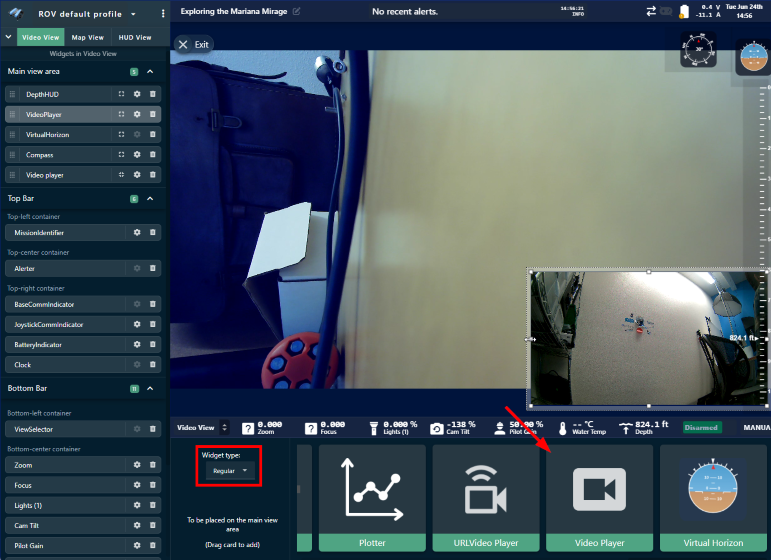
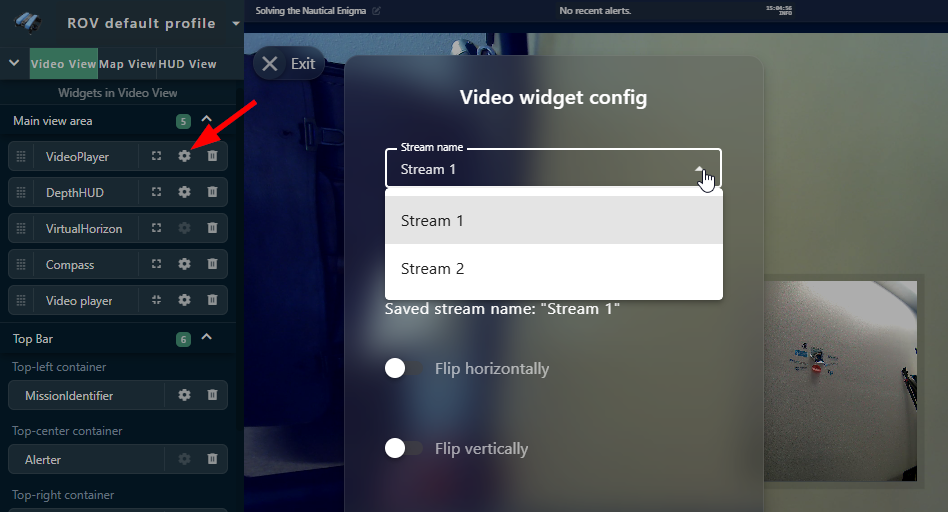
3. Click the gear icon on any video widget to choose which camera stream it displays.
Adjusting Bitrate and Advanced Settings
The bitrate for each DWE camera can be adjusted to suit your network. If you’re running multiple high-bandwidth devices, or you’re getting shorter than expected communication range, lowering the camera bitrate can help reduce overall bandwidth usage and prevent issues like video lag, stuttering, or connection instability. You can adjust the bitrate for each camera using the DWE OS extension in BlueOS.
1. Extensions support requires BlueOS version 1.1.0 or later. If your system is out of date, follow these instructions to update BlueOS then come back to this guide.
2. Go to the Extensions menu in BlueOS and install the DWE OS extension by DeepWater Exploration.
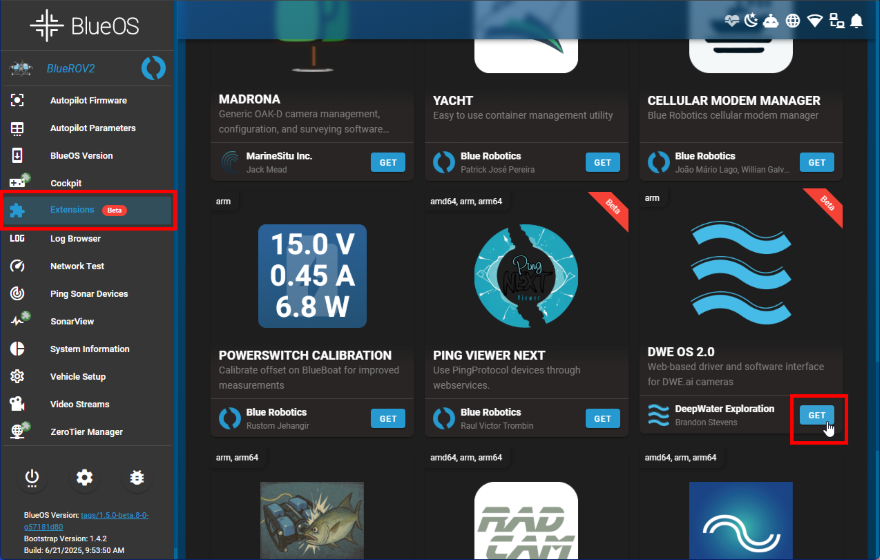
3. After the extension is installed, it will appear in the left sidebar. Click on it to launch it.
4. Expand the Camera Controls section and use the Bitrate slider to adjust the camera’s bitrate.
- Lowering the bitrate reduces data usage and overall bandwidth load, which can help if you’re seeing video lag or running multiple streams—but it also reduces image quality.
- Increasing the bitrate improves video clarity and detail but uses more bandwidth per stream, which can impact performance if your network is already busy.
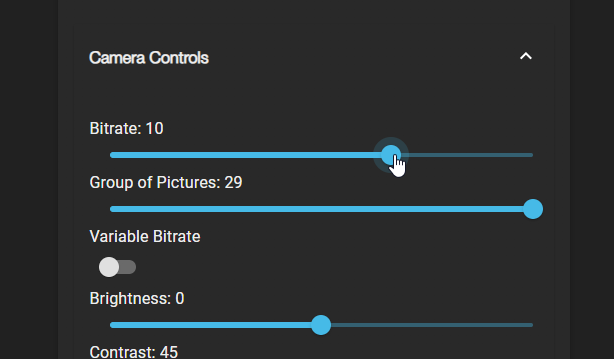
Adjust the bitrate to find a balance between image quality and system performance that works best for your setup.
The DWE OS extension also gives you access to advanced settings you can tweak for each camera.