
BlueROV2 Payload Skid Assembly
Introduction
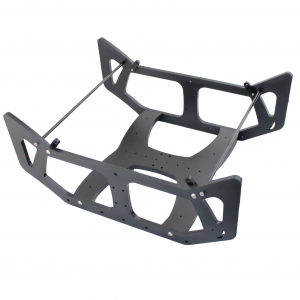
The Payload Skid is a modular frame for the BlueROV2 with mounting points for additional watertight enclosures, lights, and ballast weights. Use it to carry large payloads and expand functionality!
Parts and Tools
You Will Need
You will also need (not included):
- Medium-strength threadlocker such as Loctite 242 or 243
Usage
Assemble according to the below steps, and the Payload Skid will allow you to mount two additional Lumens, twelve additional ballast weights, and three additional 3″ watertight enclosures or one additional 4″ watertight enclosure. Note that you may have to add more than a few ballast weights to get your BlueROV2 back to neutral buoyancy if your additional watertight enclosures are mostly empty! The chart below suggests the approximate number of additional 200g ballast weights you will need to add to achieve this. They can be mounted in any combination on the BlueROV2 or Payload Skid as necessary.
| Suggested Additional Ballast Weights | |
|---|---|
| 1 x 3" Enclosure (12") | 4-6 |
| 3 x 3" Enclosure (12") | 14-16 |
| 1 x 4" Enclosure (12") | 10-12 |
Depending on the enclosure positions, you may also have to balance your BlueROV2 more towards being positively buoyant, rather than neutral. For example, three internally mounted 3″ watertight enclosures will partially block the vertical thrusters when surfacing, thus some additional positive buoyancy will make up for this. Mounting the watertight enclosures on the outside sides of the Payload Skid or only mounting one central watertight enclosure will not alter ROV performance significantly.
Assembly
Applying Threadlocker
Apply threadlocker on all screws that have metal-to-metal contact. To apply the threadlocker, apply one drop of threadlocker to the bottom of each screw then roll the screws around on a paper towel to evenly spread and remove excess threadlocker.

Attaching the Side Panels
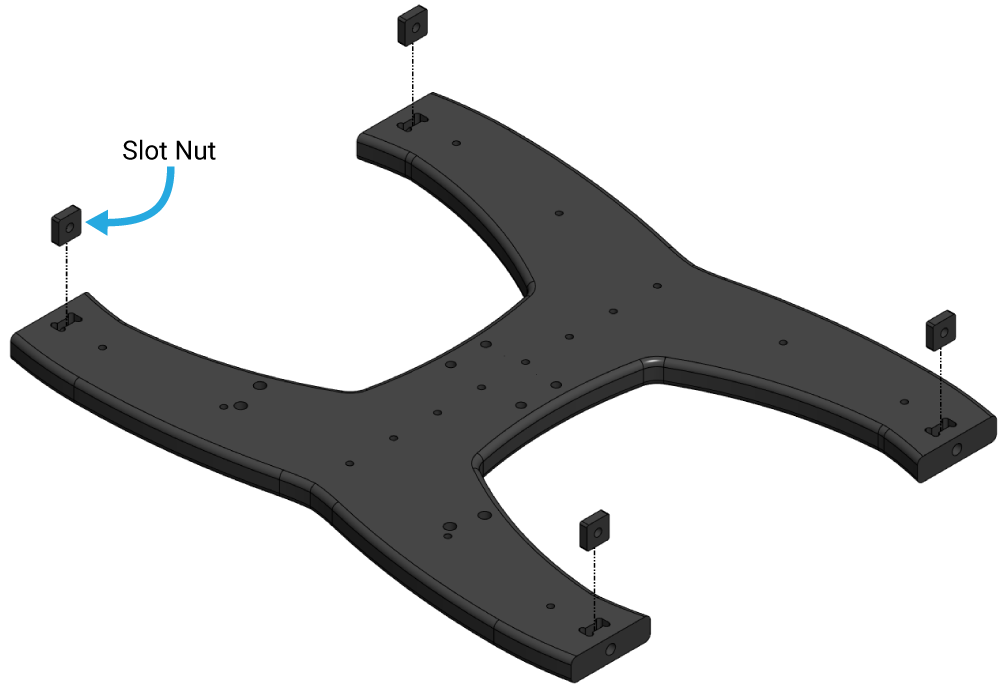
1. Insert the slot nuts in the bottom panel slot nut pockets.
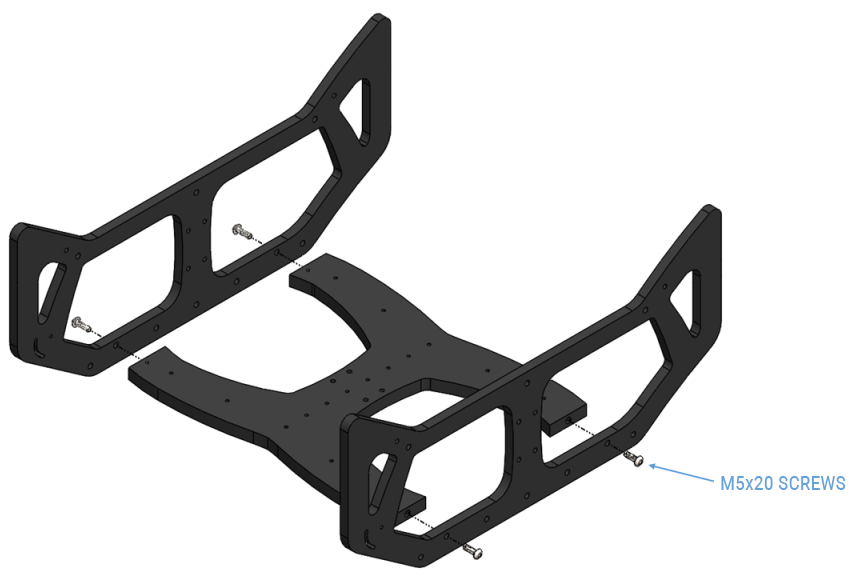
2. Use four M5x20 screws to attach the side panels to the bottom panel. Be sure to place the bottom panel counter-bore side down, and align the panels with the bottom, lumen mounting holes pointing forward.
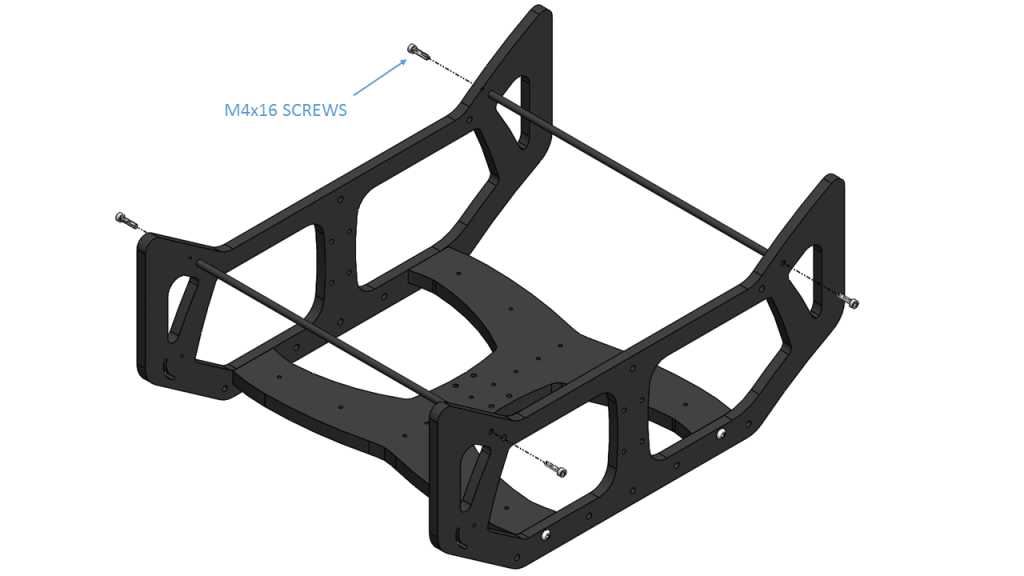
Attaching the Standoffs
Screw the standoffs between the tops of the side panels with four M4x16 screws. Note that these standoffs may be removed once the Payload Skid is mounted to a BlueROV2, but it is recommended to keep them on at all times for structural stability.
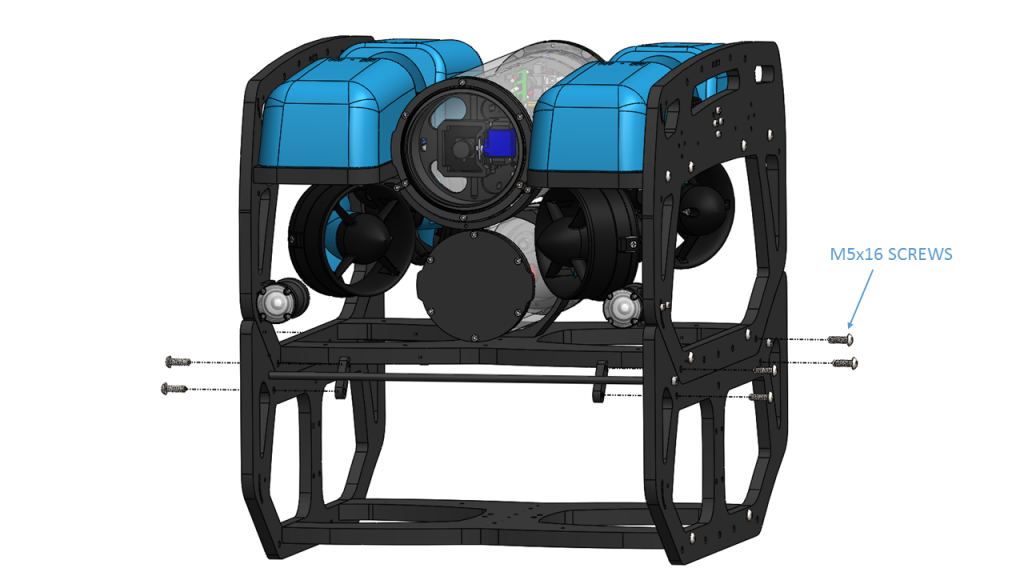
Securing to a BlueROV2
Place your BlueROV2 on top of the Payload Skid, and use the ROV side mounting holes as guides to attach the mounting clips in the proper orientation, using eight M5x16 screws.
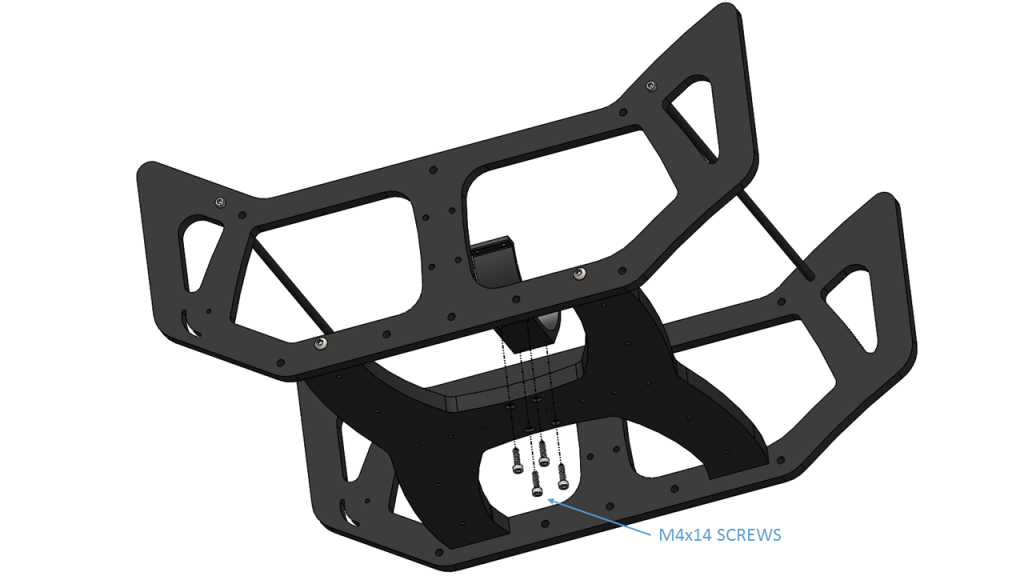
Attaching the Watertight Enclosure Clamps
Using four M4x14 screws, attach a 3″ or 4″ watertight enclosure clamp to top of the bottom panel. Using thread-locker is recommended.
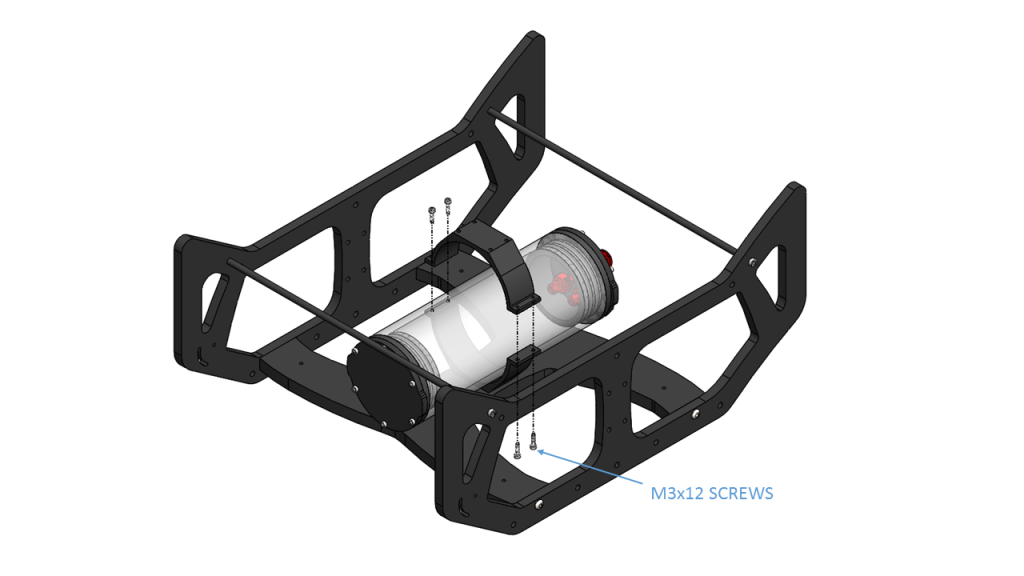
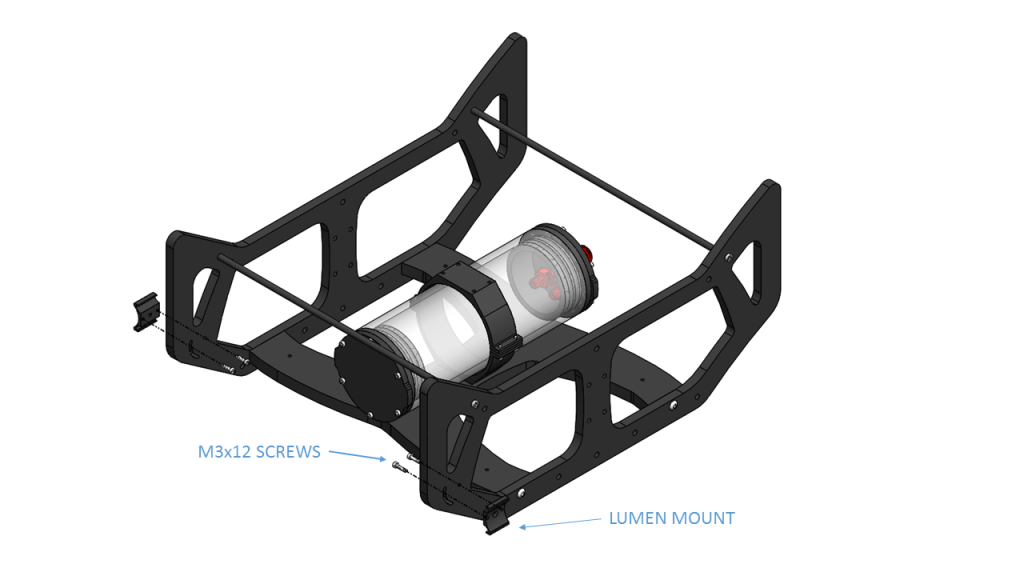
Securing the Watertight Enclosure
Using four M3x12 screws, clamp your 3″ or 4″ watertight enclosure into place with the other clamp. Install all four screws loosely at first and then slowly tighten them on both sides evenly. Keep the enclosure approximately centered in the clamps. Using thread-locker is recommended, but ensure that NO threadlocker comes into contact with acrylic tubes. Repeat steps 4 and 5 if you are mounting additional watertight enclosures to the side panels, note that you will only be able to mount three enclosures on the inside of the Payload Skid if they are all 3″ models.
Installing Additional Lights
Two additional Lumens can be mounted to the front of the payload skid using the provided mounting holes and two M3x12 screws.
Removing from the ROV
The Payload Skid can be separated from the BlueROV2 by removing the four ROV side M5x16 mounting clip screws, and lifting the BlueROV2 off the Payload Skid. The Payload Skid side mounting clip screws can be left in place.
