Viewing Celsius Temperature Sensor Readings on an ArduSub Vehicle
Introduction
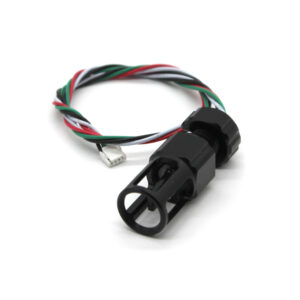
The Celsius Fast-Response, ±0.1°C Temperature Sensor (I2C) is a high-accuracy, fast-response temperature sensor comes sealed and ready to use for temperature profiling, lab measurements, and more! It can be installed on an ArduSub vehicle (such as a BlueROV2) as another sensor in addition to a mandatory pressure sensor (such as a Bar30) for depth measurements with an I2C bus splitter board.
Parts and Tools
You Will Need
Wiring Connections
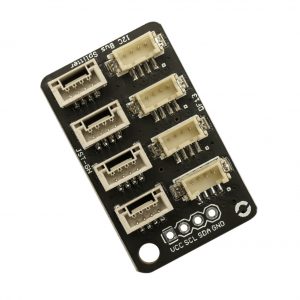
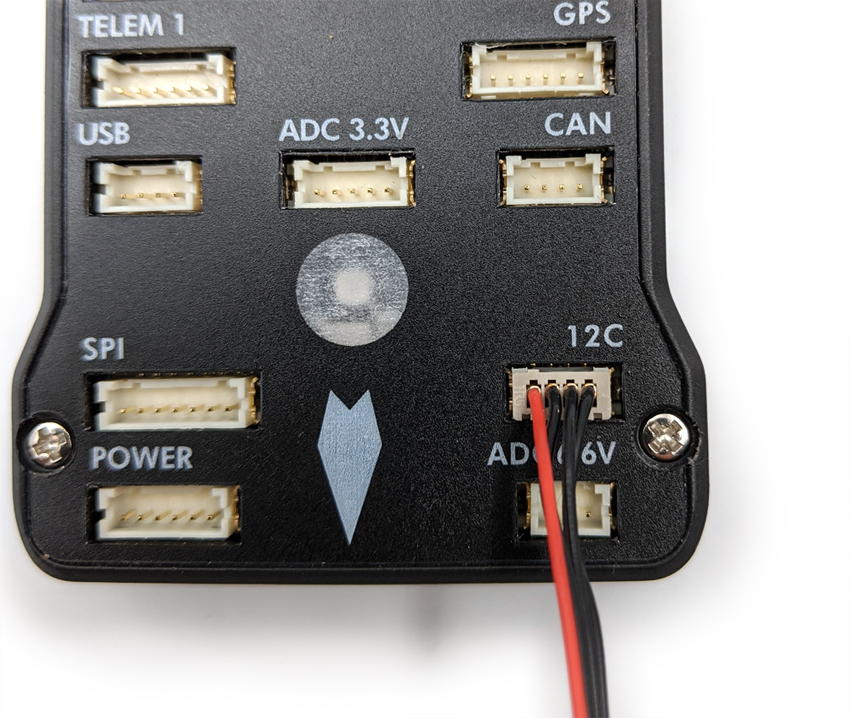
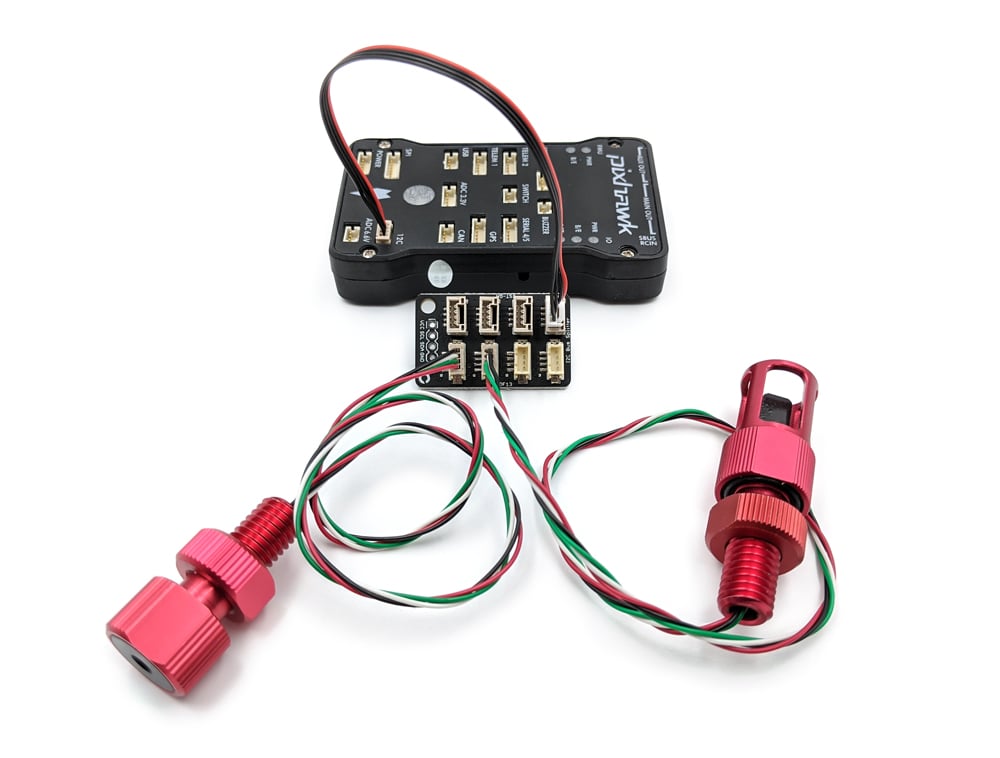
1. The I2C Bus Splitter cable has a DF13 connector on one end and a JST-GH on the other. Connect the DF13 end to the I2C port on the Pixhawk.
2. Connect the other end of the cable to a JST-GH port on the bus splitter. Connect the Bar30 and Celsius Sensors to any two open DF13 ports on the splitter.
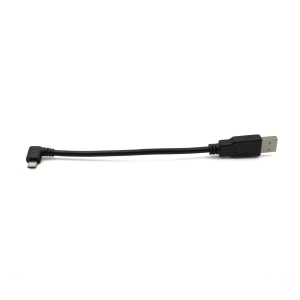
3. Connect the micro-USB to the Pixhawk and then plug it into a USB port on a computer with QGroundControl. Download instructions for the version supported by Blue Robotics can be found here: BlueROV2 Software Setup Guide
4. If purchased from Blue Robotics the Pixhawk should already have the latest version of ArduSub installed. If not, please follow this guide to load the latest STABLE version of ArduSub: QGroundControl – Loading Firmware
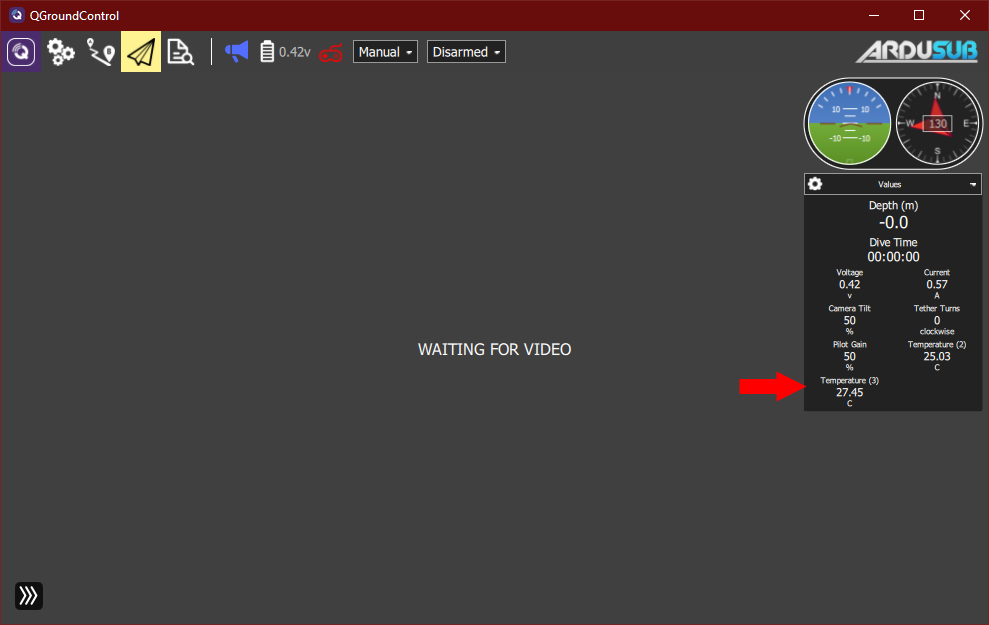
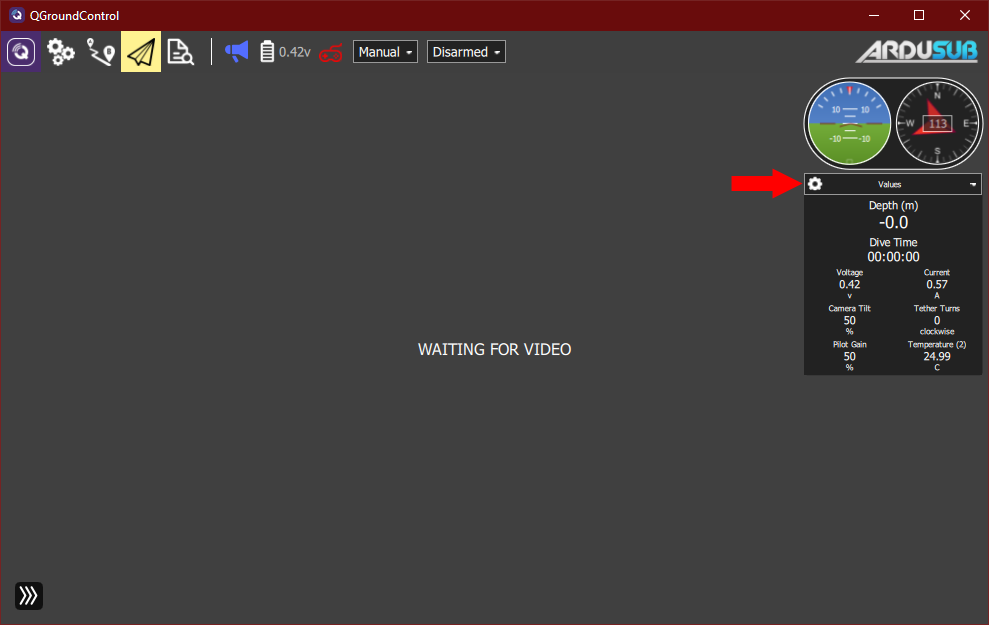
Displaying Values in the Instrument Panel
SCALED_PRESSURE3 MAVLink message.1. Click on the “gear” icon in the Instrument panel.
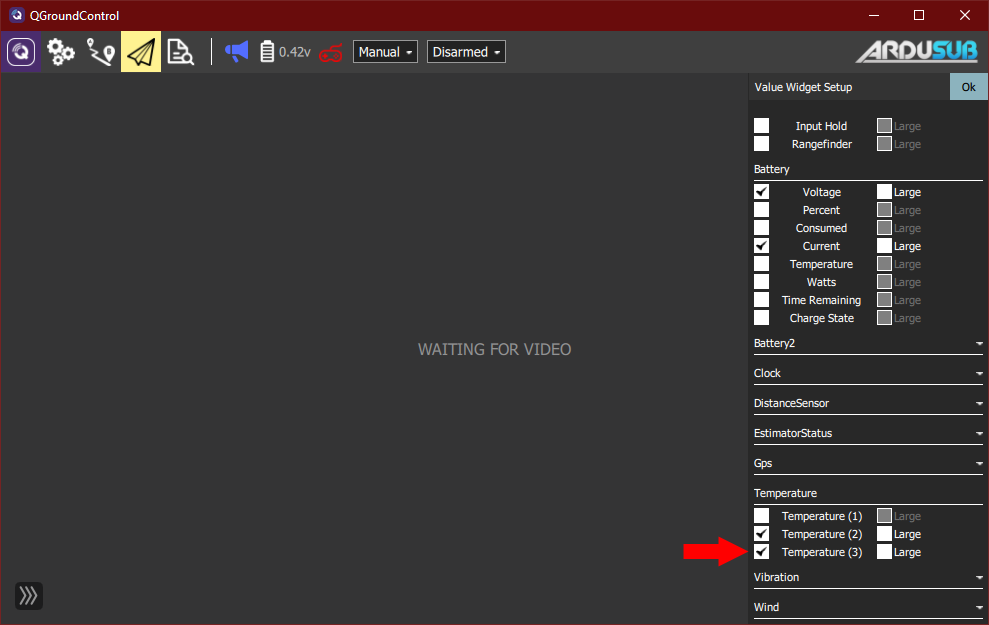
2. Scroll down the list and expand the “Temperature” section, click on the checkbox for “Temperature (3)” value. Optionally, you may check the “Large” option to make the indicated value larger than the standard size.
3. Click on the “OK” box in the upper right hand corner of the values selection to accept changes and return to the instrument panel. The high-resolution water temperature should now be displayed as live values to be viewed during vehicle dives.