
SOS Leak Sensor Installation
Introduction
The SOS Leak Sensor can detect water leaking into an improperly sealed Watertight Enclosure quickly and reliably, before any major damage can occur!
Installation
General
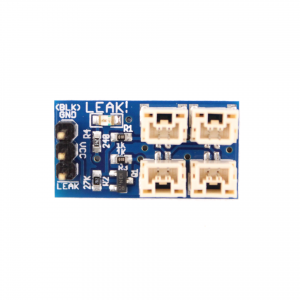
- Cut to size and use the included double sided foam tape to secure the SOS Leak Sensor board inside your vehicle’s watertight enclosure.
- Connect the 3 pin extension cable to the SOS Leak Sensor board and your microcontroller or computer.
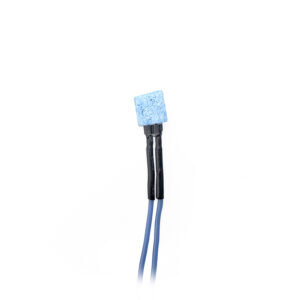
- After prepping the surface with alcohol, stick the blue SOS Leak Sensor probes in strategic locations throughout your vehicle’s watertight enclosure, or secure them with a small zip tie.
- Plug the white JST-GH ends of the probes into the SOS Leak Sensor board in any combination.
On the BlueROV2
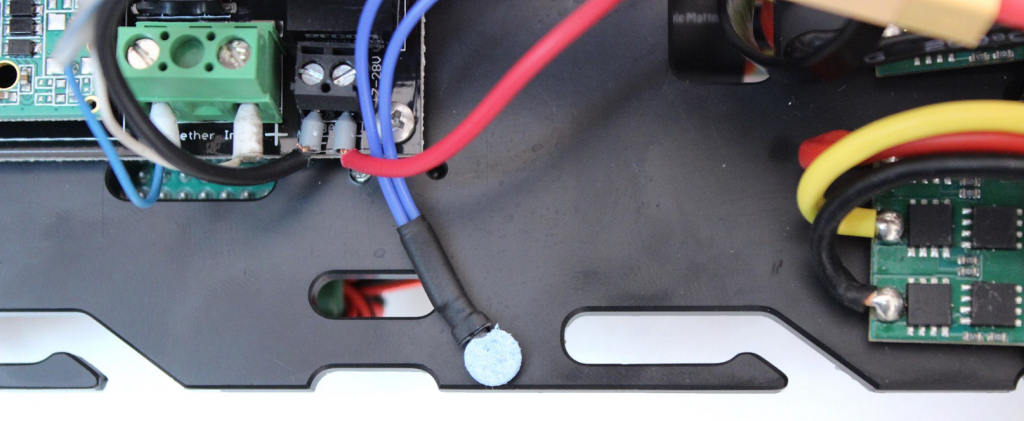
1. Cut to size and use the included double sided foam tape to secure the SOS Leak Sensor board in a convenient location on your BlueROV2 electronics tray. We like to put it behind the tether interface board or Pixhawk.
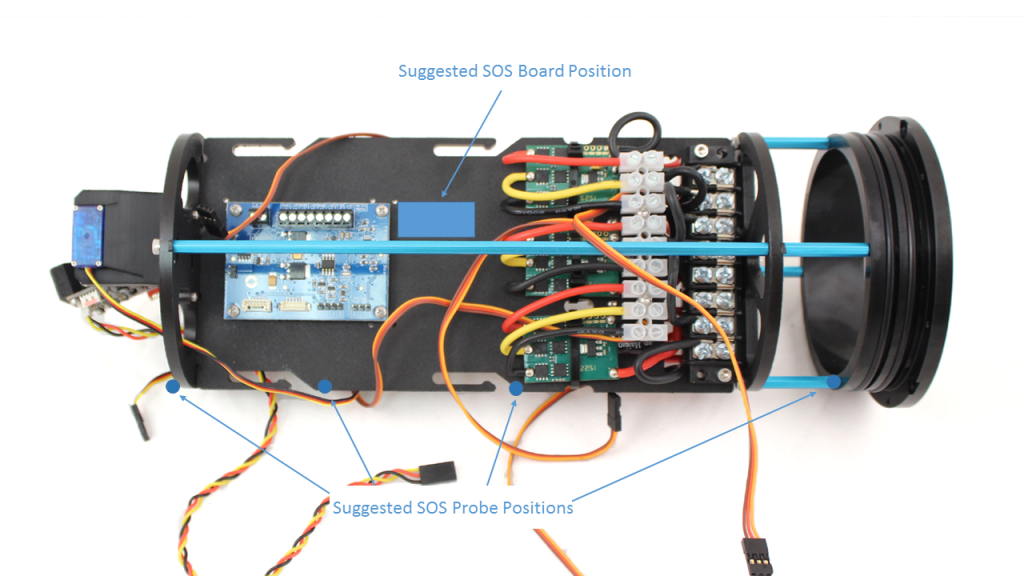
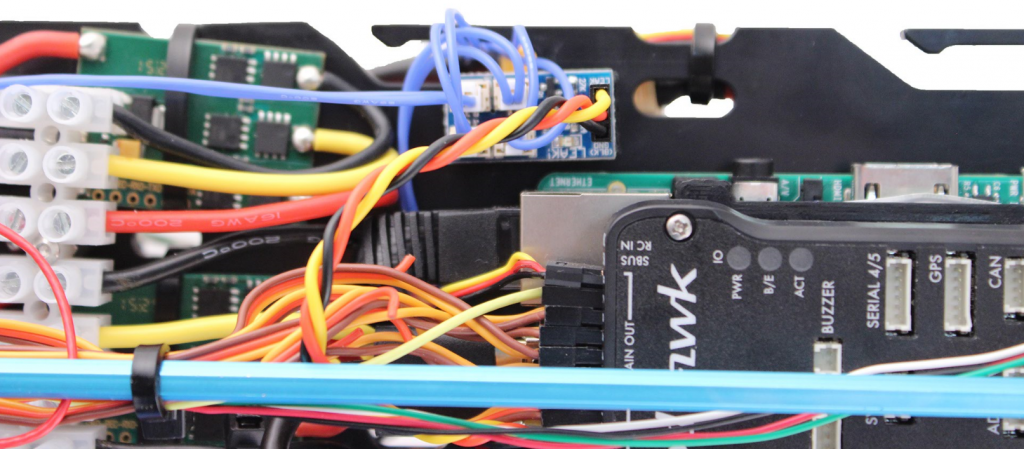
2. Connect the 3 pin extension cable to the SOS Leak Sensor board and Pixhawk port AUX OUT 6, taking care to plug the cable in the right orientation with ground (black) facing the Pixhawk top.
3. Prep mounting surfaces with some isopropyl alcohol, then peel off the backing and stick the blue SOS Leak Sensor probes in strategic locations (like the penentrators, flange seals, etc.) throughout your BlueROV2 electronics watertight enclosure, or secure them with a small zip tie. Be sure to place at least one probe at the bottom of the watertight enclosure, where leaking water is likely to collect.
4. Plug the white JST-GH ends of the probes into the SOS Leak Sensor board in any combination.
ArduSub Software Setup
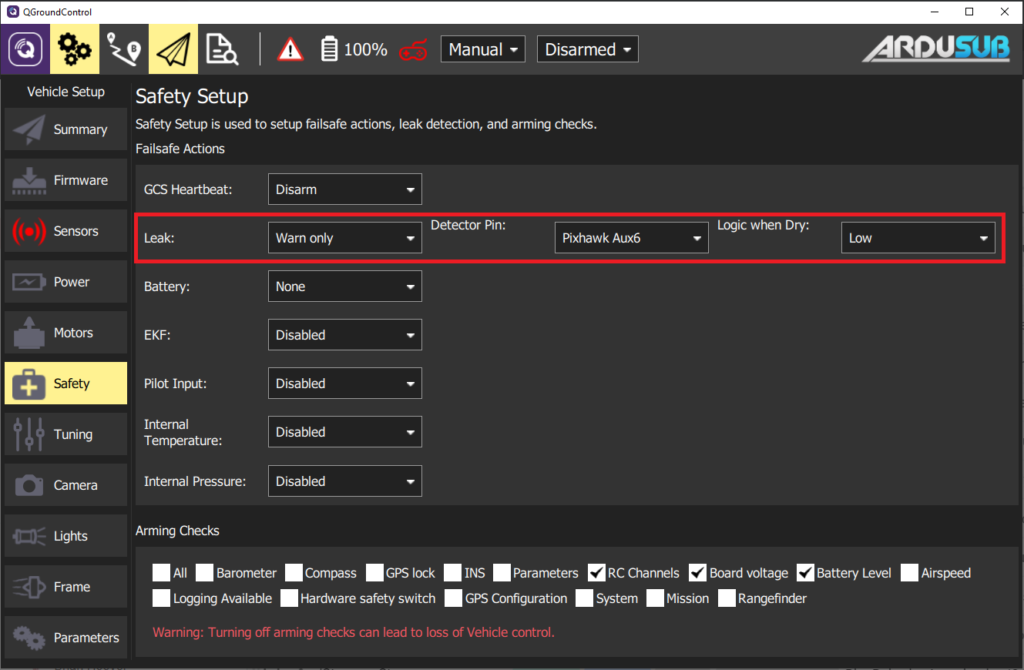
1. In the Safety tab of the QGroundControl Vehicle Setup page, select the Leak Failsafe Action from the dropdown menu:
- Disabled – The leak sensor is disabled.
- Warn Only (Suggested) – QGroundControl will announce an audible warning when a leak is detected.
- Enter Surface Mode – If the ROV is armed when a leak is detected, it will automatically return to the surface. A depth sensor is required for this functionality. Once activated, a surface maneuver can be aborted by switching to a different mode.
2. Select “Pixhawk Aux6” as the leak detector pin, and set the Logic when dry to “Low.”
After a Leak
After a leak event, flatten and let the probes dry completely before re-using them. The probe tips have a limited number of uses however, and after a time the sponge will begin to degrade and must be replaced.
Probe Tip Replacement
When a probe tip is worn and can no longer reliably function, replace the tip by pulling off the old one, and pushing on a new one. We use liquid electrical tape to secure the sponge to the probe, but urethane, rubber cement, CA glue, and even white Elmer’s glue will work as well.
Arduino Example
This example will work on any Arduino board that can provide 5v or 3.3v power and has a free digital pin.
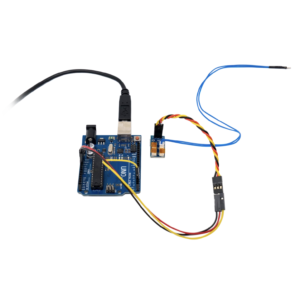
SOS Leak Sensor with an Arduino
If you’ve never used Arduino before, we suggest checking out some tutorials!