
Control the NavLight with Arduino code
Introduction
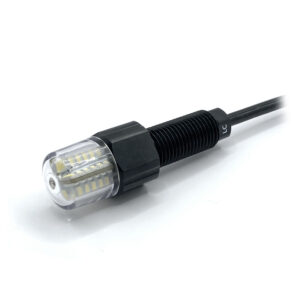
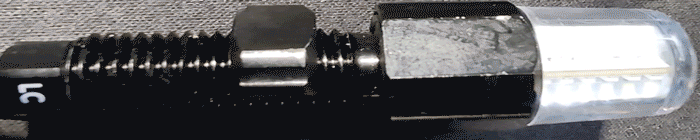
This guide will show you how to use Arduino code to control the NavLight. The NavLight has three wires, and the signal wire acts as an electronic switch. Unlike our Lumen Light the NavLight does not support control via a servo-style PWM signal, so control is either on/off, or linear brightness corresponding to a PWM duty cycle. The red & black wires connect to positive voltage and ground, with the yellow wire connected to the control signal. When the signal wire is connected to ground, the light will turn off.
Parts and Tools
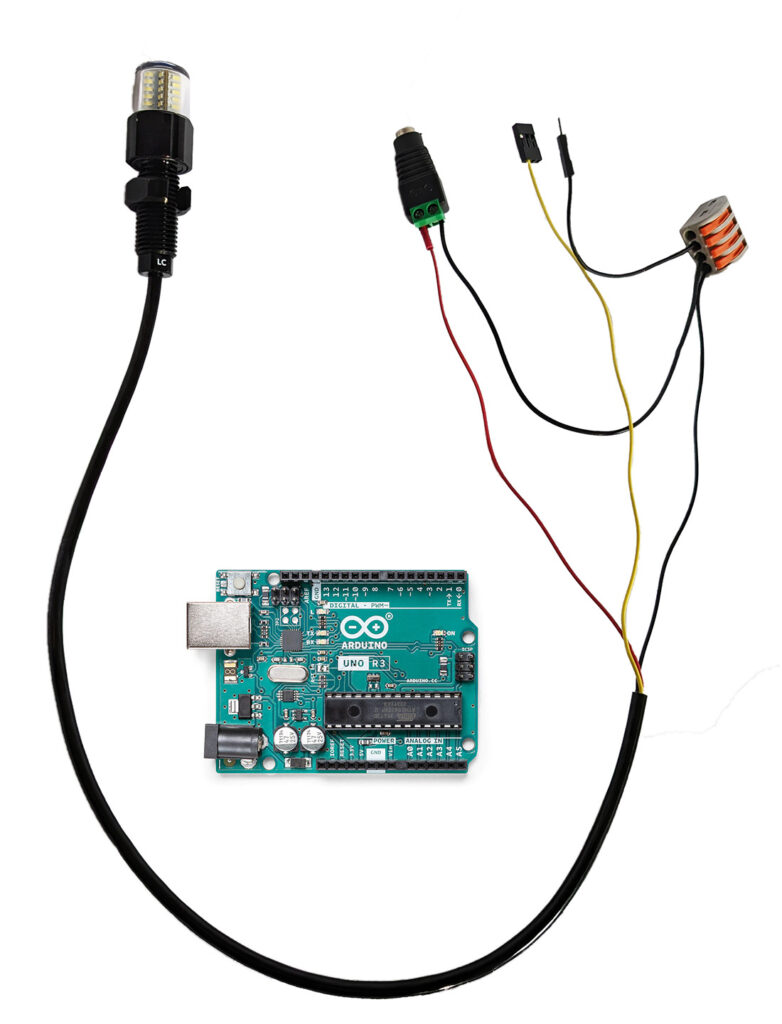
Main components used in this guide.
You Will Need
You will also need:
- Arduino Microcontroller (This tutorial uses an Arduino Uno)
- 1 x USB A to B cable (for connecting the Arduino to a computer)
- 2 x male to male Jumper Wires
- 1 x 1×3 Wire connection (for connecting three ground wires)
- Battery or Power Source for NavLight (maximum voltage rating of 12V DC)
- Laptop or computer with Arduino IDE
Wire Connections
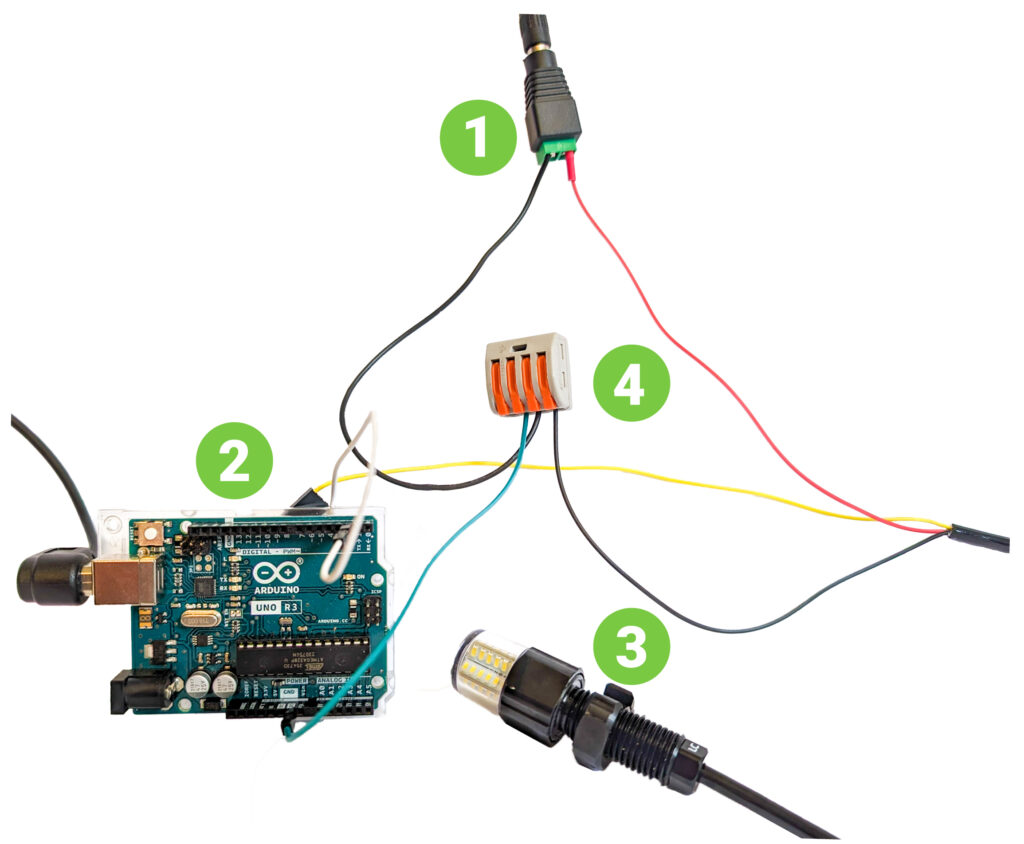
Wire connections to NavLight and Arduino.
| # | Component |
|---|---|
| 1 | DC Power Supply |
| 2 | Arduino Uno |
| 3 | NavLight |
| 4 | 3 wire connector for ground connection |
1. Connect the red wire to voltage in the range from +5 to +12V.
2. Connect the black wire to GND, as well as to a GND terminal of the microcontroller. When you first connect power, the light will turn on.
3. Verify connections are good by connecting the yellow wire to GND, the light will then turn off.
4. Now connect the signal wire to the GPIO pin (#2) used for control. You’re now ready to upload code and test!
Using the Code Examples
Simple Example
1. Connect the Arduino to the computer with the USB cable.
2. Copy the code from the example sketch into a new sketch in the Arduino IDE.
// LED connected to digital pin 2
const uint8_t ledPin = 2;

// The setup function runs once when you press reset or power the board
void setup() {
  // Initialize the digital pin as an output.
  pinMode(ledPin, OUTPUT);
}

// The loop function runs over and over again forever
void loop() {
  digitalWrite(ledPin, HIGH);  // Turn the LED on (tie the signal to max output voltage)
  delay(3000);                 // Wait for 3 seconds (3000 milliseconds)
  digitalWrite(ledPin, LOW);   // Turn the LED off (Tie signal to GND)
  delay(2000);                 // Wait for 2 seconds
}
3. Upload the sketch to the Arduino. The light should begin to blink after a few seconds.
Advanced Example
Some applications may benefit from controlling the light without blocking the execution of other code with the delay() function. One way to do this is given in this second code example:
// LED connected to digital pin 2
const uint8_t ledPin = 2;

// Time intervals for LED states
unsigned long onTime = 5000;  // On for 3 seconds
unsigned long offTime = 2000; // Off for 2 seconds

// Tracks the last time the LED state was changed
unsigned long lastChangeTime = 0;

// Initial LED state
bool ledState = LOW;

void setup() {
  pinMode(ledPin, OUTPUT);
}

void loop() {
  unsigned long currentTime = millis();
  // If the LED is off and it's been fof for longer than offTime, turn it on
  if (ledState == LOW && currentTime - lastChangeTime >= offTime) {
    ledState = HIGH; // Turn on the LED
    lastChangeTime = currentTime; // Remember the time
  }
  // If the LED is on and it's been on for longer than onTime, turn it off
  else if (ledState == HIGH && currentTime - lastChangeTime >= onTime) {
    ledState = LOW; // Turn off the LED
    lastChangeTime = currentTime; // Remember the time
  }
  digitalWrite(ledPin, ledState);
}
It’s possible to control the light intensity via PWM and the analogWrite function. This is only available on certain pins, so for this example the control signal is connected to pin 3.
// LED connected to digital pin capable of PWM (e.g., 3, 5, 6, 9, 10, or 11 on most Arduino boards)
const uint8_t ledPin = 3;  // Change this to a PWM-capable pin

// Constants for the breathing effect
const int fadeAmount = 5; // Amount to fade the LED by
const int fadeInterval = 100; // Interval in milliseconds for each fade step

// Tracks the current brightness
int brightness = 0;

// Tracks whether we're fading in or out
bool fadingIn = true;

void setup() {
  pinMode(ledPin, OUTPUT);
}

void loop() {
  // Set the brightness of the pin
  analogWrite(ledPin, brightness);

  // Change the brightness for next time through the loop
  brightness = brightness + (fadingIn ? fadeAmount : -fadeAmount);

  // Reverse the direction of the fading at the ends of the fade:
  if (brightness <= 0 || brightness >= 255) {
    fadingIn = !fadingIn;
  }

  // Wait for fadeInterval milliseconds before changing the brightness again
  delay(fadeInterval);
}
Troubleshooting
- The NavLight doesn’t come on when connected to power
- Check that yellow signal wire is not connected to ground, and for proper polarity of the power+ground wires.
- The NavLight does not turn off when signal wire connected to ground, but it is flickering.
- Verify wiring continuity – ground of power supply must have good connection to ground of Arduino.
- The NavLight does not blink when connected to Arduino running example code
- Verify pin # used in code matches connection to Arduino. Also check Arduino ground is connected to the NavLight power supply ground.
What did you think of this guide? Can we improve it? Let us know here!