
Using a Handheld PC to Control the BlueROV2
Handheld PCs have exploded in popularity recently, and there are now dozens of options to choose from. Their high performance, portability, and built-in controllers make them an excellent alternative to a traditional laptop setup for operating an ROV, especially in the field where a full size laptop may not be convenient.
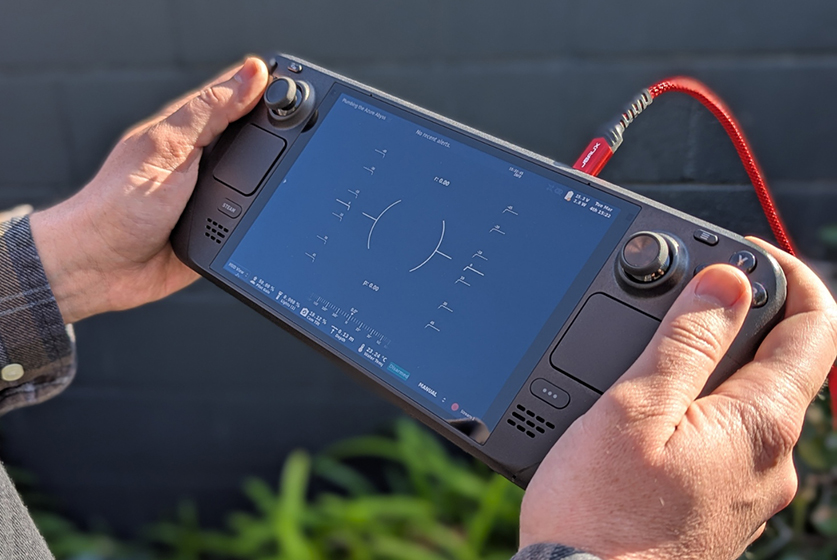
Steam Deck running Cockpit.
For this guide, we’ve tested and selected two of our favorite handheld PCs, the Steam Deck and the Lenovo Legion GO, and will walk you through how to use them to control the BlueROV2.
The Steam Deck vs The Lenovo Legion Go
The two systems we chose are the Steam Deck and the Lenovo Legion Go. Both work great with the BlueROV2 and have their advantages.
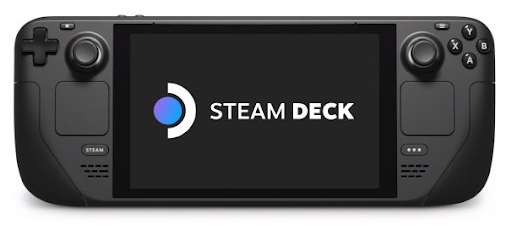
The Steam Deck
The Steam Deck is a Linux-based handheld PC first released in 2022, with an updated OLED version released in 2023.
Why we like it
- It’s relatively affordable. The original LCD version Steam Deck can currently still be purchased for $399 USD, making it a great budget-friendly option.
- It’s light and comfortable to hold. The Steam Deck is surprisingly lightweight in the hands, which becomes important if you are operating an ROV for several hours. Its ergonomics also make it very easy to hold securely. It never feels like it might take a tumble into the depths while pushing buttons, operating the ROV, or interacting with the software.
- It has good battery life. We were able to consistently get several hours of mission time with a single charge.
Why you might not like it
- It runs SteamOS. SteamOS is a Linux-based operating system, which may be unfamiliar territory if you have only used Windows or Mac systems. You’ll also want to make sure any of your frequently used 3rd party software is compatible.
- It’s not simple to install QGroundControl. This shouldn’t matter much because we can use Cockpit, but those users who are partial to QGC should know.
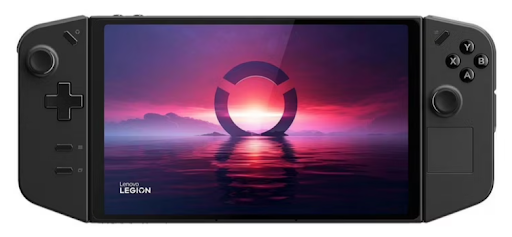
The Lenovo Legion Go
The Lenovo Legion Go is a handheld PC running Windows 11, it was first released late 2023.
Why we like it
- It has a large screen. One of the biggest sacrifices when using a handheld PC is screen real estate, so we chose the Legion Go because it has one of the largest screen sizes compared to other handhelds.
- It runs Windows. The Legion Go runs a full desktop version of Windows, so using it is exactly the same as a regular Windows computer. It’s familiar and all your favorite Windows software is compatible.
Why you might not like it
- It’s pretty big and heavy. Its weight becomes noticeable during long ROV operations, and its size makes it feel a bit unwieldy at times. Thankfully, it has a built-in kickstand so it can be set down while staying upright.
- Its battery life is not great. The large screen and great performance do not come without its price, and battery life takes a hit in this case. You’ll want to have an external power source for long missions.
Setting Up the Steam Deck
This section will go over setting up the Steam Deck for use with the BlueROV2. If you are setting up a Windows-based handheld, skip to this section below.
For this set up you will need:
- The Fathom-X Tether Interface (FXTI) from the BlueROV2 kit.
- A long USB B to USB C cable to connect the FXTI to the Steam Deck. You can use a USB A to C adapter to connect the FXTI using its included cable for initial setup, but you’ll want to use a longer cable (around 1.5 meters or more) during use in the field for freedom of movement.
Initial Setup
The first time you boot up a Steam Deck, it will take you through the process of connecting to Wi-Fi and logging into a Steam account. If you don’t already have a Steam account, you can sign up for one for free. We recommend using a Steam account as it makes using the Steam Deck easier, and gives you access to the on screen keyboard, which we’ll need during setup.
If you don’t want to use a Steam account you will need to install a keyboard utility, which we’ll show how to do later, or you can always plug in a USB keyboard instead.
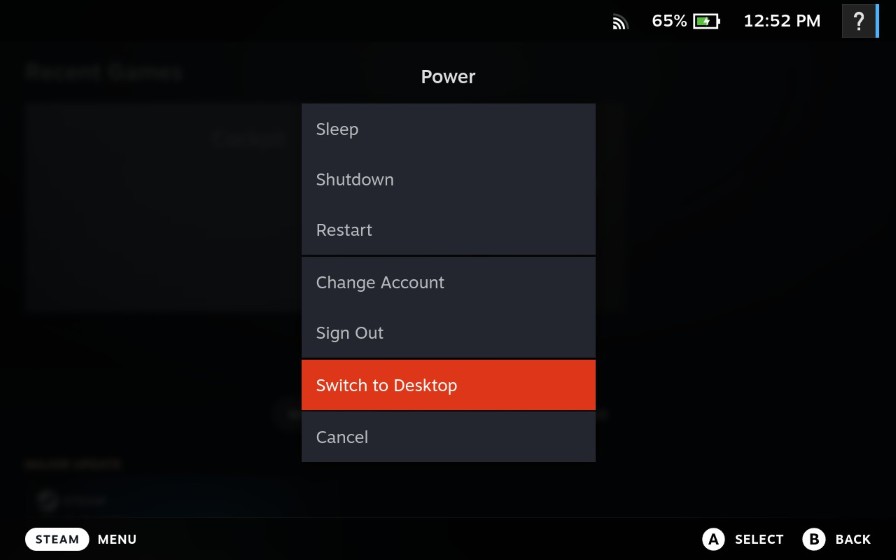
Once you finish Steam’s initial setup and are logged in, access the Power menu by pressing the STEAM button (the long button that says “STEAM” at the lower left side of the Steam Deck). In the Power menu, select Switch to Desktop to go to desktop mode.
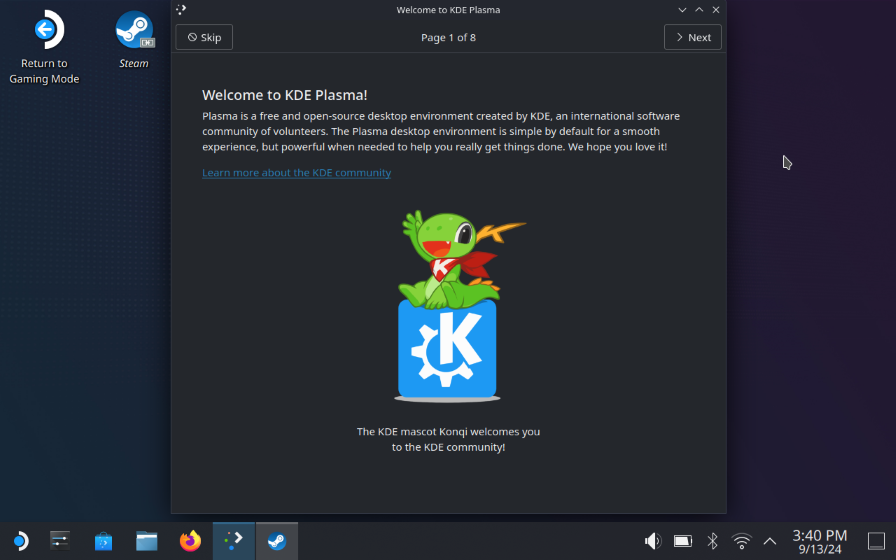
In desktop mode, you may be greeted with this welcome message, either take the KDE tour or close the window, it’s not important for our purposes.
Installing an Onscreen Keyboard
If you chose not to use a Steam account you’ll need to install an onscreen keyboard utility. If you are using a Steam account then you can just use the keyboard that’s already installed and skip this section. If you have a USB keyboard available you can also use that instead during setup.
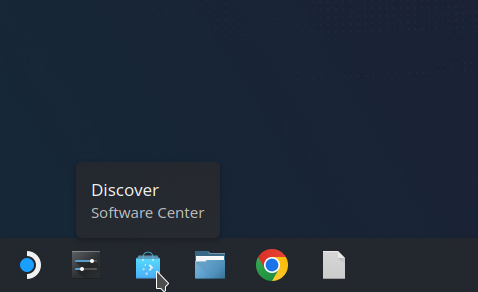
1. In desktop mode, open the Discover application from the bottom left of the screen. Discover is used to search, install, and manage applications on your Steam Deck.
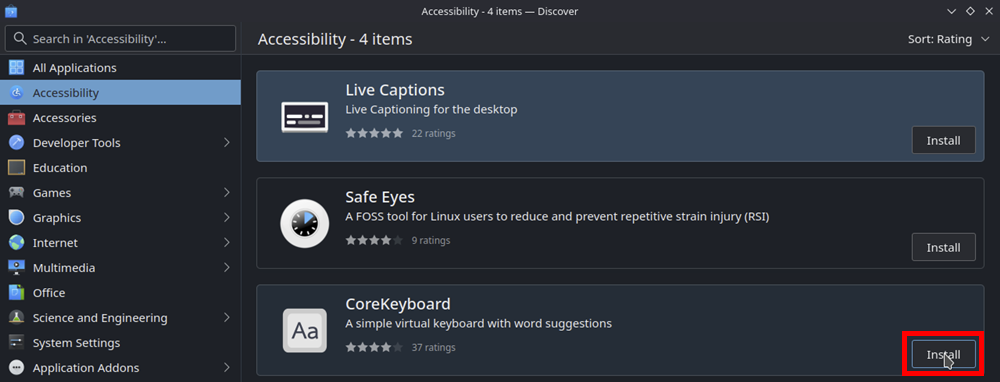
2. From the left sidebar, click on the Accessibility tab. Find the CoreKeyboard app and click on Install to install it.
Network Setup
The Steam Deck needs to be configured with the static IP address 192.168.2.1 to communicate with the BlueROV2.
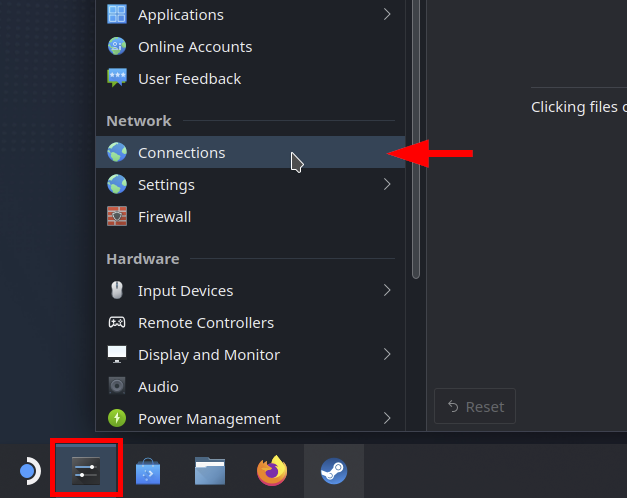
1. In desktop mode, open System Settings from the bottom left then select Connections from the left sidebar.
While on the Connections screen, plug in the USB cable from the FXTI into the USB C port at the top of the Steam Deck. You will see Wired connection 1 attempt to connect.
2. Click on Wired connection 1, then the IPv4 tab. Change the Method: dropdown to Manual then click + Add. This will add a line to the address table.
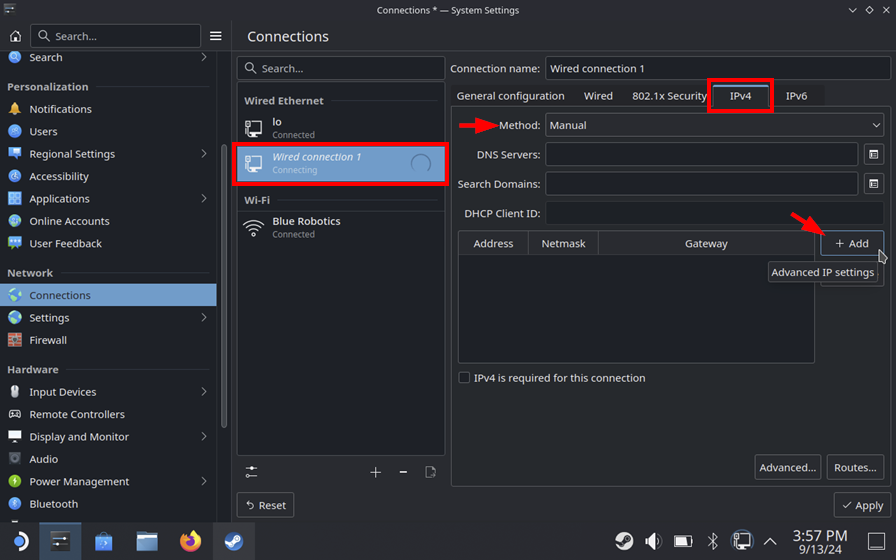
3. Put the cursor in the field under the Address column and bring up the onscreen keyboard by pressing STEAM + X (the Steam button and the X button at the same time). If you don’t have access to the Steam keyboard, you need to use the CoreKeyboard app you installed earlier, or a wired keyboard.
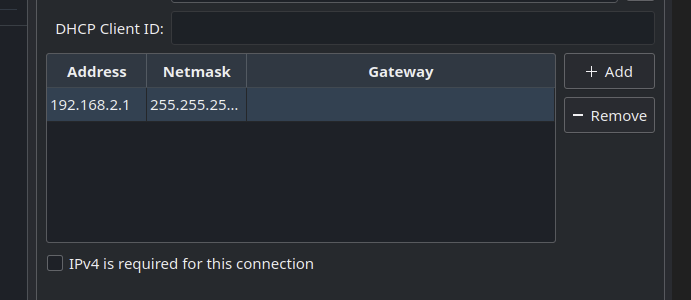
4. Enter the IP address 192.168.2.1 under Address and hit Enter. The Netmask section should autofill with 255.255.255.0, check it to make sure it’s correct. Click Apply when you are done.
Installing Cockpit
Cockpit can be installed by downloading the flatpak installer from the Cockpit docs site.
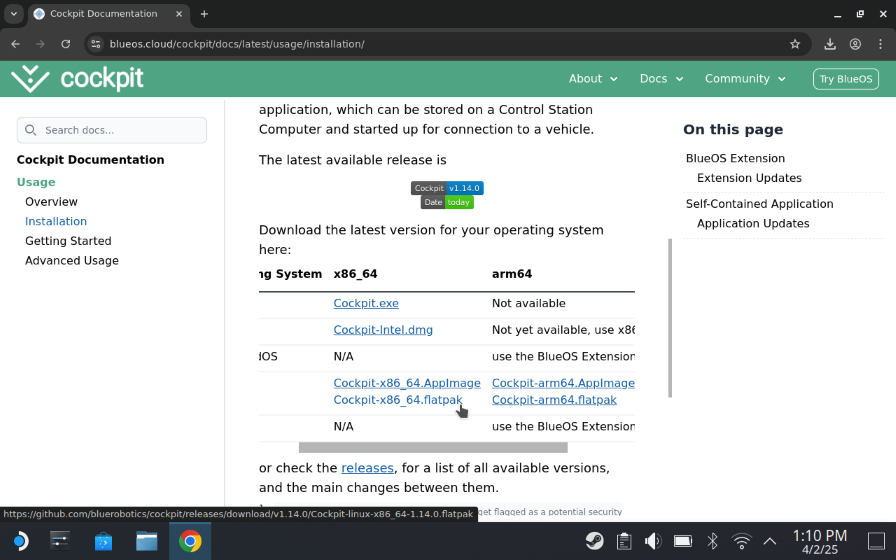
1. Open a web browser on your Steam Deck and go to https://blueos.cloud/cockpit/docs/latest/usage/installation/, the download links here will always point to the latest version of Cockpit. You can install Chrome or Firefox from the Discover app if you don’t have a web browser installed already.
2. Under Self-Contained Application, click on the x86_64.flatpak version of the Linux installer to download it (do not use the arm64 version). Don’t pay attention to the version number in the picture below, this will be different when you do it.
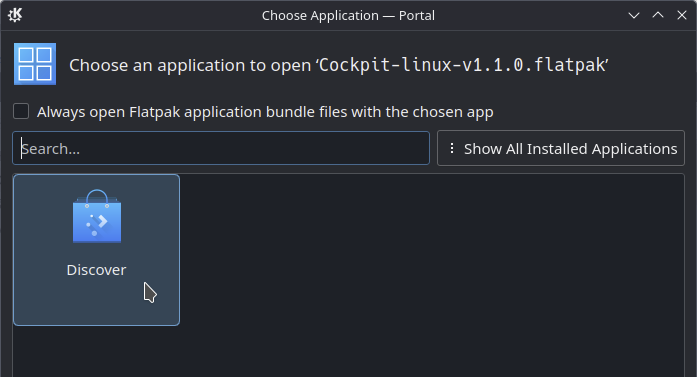
3. The installer will usually go into your Downloads folder (but this might be different depending on the browser you are using). Use the file browser to find the .flatpak in the Downloads folder and open it.

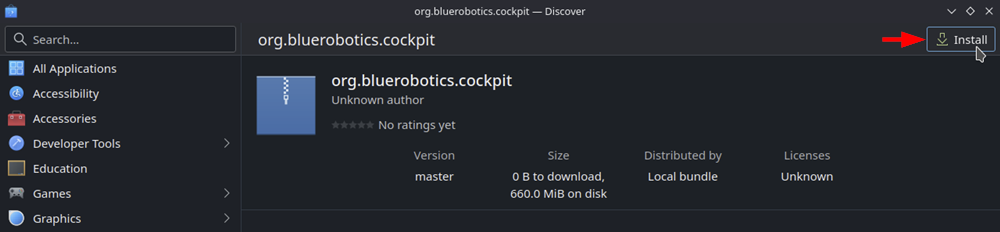
4. Choose the Discover app if it asks you to choose which application you want to use to open it.
5. After it opens in Discover, click on Install to install Cockpit.
Launching Cockpit
After installing Cockpit, launch it from the Application Launcher in desktop mode. We recommend using desktop mode for the best experience, as it ensures all features work as intended.
If you prefer, you can add Cockpit to Steam to launch it directly from the Steam interface in game mode—no need to switch to desktop. Just keep in mind that some features, like touch controls, aren’t fully supported in game mode yet.
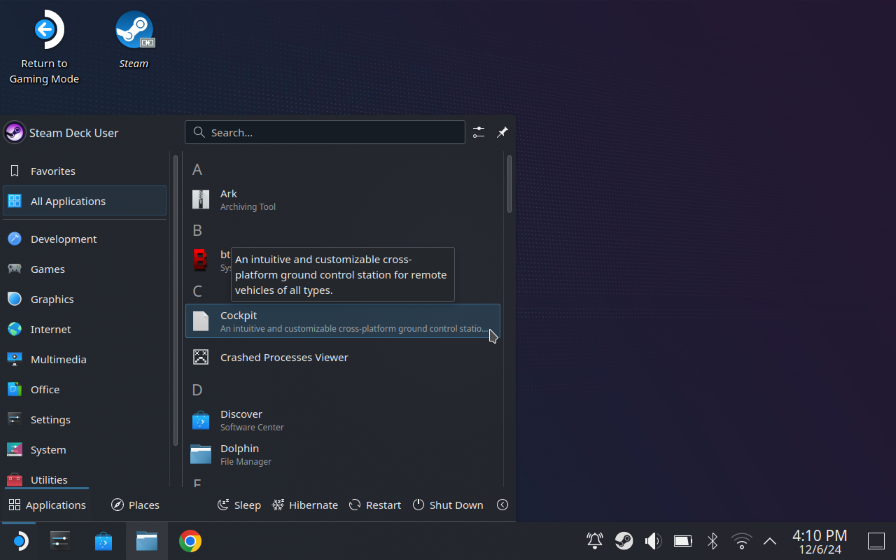
1. Find Cockpit in the Application Launcher and “right click” by pressing the left trigger on it. Select the Add to Steam option.
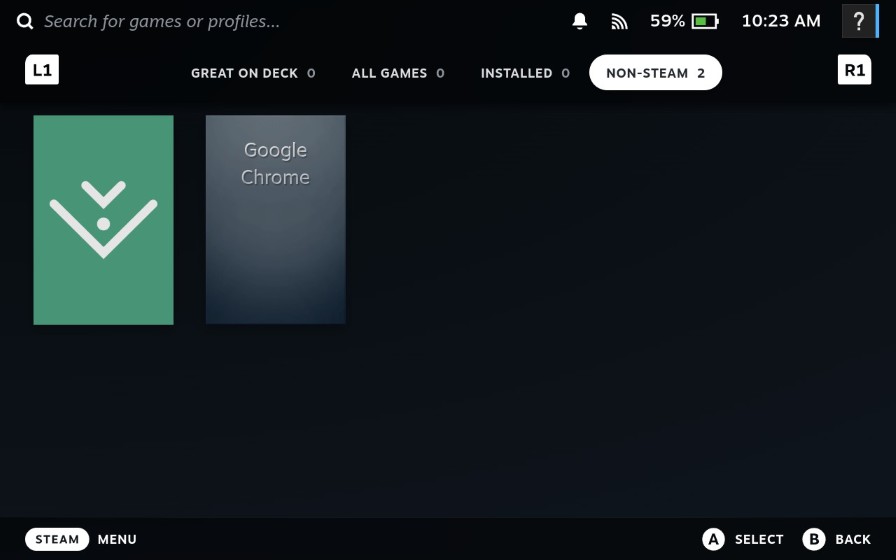
2. Now when you turn on the Steam Deck, you can launch Cockpit directly from the launcher without having to go into desktop mode. Cockpit will be listed under NON-STEAM games initially but will move to the recently launched section after launching it for the first time.

Bonus: Add the Cockpit logo to the Cockpit launcher
When you add Cockpit to the Steam launcher it will display as a plain gray rectangle, but you can add the Cockpit artwork to the Cockpit launcher in Steam. This part is purely optional but it does make things look nicer!
1. Go into desktop mode.
2. While on your Steam Deck, open a web browser and download this image file. If you don’t know how to do that, right-click on the image by using the left trigger and choose Save image as…

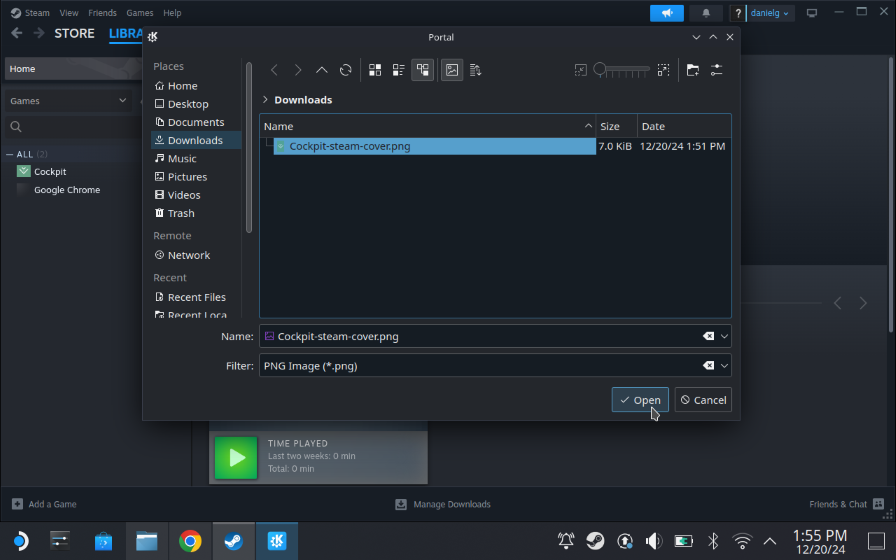
3. Launch Steam while still in desktop mode and find Cockpit in your Library. Use the left trigger to right click on it, go to Manage > Set custom artwork.

4. This will open the file browser, go to the folder where you saved the Cockpit image, select it and click Open. If you don’t see it in the folder try changing the filter to show PNG files.
When you are done you can go back to game mode and voila! The Cockpit launcher now has the official Cockpit logo.
Tips for the Steam Deck
- The battery will slowly drain in sleep mode. Shut down the Steam Deck completely to keep the battery fully charged between missions.
- Press the Options button to bring up the quick settings menu where you can easily change the performance mode to save battery life.
Setting Up the Lenovo Legion GO
The Legion Go runs a full desktop version of Windows, so setup is exactly the same as a normal Windows computer. Follow the Windows steps from the regular BlueROV2 Software Setup guide to get started. The only difference is you will need to use a USB C to USB B cable to connect the FXTI to the Legion GO. You can use a USB A to C adapter to connect the FXTI using its included cable for initial setup, but you’ll want to use a longer cable (around 1.5 meters or more) during use in the field for freedom of movement.
Cockpit or QGroundControl
Since the Legion go uses regular Windows, you have your choice of using QGroundControl or Cockpit (or both?)
- For QGroundControl: use the download link in the BlueROV2 Software Setup Guide to download QGC.
- For Cockpit: Open a web browser on your Steam Deck and go to https://blueos.cloud/cockpit/docs/latest/usage/installation/, this link will always point to the latest version of Cockpit. Under Self-Contained Application download the Cockpit.exe installer for Windows.
Tips for the Legion GO
- Bring up the virtual keyboard by pressing the Legion button and B button at the same time.
- Press the Quick Settings button to bring up the quick settings menu where you can easily change the performance mode to save battery life.
Connecting Everything Together
With the network settings configured and software installed, it’s just a matter of connecting everything together.
1. Connect the tether to the FXTI.
2. Connect the hand-held to the FXTI using a USB C to USB B cable.
3. Power on the BlueROV2.
4. Launch Cockpit or QGC and dive in!
Feedback
We’re always working to make our guides, software, and user experience even better. If you have any ideas on how we can improve this guide, feel free to let us know here.