Power Sense Module (PSM) Installation
Introduction
The Power Sense Module provides current and voltage sensing abilities for your underwater project. The following guide will show how to install it for use on a Pixhawk or BlueROV2.
General Installation
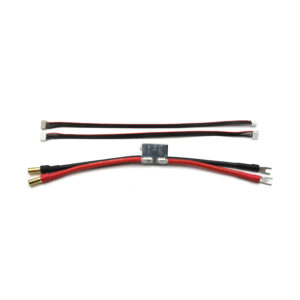
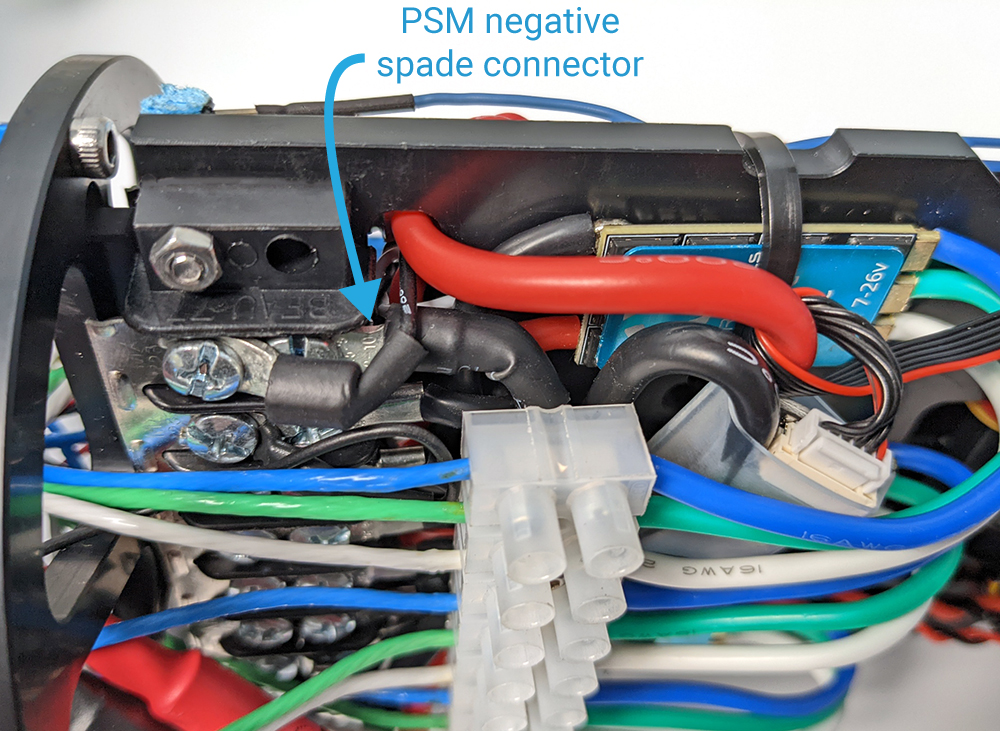
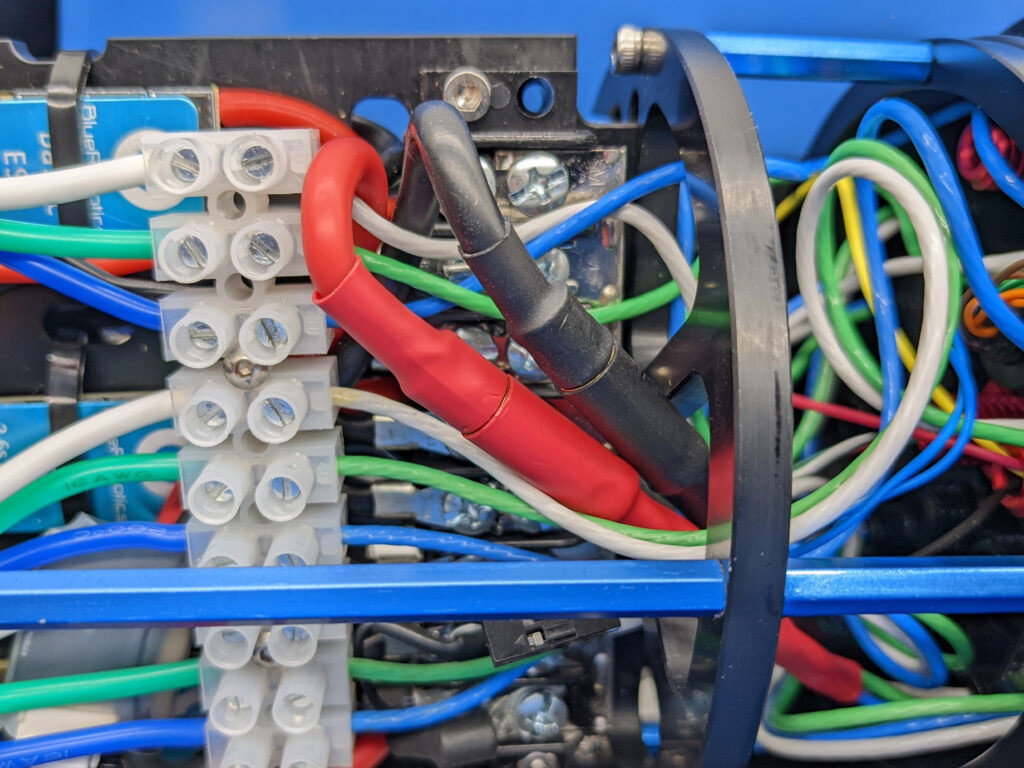
- Connect the wires with the attached spades to a power distribution board.
- Connect the bullet connectors to a battery or power supply.
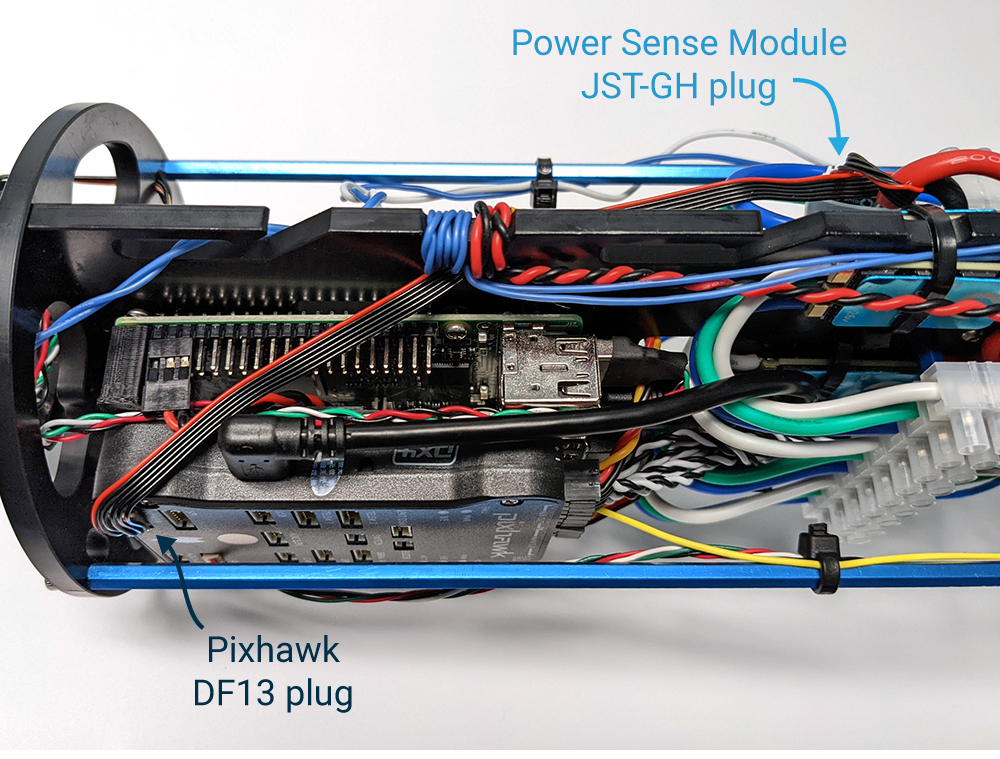
- Connect the 6-position JST-GH to DF13 cable (JST-GH plug side) into the JST-GH socket on the Power Sense Module.
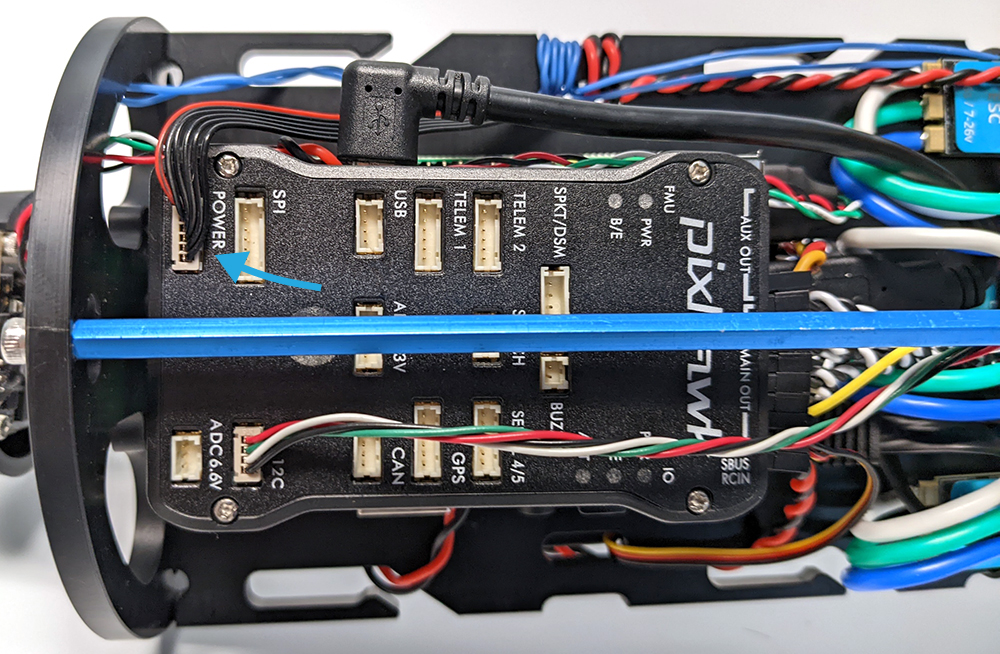
- Connect the other end of the cable (DF13 plug side) into the DF13 “POWER” socket on the Pixhawk.
Installation on the BlueROV2
Parts and Tools
You will also need:
- 1 x #2 Phillips head screwdriver
Version Compatibility
The current version of the Power Sense Module has 5.5 mm bullet connectors that are only compatible with the R3 BlueROV2 or later. To install the current version of the Power Sense Module on an older BlueROV2 (R1 and R2 versions), the battery power cables will need to be updated as well.
If you need a replacement Power Sense Module that is compatible with your older BlueROV2, please contact us at [email protected]
Removing the Old Power Sense Module
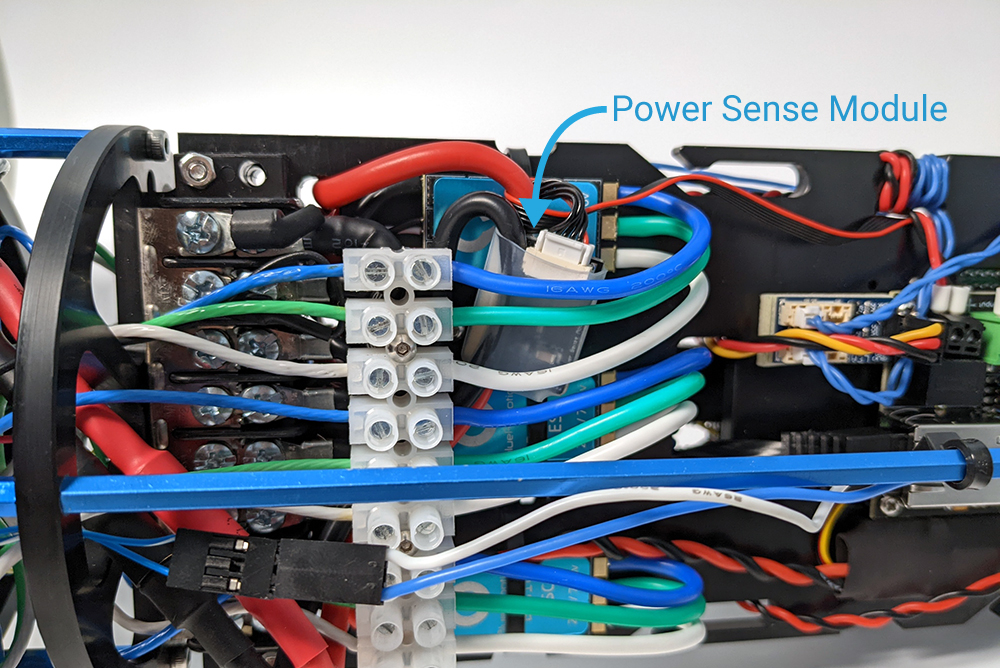
1. Identify the Power Sense Module, it is usually tucked behind the ESC wires and motor terminal blocks.
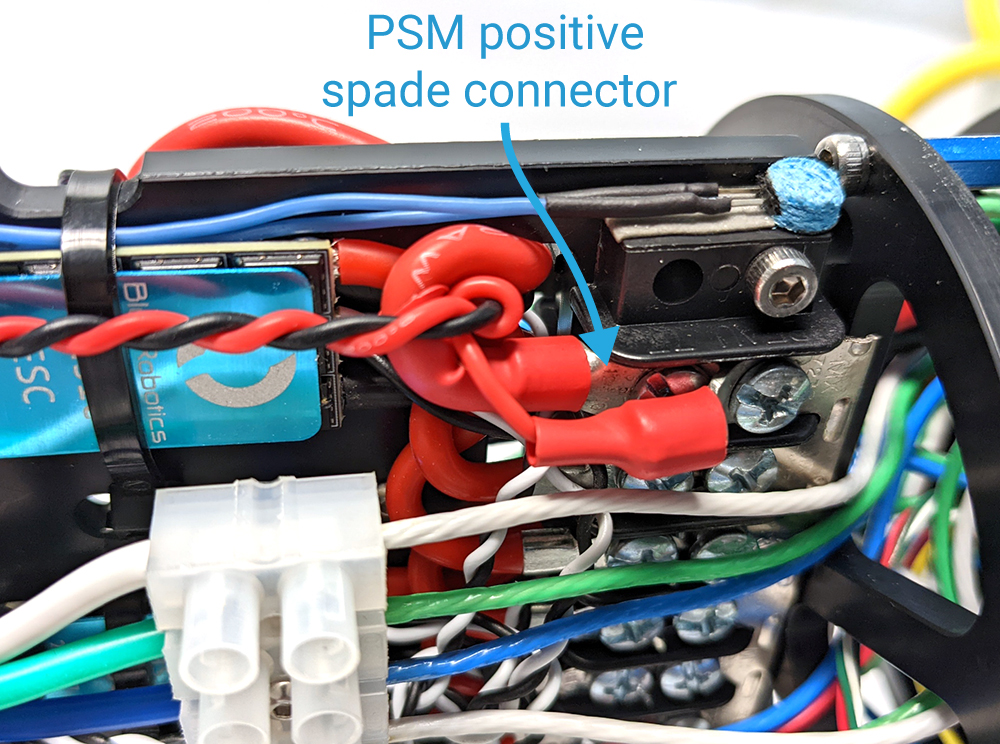
2. Disconnect the old Power Sense Module spade connectors—positive (red) and negative (black)—from the BlueROV2 terminal blocks.
3. Disconnect the Power Sense Module from the BlueROV2 battery power cables. The type of connector used here depends on when you purchased your ROV:
- The latest revision of BlueROV2 and Power Sense Module use 5.5 mm bullet connectors.
- R1 and R2 versions of the BlueROV2 and Power Sense Module use 3.5 mm bullet connectors.
- Very old R1 BlueROV2s have a Power Sense Module with a yellow XT60 type connector.
4. Disconnect the DF13 cable plug from the “POWER” port on the Pixhawk.
5. The old Power Sense Module can now be removed from the ROV.
Installing the New Power Sense Module
1. Connect the positive and negative power wire spades from the new Power Sense Module into their respective terminal blocks. The red wire should connect to the terminal block with the rest of the red wires and the black wire should connect to the terminal block with the rest of the black wires.
2. Connect the male bullet connectors from the Power Sense Module to the female bullet connectors on the BlueROV2 power wires.
3. Connect the 6-position JST-GH to DF13 cable (JST-GH plug side) into the JST-GH socket on the Power Sense Module. Connect the JST-GH to DF13 cable (DF13 plug side) into the DF13 POWER socket on the Pixhawk.
Software Setup
R2 (24 mm long PCB) and R3 Power Sense Module
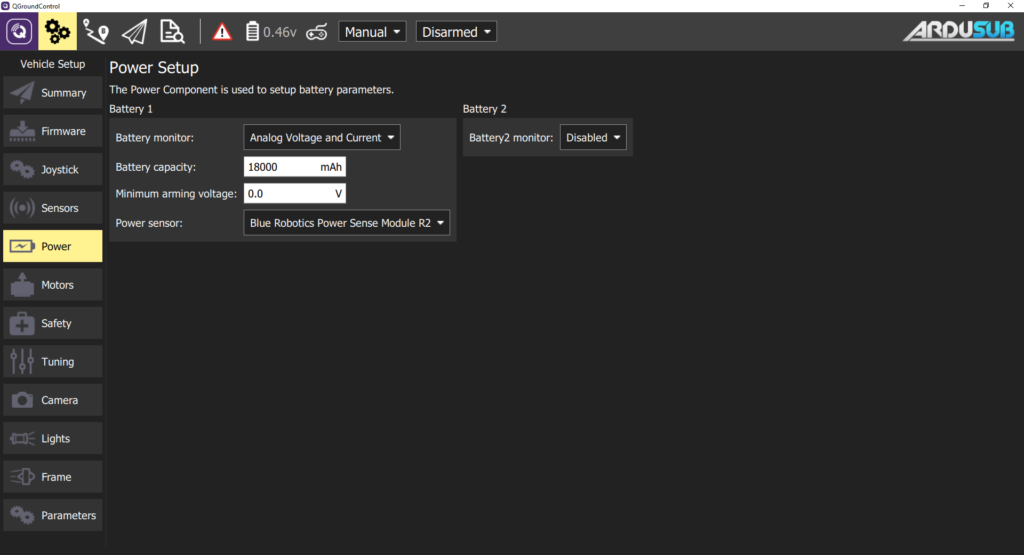
1. In the Power tab of the QGroundControl Vehicle Setup page, select “Blue Robotics Power Sense Module” for the Power Sensor. The correct settings will be loaded automatically.
R1 PSM (16 mm long PCB)
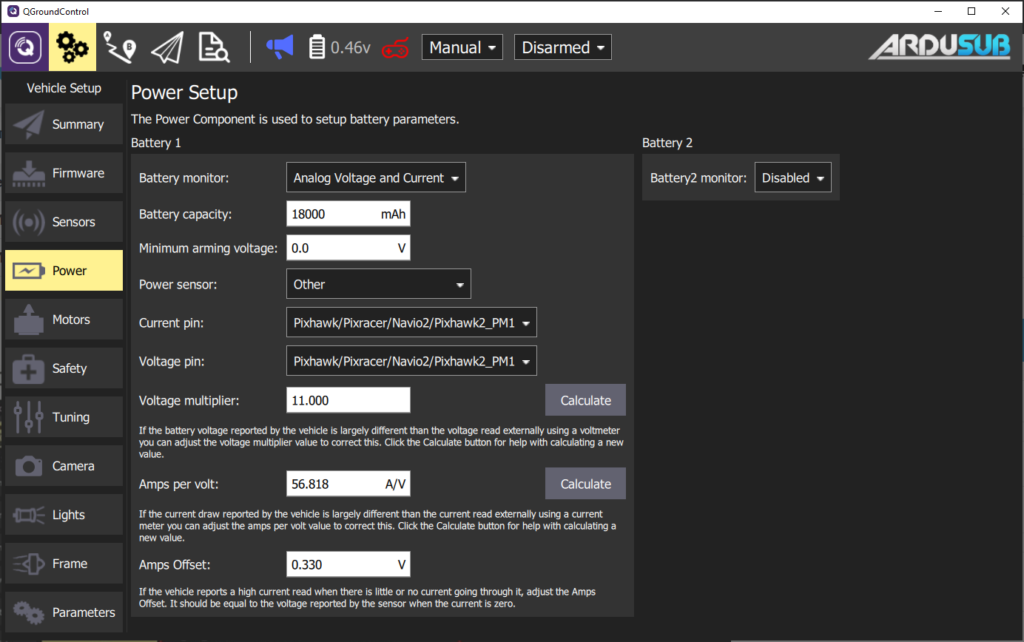
1. In the Power tab of the QGroundControl Vehicle Setup page, select “Other” for the Power Sensor and enter the following values:
| Parameter | Value |
|---|---|
| Voltage Multiplier | 11.000 |
| Amps per Volt | 56.81818 |
| Amps Offset | 0.330 |