
Watertight Enclosure RAILS User Guide
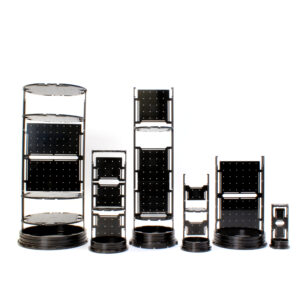
Watertight Enclosure RAILS is a modular electronics tray system for Blue Robotics cylindrical enclosures. This guide will show you how to configure a RAILS system and install it in your enclosure.
About RAILS Compatibility
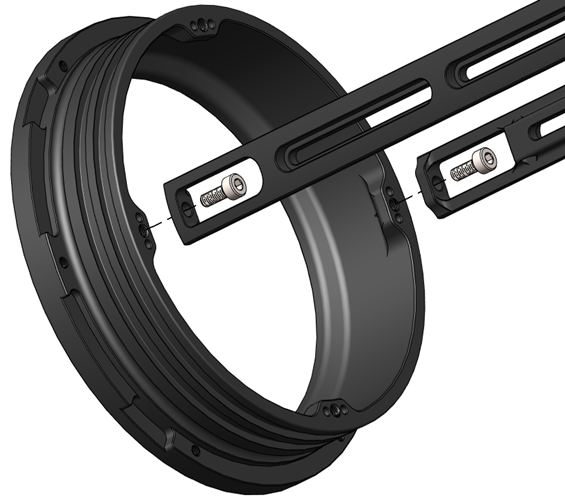
RAILS is only directly compatible with locking series flanges that have the alignment holes next to the rail mounting points (see picture below). RAILS compatible flanges with alignment holes were released January 28, 2025.
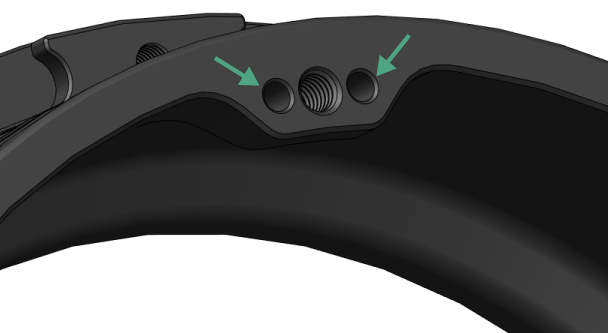
Alignment holes
Older locking series flanges do not have these alignment holes but the rails can be modified to force compatibility using one of two methods:
- By removing the alignment nubs at the end of the rails (by filing down or cutting off).
- By mounting using the end of the rail that doesn’t have alignment nubs. The threads in this mounting hole can be drilled out using a 1/8″ (~3.2 mm) drill bit.
RAILS is not compatible with non-locking series flanges.
Configuring Your RAILS System
This section will explain how to configure a RAILS system for your Watertight Enclosure. If you have already purchased RAILS and just want to know how to assemble it, skip to the assembly section below.
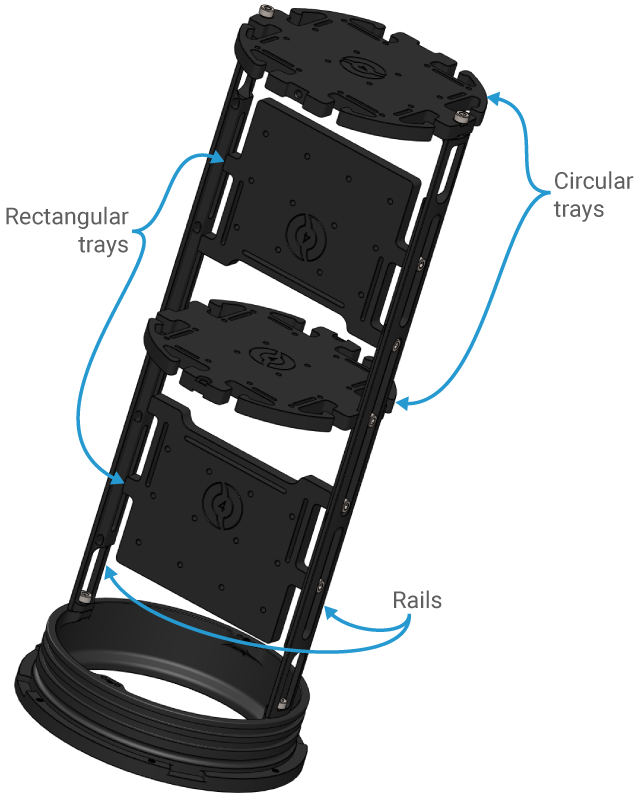
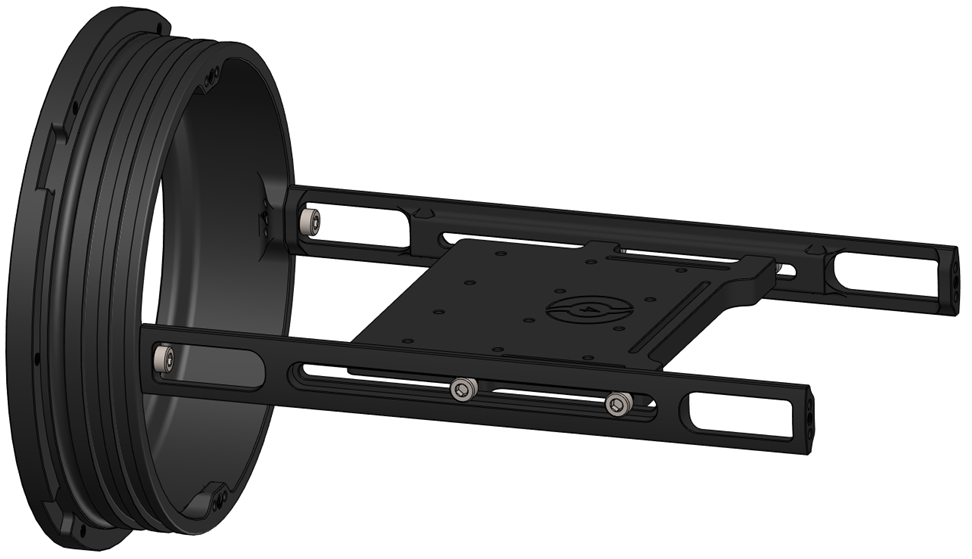
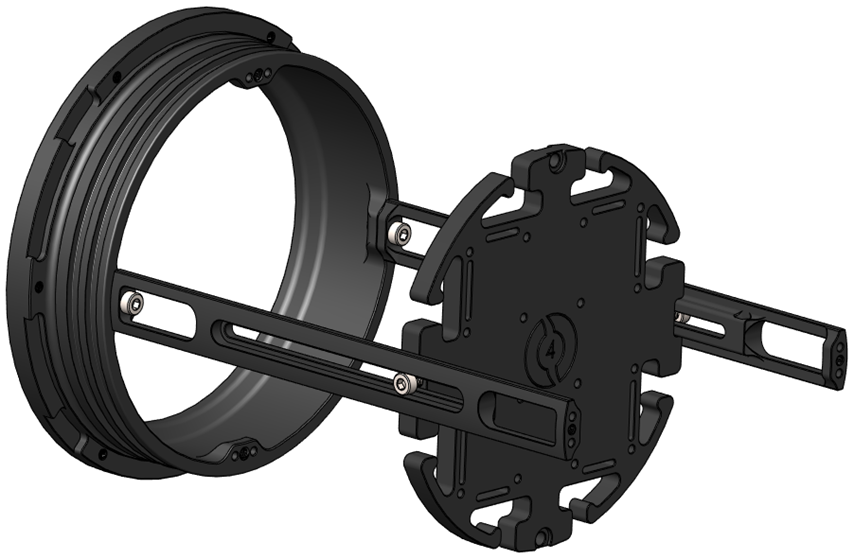
RAILS allows you to create a custom electronics tray layout for to your Watertight Enclosure design. And since it’s modular, you can add or remove components as your design evolves. RAILS has three main components, the rails, rectangular trays, and circular trays.
Choosing Rails
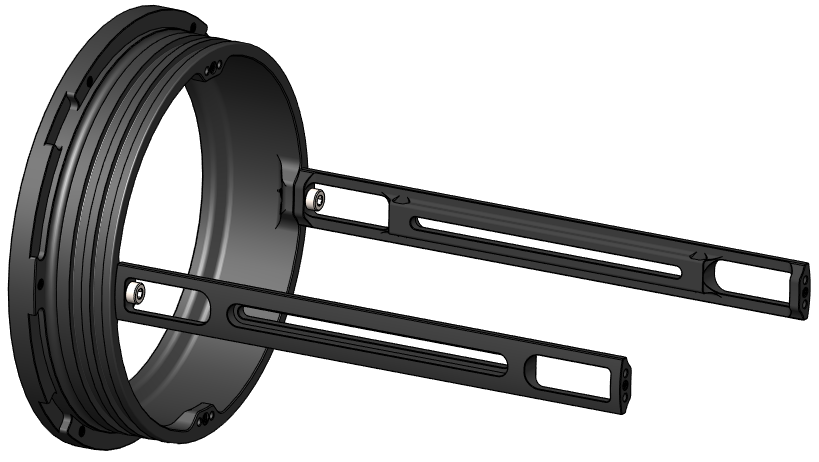
Rails attach to O-ring Flanges or Coupler Flanges and function as a frame for the trays.
Rails come in two widths:
- Choose Narrow rails for 2″, 3″, and 4″ series enclosures.
- Choose Wide rails for 5″, 6″, and 8″ series enclosures.
Next, decide on the rail length based on your enclosure.
- If you want RAILS to span the full length of your enclosure, match the rail series number to your enclosure tube length. For example, if you have a 240 mm tube get 240 series rails.
- You can also make a RAILS system that is shorter than the enclosure by using shorter series rails. The rails lengths are provided in the table below.
- Do not get rails with a larger series number than your tube length—they won’t fit!
| Rail Series | Rail Length |
|---|---|
| 150N | 98 mm |
| 200N | 148 mm |
| 240N | 188 mm |
| 300N | 248 mm |
| 400N | 348 mm |
| 300W | 230 mm |
| 500W | 430 mm |
Choosing Trays
Trays attach to the rails and are where you mount your components. Two tray shapes are available.
- Rectangular trays are installed in line with the rails, used for basic component mounting.
- The following table shows the maximum number of rectangular trays can fit reach rail series.
- Circular trays are installed perpendicular to the rails, used for mounting cameras, making partitions, creating high-density electronics layouts, etc.
- Trays sizes are specific to each Watertight Enclosure series and are not interchangeable. For example, a 3″ series tray won’t work in a 4″ series enclosure.
- 3D files for all trays are available so you can redesign the trays and further customize your RAILS.
| Tray Series / Rail Series | 150N | 200N | 240N | 300N | 400N | 300W | 500W |
|---|---|---|---|---|---|---|---|
| 50mm (2") | 2 | 3 | 4 | 5 | 7 | – | – |
| 75mm (3") | 2 | 3 | 4 | 5 | 7 | – | – |
| 100mm (4") | 0 | 2 | 2 | 3 | 4 | – | – |
| 130mm (5") | – | – | – | – | – | 2 | 4 |
| 150mm (6") | – | – | – | – | – | 2 | 4 |
| 200mm (8") | – | – | – | – | – | 2 | 4 |
Assembling Your RAILS System
Installing RAILS is super simple and all hardware is included, all you need is a 2.5 mm hex driver. We recommend using a ball end hex driver or a hex key with a short side to install the rail mounting screws.
Mounting the Rails
1. Ensure you are using the correct width rail for your enclosure size.
- Narrow rails are for 2″, 3″, and 4″ series enclosures and are labeled “N” next to the series number.
- Wide rails are for 5″, 6″, and 8″ series enclosures and are labeled “W” next to the series number.
2. Rails have alignment nubs on one side that fit into the alignment holes in the flange. Use a 2.5 mm hex driver and included M3x10 screws to mount the rails to your enclosure flange, making sure the nubs seat into the holes in the flange. Mount rails so they are directly across from each other.
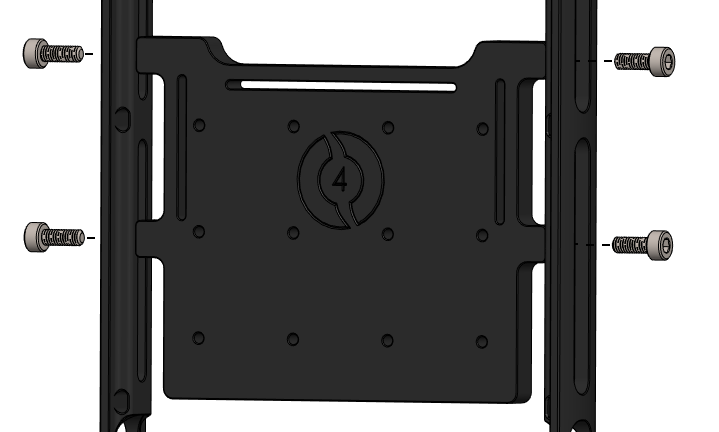
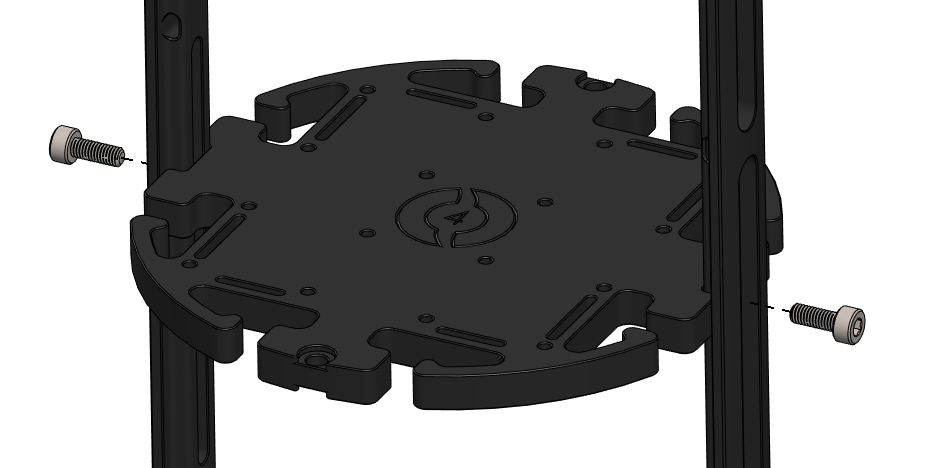
Mounting the Trays
1. All trays are labeled according to the Watertight Enclosure series it fits, make sure you are using the right size for your enclosure!
2. Use a 2.5 mm hex driver and included M3x10 screws to secure the trays to the rails. Do not overtighten the screws! Only hand tighten until snug.
- Rectangular trays are installed in line with the rails.
- Circular trays are installed perpendicularly across the rails.
- Circular trays can also be installed at the end of the rails.
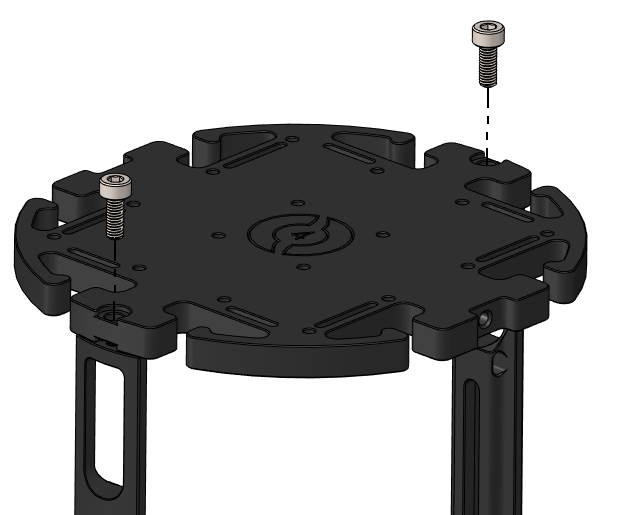
3. The position of the trays on the rails can be adjusted by loosening the screws and sliding the trays along the rail slots.

Mounting Components to the Trays
RAILS has features to make mounting components easy.
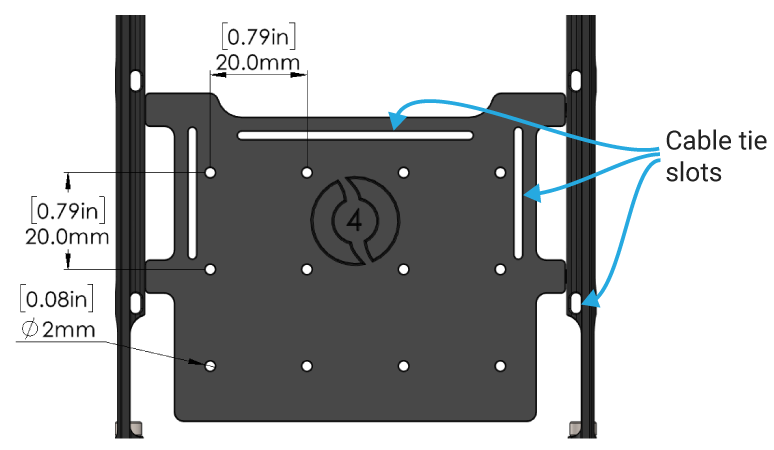
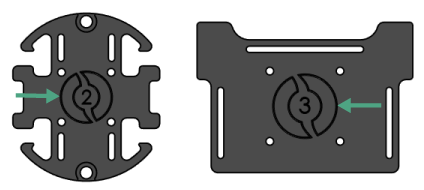
- Trays have a 20 mm by 20 mm mounting hole pattern with 2 mm diameter holes.
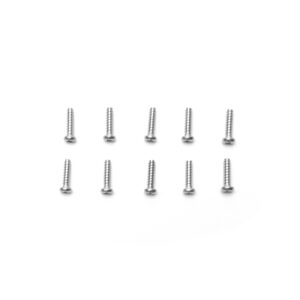
- #3 thread forming screws are recommended. 10 packs of Accessory Mounting Screws are available for purchase.
- You can also drill your own holes in the plastic if needed.
- The long slots on the trays can be used for cable ties. The rails also have slots for cable ties.
Feedback
We’re always working to make our guides, software, and user experience even better. If you have any ideas on how we can improve this guide, feel free to let us know here.